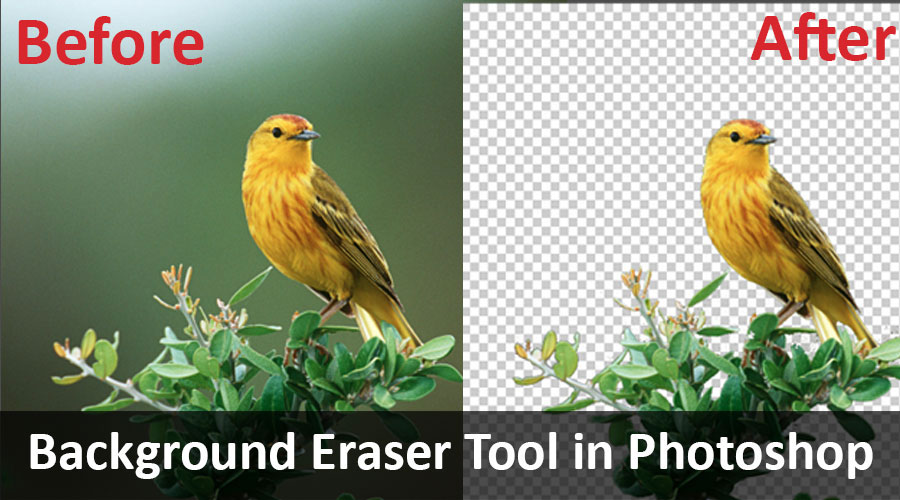
Overview of Background Eraser Tool in Photoshop
Background Eraser Tool in Photoshop is the simplest or quickest way to remove background or any part from background Image in Photoshop. The background eraser tool is the best possible combination of the quick selection tool and eraser tool.
The Background Eraser tool is extremely useful for photographs which consist of many small details along with edges with objects you would like to cut out and the background of photographs. For example, images with hair, fur, skies, etc.
How to Use the Background Eraser Tool in Photoshop?
Let’s discuss in detail about the Background Eraser Tool.
The Photoshop Interface with Background Eraser Tool Selected
If you Left click on the Eraser Tool, you can see Background Eraser is nested in the same option. This is a tool that is very useful, though it does the same work as the Normal Eraser Tool does. However, it has some significant features which are more useful for removing various things, such as the background.
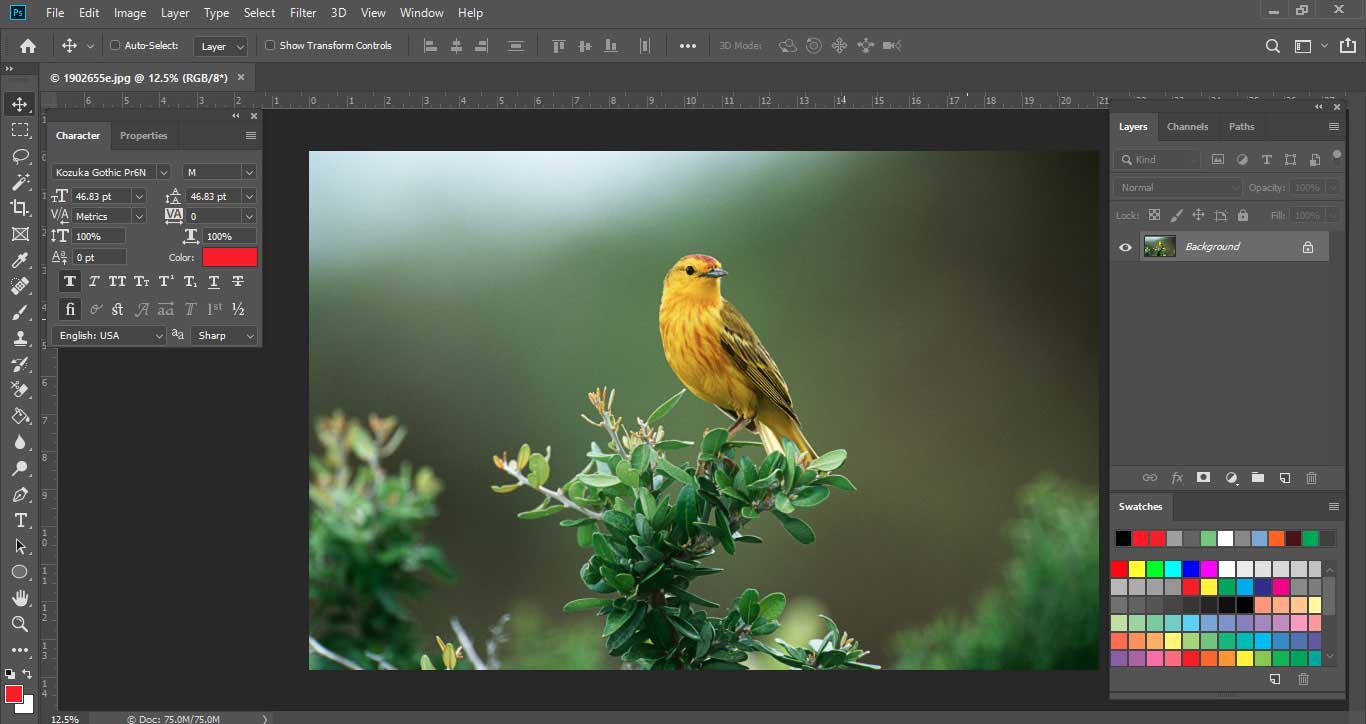
Now, let’s take a look at the actual process of removing the background color. Here in this photograph below, there is a white background color.
I have put one more layer down of an actual photo, which is blue in color. I had to create this layer because when we are removing the white color from the original photo, we can see precisely how accurately it got removed. I would recommend that while practicing or erasing any background from an image. Always put one more layer to double-check before proceeding for further changes.
Little confusing, right? Let me show you an actual process in another image below.
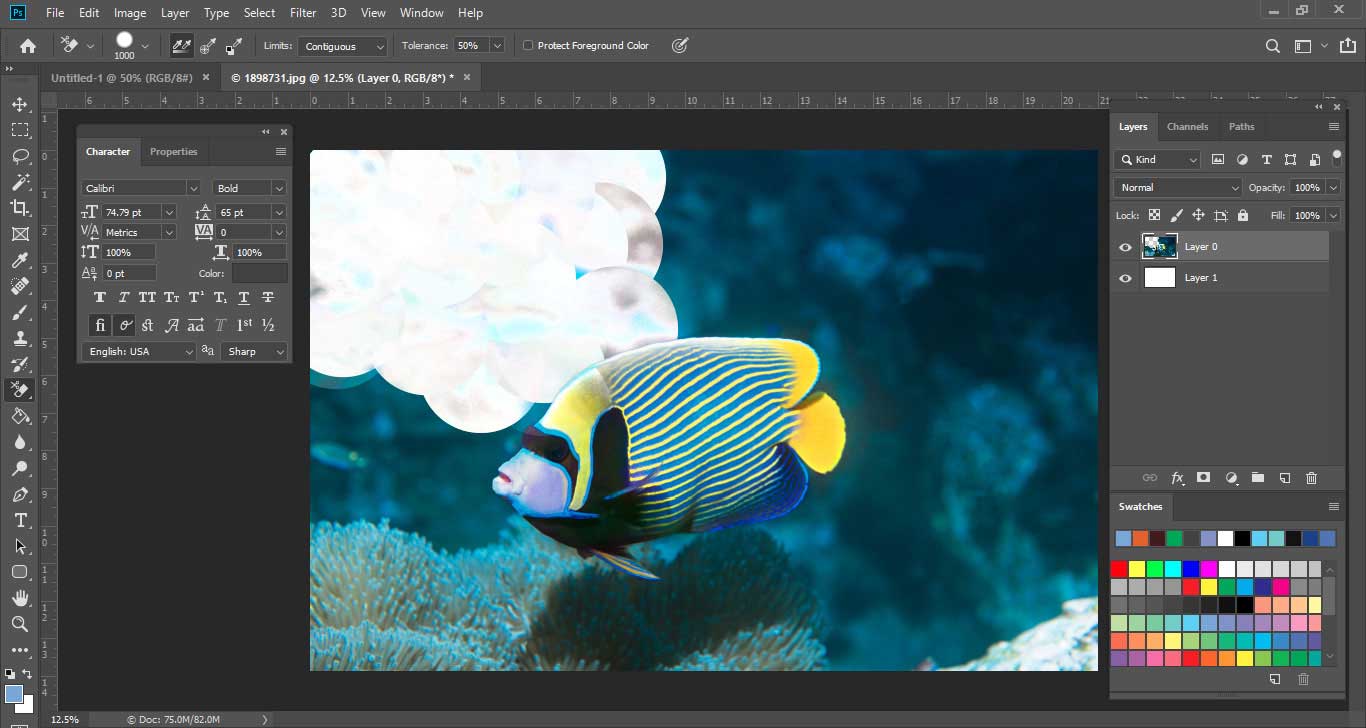
Here, I can explain this to you in more detail. You can see the blue background while we are removing the water from the background with the Background Eraser Tool. But you might notice one thing that, on the Coral Reef Fish, there is a white patch of color appearing. That is because of the Tolerance setting.
For the Tolerance Setting, we have to continuously change the setting depending upon the complexity of the photograph. Here the setting was 50%, but now I am going to decrease the setting to 25%. After changing the Tolerance Setting, we can see that the image looks flawless now.
Let’s complete this full image with this tool. Quickly and very easily, we can remove the unwanted background of any photograph without damaging the other parts of the picture.
This is the Coolest Thing About the Background Eraser Tool
Now we can fill any other color of our choice into the background layer or simply can keep it transparent. That is up to you.
Giving any special effect or manipulation keeps it transparent so that the Photo manipulation effect will look more realistic. The background eraser tool removes the pixels from an image on the layer convert it into a transparent layer as you start dragging. You can still remove the background while preserving the fine edges of an object in the foreground. By indicating various sampling and tolerance setting, you can still control the specific range of the transparency and sharpness of an image.

A few important points to take into consideration are that we keep the Tolerance setting at 25%. For the Eyedropper tool, three settings are available. Among them, I chose Sampling once because of our background color for the original photograph is white. So in this, we can select that option. But if you are doing any complex photograph which has a lot of elements, then, in that case, you should select Sampling Continuous.
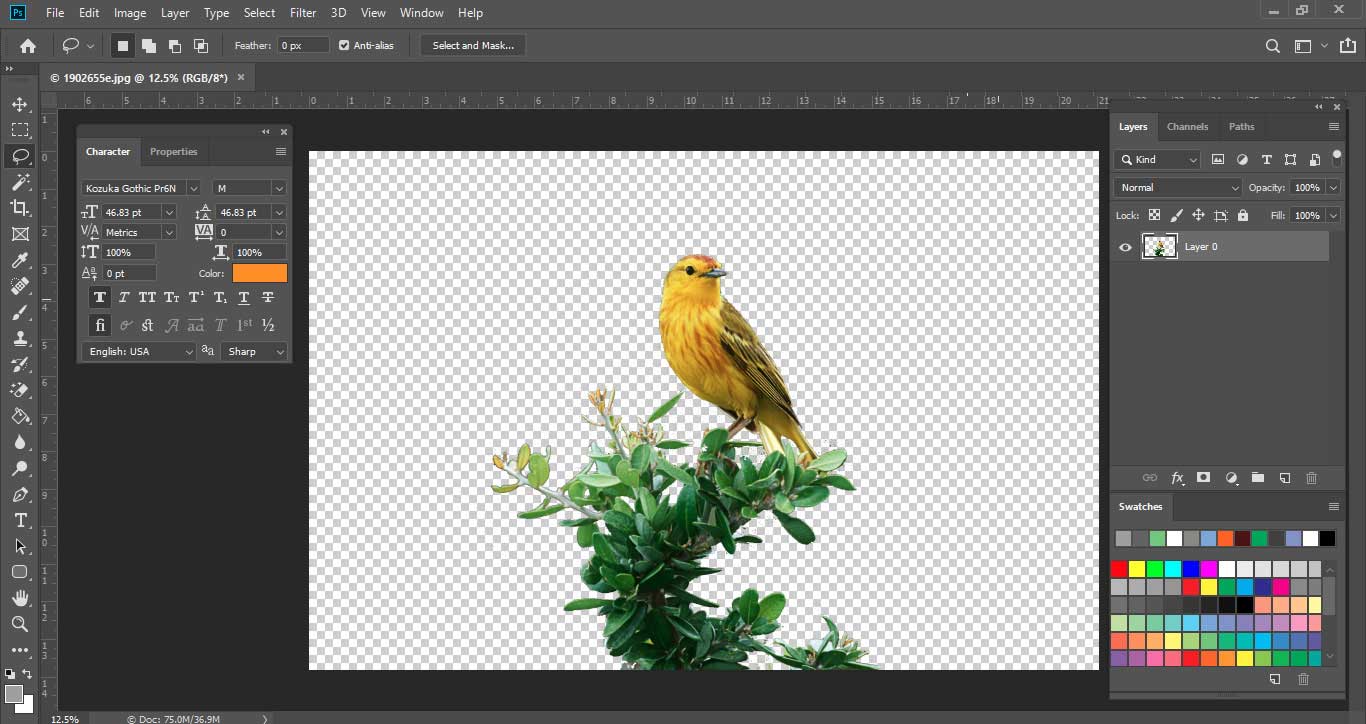
In this photograph, there is a tree and sparrow as well. so we will be keeping the setting for the Eyedropper tool as continuous, which means we have to continuously take samples from areas for the tiny part.
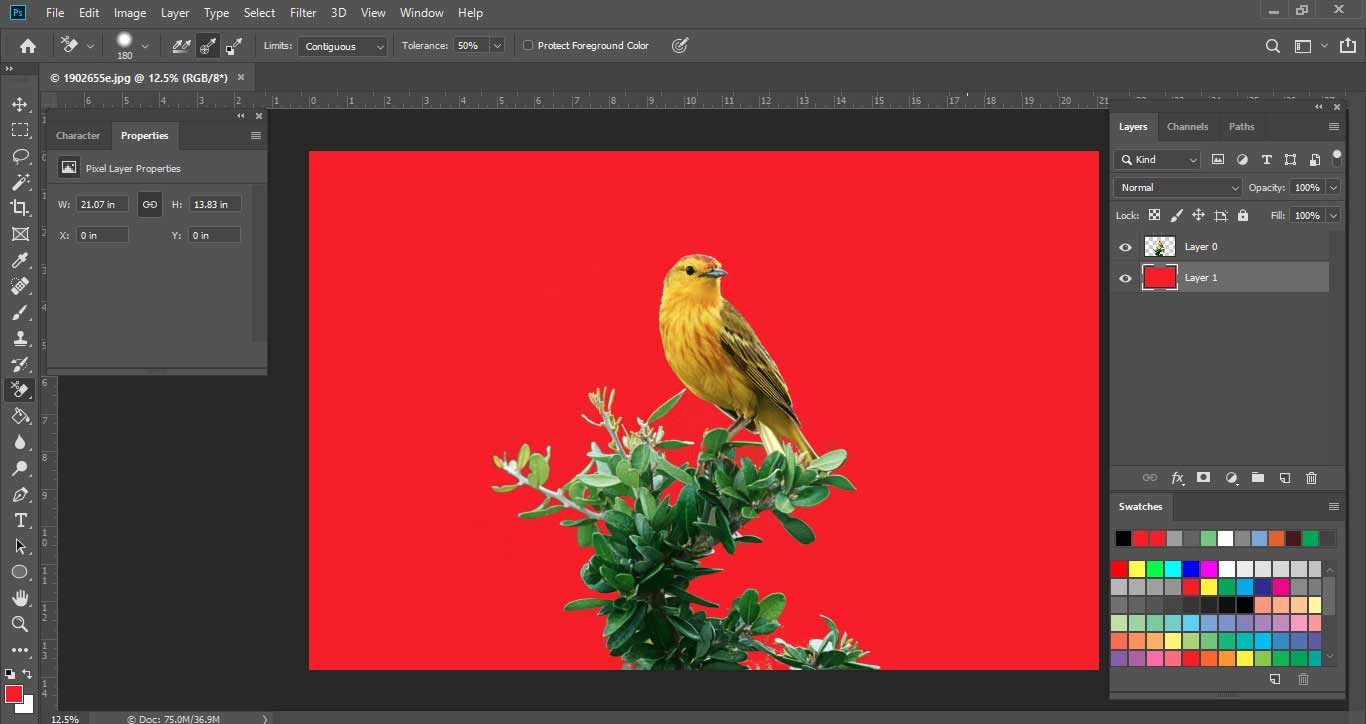
Here, in this image, while removing the background nature, I have put a new layer with a red color that is the reason we see red color in the background. If I remove that layer, you will be able to see only the trees with a transparent background.
Brush Size: It can be adjusted with left or right bracket keys for speeding up the process. It helps us a lot when we are doing the photo manipulation or erasing the strenuous background.
Limits: It is also a very important feature in the Background Eraser Tool setting in Control Bar. Photoshop knows which color/hues you want to remove, and Limits indicate the possibility of pixels that match that color so it can erase them easily.
Limits have Four Different Option:
- Contiguous
- Discontiguous
- Find Edges
- Protect Foreground Color
Image is shown below for setting in control bar different Options

- Contiguous – This is the default option selected by Photoshop. It will remove the pixels in that area which is substantially touching the pixel under the area.
- Discontiguous – This will remove any pixels that are closer to the sampled color, even if these are different by area of a different color.
- Find Edges – This option is identical to the contiguous option but more explicit, especially for fine edges.
- Protect Foreground Color – It will protect your current foreground color from being erased/removed.
I would like to mention that while using Background Eraser Tool for any removal of a specific background layer, that layer will be permanently removed, and you cannot retrieve it after it has been removed. It is always a good idea to copy your layer to preserve it for the future.
Conclusion
Photoshop has many tools for various tasks carried out for designing, retouching, editing photographs. The Background Eraser Tool is one of them. It’s very easy and effective to use, even if you are new to Photoshop. I hope you understand the detailed information about the eraser tool and its advantages/uses.
Recommended Articles
This has been a guide to Background Eraser Tool in Photoshop. Here we discuss how to use Background Eraser Tool in Photoshop. You can also go through our other suggested articles to learn more –
