Updated March 13, 2023

How to Install Ansible?
The following article provides an outline for How to Install Ansible? Ansible acts as a stabilized engine where every software application can be nicely deployed. Apart from a deployment perspective, other attributes like the support of cloud-related services are also available through ansible. A component called ansible-playbook allows to precisely achieve the above-depicted properties and also, in addition, it allows automated processing of job execution.
The layout of the ansible-playbook is installed over largely flexible languages such as YAML which also tends to be in a human-readable format. a server-side element like SSH(Secured shell host ) is used for establishing a connection for Ansible with its corresponding nodes. Also, this setup of SSH and Ansible connectivity involving nodes to be connected is a process that is demon less and does not involve an agent.
Pre-requisites to Install Ansible
- Distro: CentOS/ Ubuntu Linux /Debian/ RHEL/
- Jinja2: Friendly designing language used specifically for python
- PyYAML: Python programming language emitter and parsing component
- parmiko: SSHv2 protocol library which is python native
- httplib2: A inclusive library of client python
Steps to Install Ansible
Given below are the steps required to install the Ansible:
Install Ansible Using YUM
Step 1: Form a universal id on collective machines, for Example, ansible with SUDO privileges. All ids involved in automation tasks can use this ID.
Code:
# user and Ansible

# passwd ansible
Step 2: Correct the /etc/ssh/sshd_config file associated with the run machine also all PasswordAuthentication and PermitRootLogin lines are uncommented.
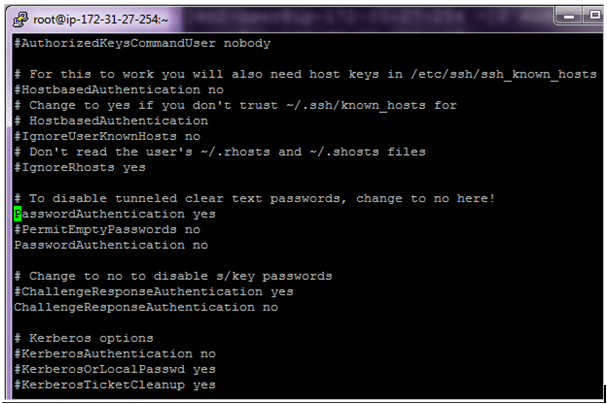
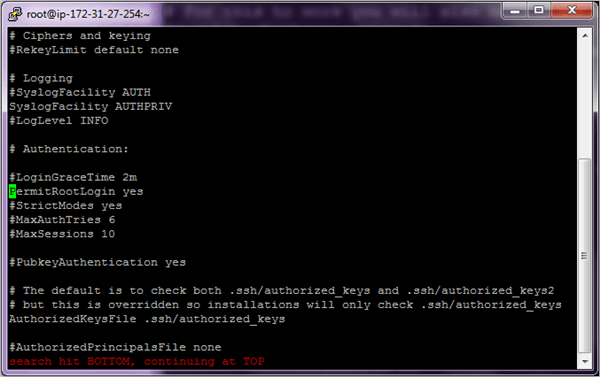
Both the machines execute the above-listed set of steps. This happens when the end system is to be restarted
# systemctl restart ssh
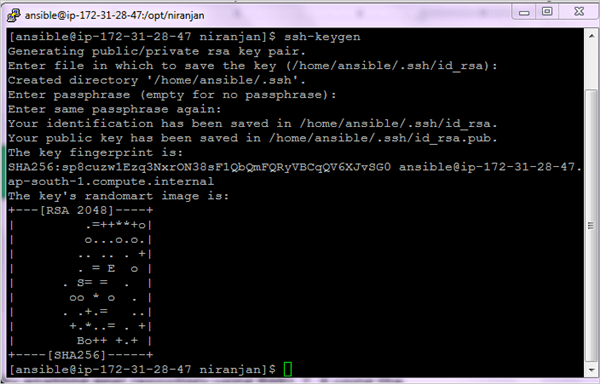
Step 3: For total mechanization of errands, a nonpassword expected SSH authentication will not be used in the case when an entire password has to be typed each and every time. After the changes applied over executing the command ssh <target machine> and ssh <control machine>, Keying a password every time is not the right technique to accomplish the Ansible tasks.
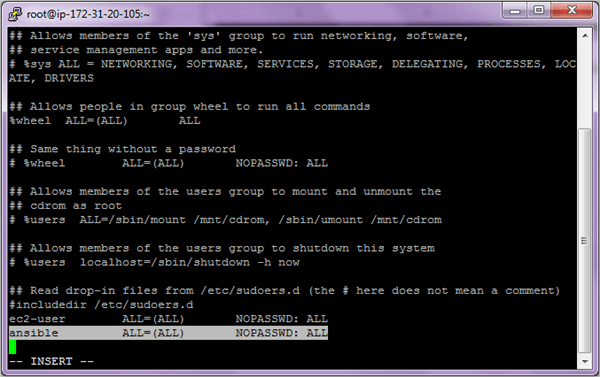
Step 4: For achieving passwordless authentication the below list of steps has to be performed. initially add the Ansible user to the /etc/sudoers file on both the machines which finely allows Ansible users to execute all commands which need root privileges. Terminal exit once the needed elements are added.
Step 5: Switch out to user Ansible.
Control Machine su – ansible AND Target Machine su – ansible

Target Machine:
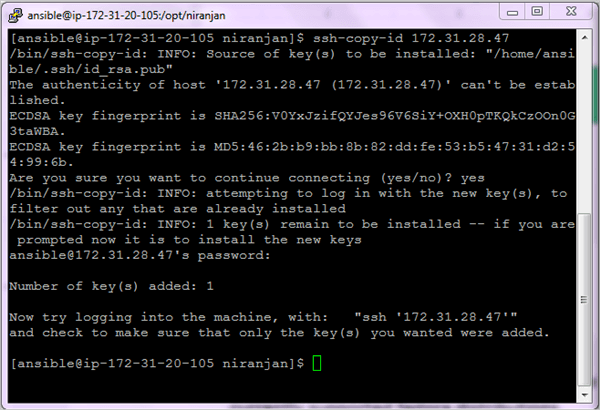
Target Machine ssh-copy-id <Control-machineIIP-Address>:
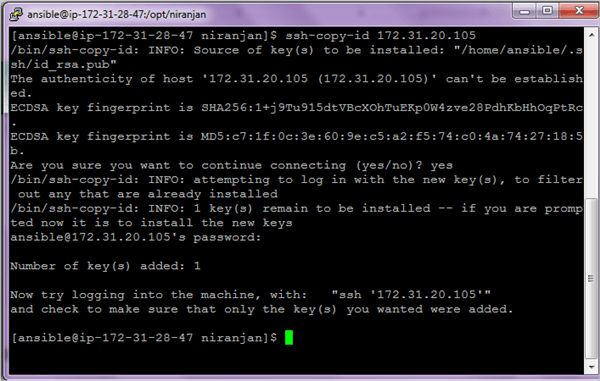

Target Machine: ssh ansible@<IP-Address-Control-Machine>:

Step 6: Wget has to be installed in both the machines involved.
$ sudo yum install get -y
Step 7: Enabling EPEL repo allows us to install ansible on the control machine. Add-on software packages can be installed using Fedora.
Code:
$ get http://dl.fedoraproject.org/pub/epel/epel-release-latest-7.noarch.rpm

$ sudo rpm -ivh epel-release-latest-7.noarch.rpm

$ sudo yum install ansible -y

$ ansible --version
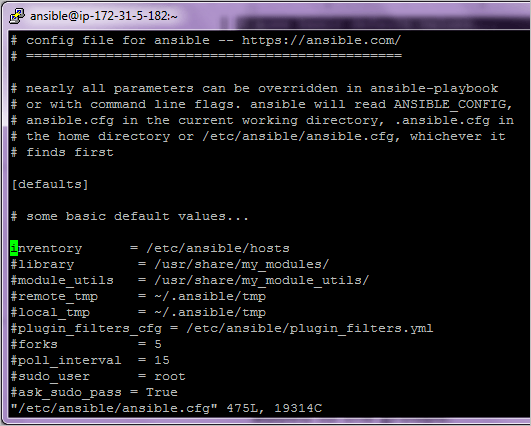
Step 8: Edit the ansible.cfg file and enable the inventory file parameter on the Control machine.
Code:
$ sudo vi /etc/ansible/ansible.cfg
Step 9: Target machines are tracked and managed using inventory in Ansible. Usually, this file is present in /etc/ansible/hosts and allows to be edited. Every needed machine is associated with these groups. A group name and square bracket are applied within each and every group. Multiple groups are tagged in a server.
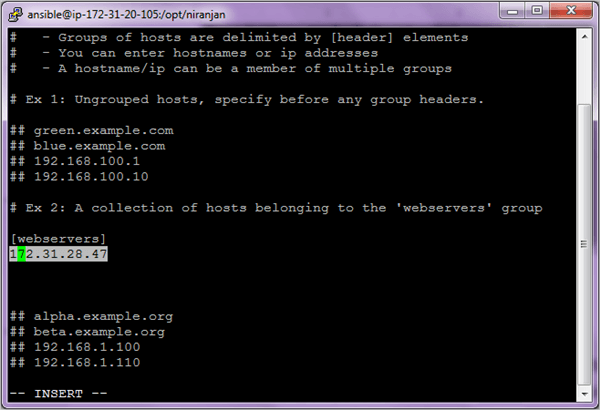
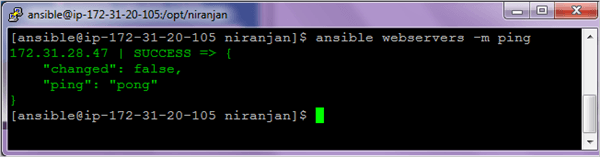
Step 10: To execute the webservers groups allow execution of the below-listed ansible commands. Ping allows a particular function to be tested and also whether the host systems can be established as the connection parameters mentioned in the inventory file.
Code:
$ ansible webservers –m ping
Ansible Installation Commands using MacOS.
Code:
sudo easy_install pip

sudo pip install ansible
Commands to Install Ansible using CentOS/Fedora.
Code:
sudo yum install ansible
Commands to Install Ansible using Ubuntu.
Code:
sudo apt-get install software-properties-common

sudo apt-add-repository PPA0:ansible/ansible

sudo apt-get update

sudo apt-get install ansible
Ansible Basic Commands
Given below are the ansible basic commands:
- Host connectivity verification: # ansible <group> -m -ping
- Rebooting host systems: #ansible <group> -a “/sbin/reboot”
- Creating a new user: # ansible <group> -m user -a “name=ansible password=<encrypted password>”
- User deletion: # ansible <group> -m user -a “name=ansible state=absent”
- Permissions changing: # ansible <group> -m file -a “dest=/home/ansible/file1.txt mode=777”
- Verify package installation with update: # ansible <group> -m yum -a “name=httpd state=latest”
- Verify package installation without an update : # ansible <group> -m yum -a “name= httpd state=present”
- Verify package version: # ansible <group> -m yum -a “name= httpd-1.8 state=present”
- Verify package installation : # ansible <group> -m yum -a “name= httpd state=absent”
- Display host information: # ansible <group> -m setup | less
Conclusion
Ansible definitely acts to be a largely stable system in the market that priorly works on software deployment and managing configurations across this software. All the above statements of ansible setup are done in a largely optimized manner. Also, ansible exhibits very strong support for its platform and also in the process of integrating cloud services and methods.
Recommended Articles
This has been a guide to Install Ansible. Here we have discussed how to install Ansible using commands in different operating systems. You may also look at the following article to learn more –

