EDUCBA

EDUCBA

MENUMENU
  • Free Tutorials
  • Free Courses
  • Certification Courses
  • 280+ Courses All in One Bundle
  • Login
Home Design Design Tutorials After Effects Tutorial After Effect Hologram
Secondary Sidebar
After Effects Tutorial
  • After Effects Tools
    • After Effects Tools
    • After Effect Hologram
    • Pen Tool in After Effects
    • Puppet Tool in After Effects
    • KeyFrames in After Effects
    • Adding Keyframes in After Effects
  • Basic
    • What is After Effects
    • After Effects Versions
    • After Effects Software
    • After Effects Shortcuts
    • Adobe After Effects Plugins
    • How to Use After Effects
  • Effects
    • Crop in After Effects
    • Color Grading in After Effects
    • Text Effects in After Effects
    • After Effects Templates
    • After Effects Bounce Expression
    • Time Remapping After Effects
    • After Effects Gradient
    • After Effect Font
    • After Effects Duplicate Composition
    • After Effects Expressions List
    • After Effects Green Screen
    • After Effects Loop Composition
    • Drop Shadow in After Effects
    • Background in After Effects
    • Blur in After Effects
    • After Effects Freeze Frame
    • After Effects Move Anchor Point
    • After effects?Quicktime
    • Text in After Effects
    • Motion Blur in After Effects
    • Mask in After Effects
    • Color Correction in After Effects
    • Blending Modes in After Effects
    • Track Matte in After Effects
    • Transparent Background in After Effects
    • Slow Motion in After Effects
    • Animation in After Effects
    • Text Animation in After Effects
    • Logo Animation in After Effects
    • 2D After Effects Animation
    • 3D Effects in After Effects
    • 3D Text in After Effects
    • After Effects 3D Objects
    • Shape Layers in After Effects
    • Export in After Effects
    • Morphing in After Effects
    • Twitch in After Effects
    • Snowfall in After Effects
    • Rain in After Effects
    • Masking Layers in After Effects
    • Group Layers in After Effects
    • Glitch Effect in After Effects
    • Ripple Effect in After Effects
    • Composition in After Effects
    • After Effects Transitions
    • Typography in After Effects
    • Slider Control After Effects
    • Motion Graphics in After Effects
    • Wiggle in After Effects
    • After Effects Portable
    • Wiggle Expression in After Effects
    • Keylight in After Effects
    • Rotoscoping in After Effects
    • After Effects Render
    • After Effects Expressions
    • After Effects Presets
    • Duik After Effects
    • After Effects Split Clip
    • Trapcode in After Effects
    • Plexus After Effects
    • Logo Reveal After Effects
    • Mocha in After Effects
    • Twixtor in After Effects
    • Lens Flare in After Effects
    • After Effects Particles
    • After Effects Timeline
    • After Effects Tracking
    • Camera Tracking in After Effects
    • After Effects Repeater
    • After Effects Cartoon
    • After Effects Loop Expression
    • After Effects?Optical Flares
    • Glow in After Effects
    • After Effects GIF
    • After Effects Motion Tracking
    • After Effect Kinetic Typography
    • Cut Clips in After Effects
    • Lower third after effect
    • Masking Layers in Adobe After Effects

Related Courses

After Effects Training Course

Adobe Premiere Pro Training Course

Design Training Course

After Effect Hologram

After Effect Hologram

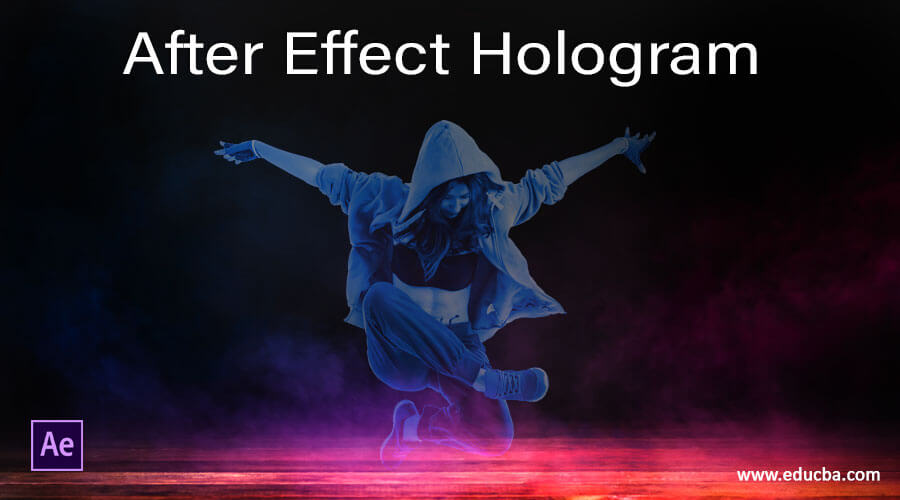
Introduction to After Effect Hologram

In this article, we are going to learn how to create a hologram in after effects. This effect is mostly created in sci-fi movies. The hologram, in general, is a light diffraction technique that is used to create the 3D light field, and the depth and parallax are achieved. In reality, the laser is used to create a hologram. In other words, we can say that hologram is a 3-dimensional photo.

Steps of After Effect Hologram

Here are the following steps mention below:
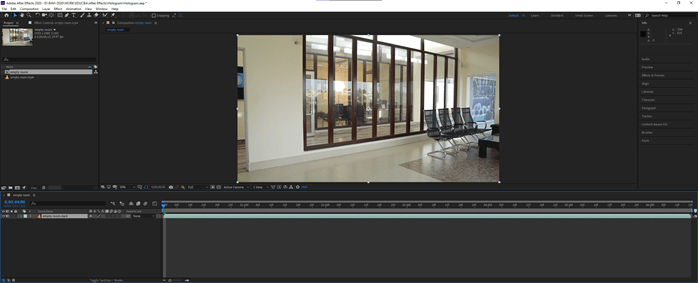
Step #1

We have imported a video by dragging it into the project panel and then into the layers panel. First, make sure it pans the view.
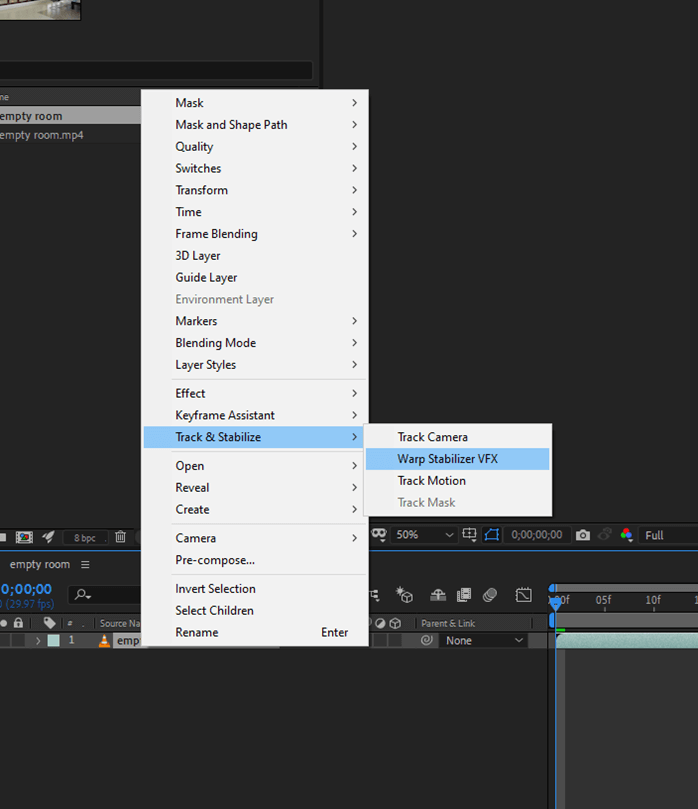
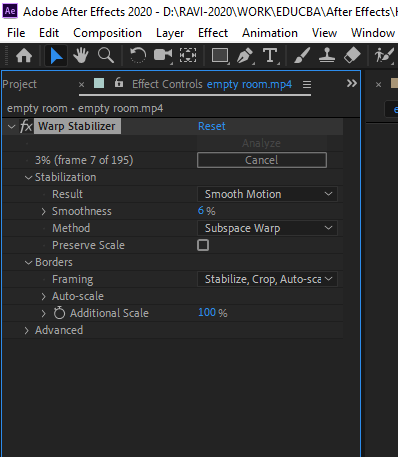
All in One Design Bundle(280+ Courses, 100+ projects)
AutoCADHoudiniAdobe Premiere ProPhotoshop
SolidworksVFX Visual EffectsCorelDrawUnreal Engine
Price
View Courses
280+ Online Courses | 100+ projects | 2000+ Hours | Verifiable Certificates | Lifetime Access
4.6 (64,828 ratings)

After Effect Hologram output 1

Start Your Free Design Course

3D animation, modelling, simulation, game development & others

Step #2

Warp stabilize the video to make it stable and set smoothness to around 6%
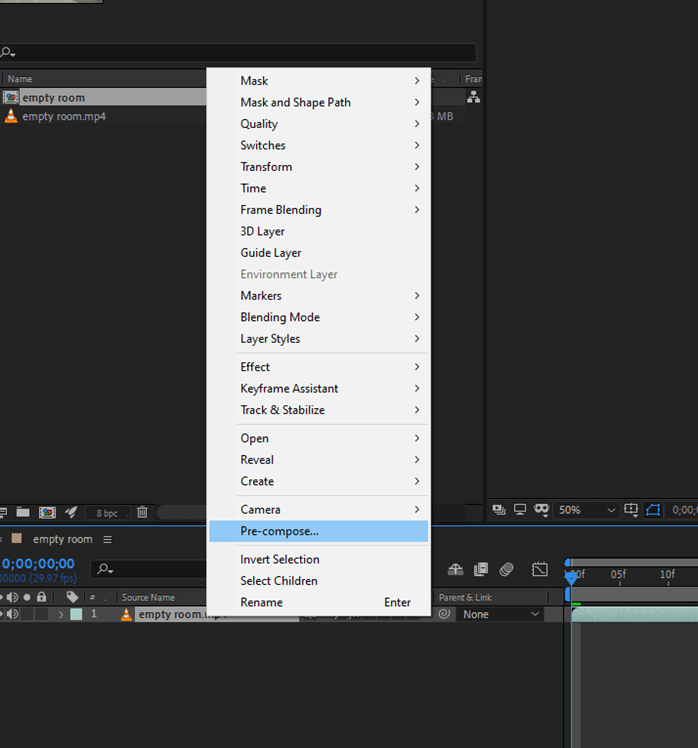
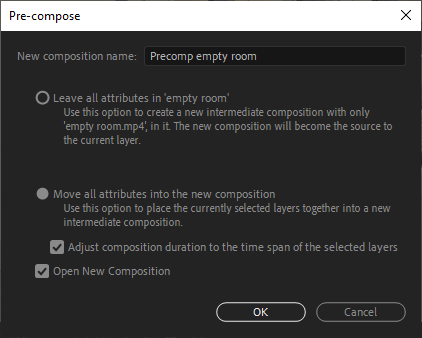
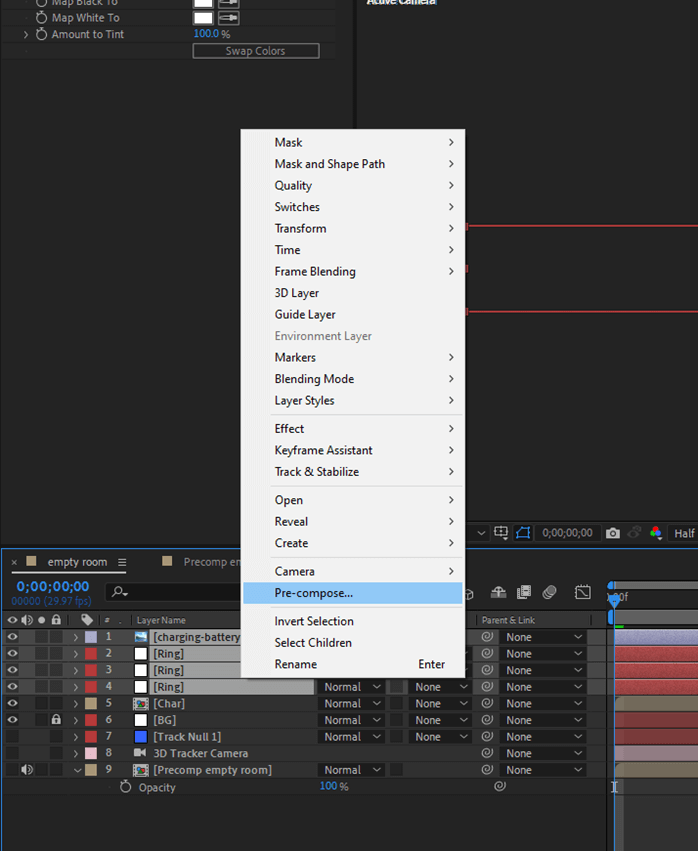
After Effect Hologram output 2

After Effect Hologram output 2.2

Step #3

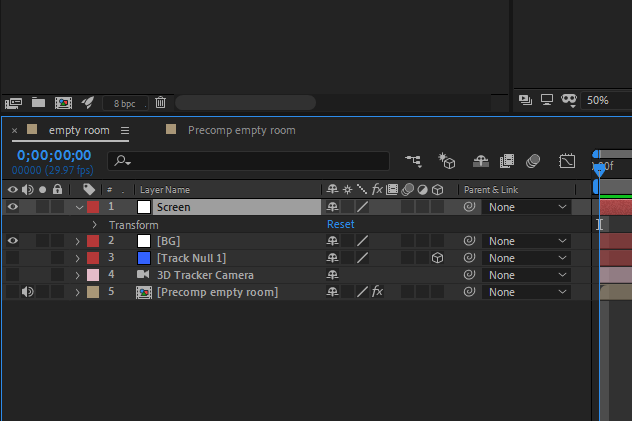
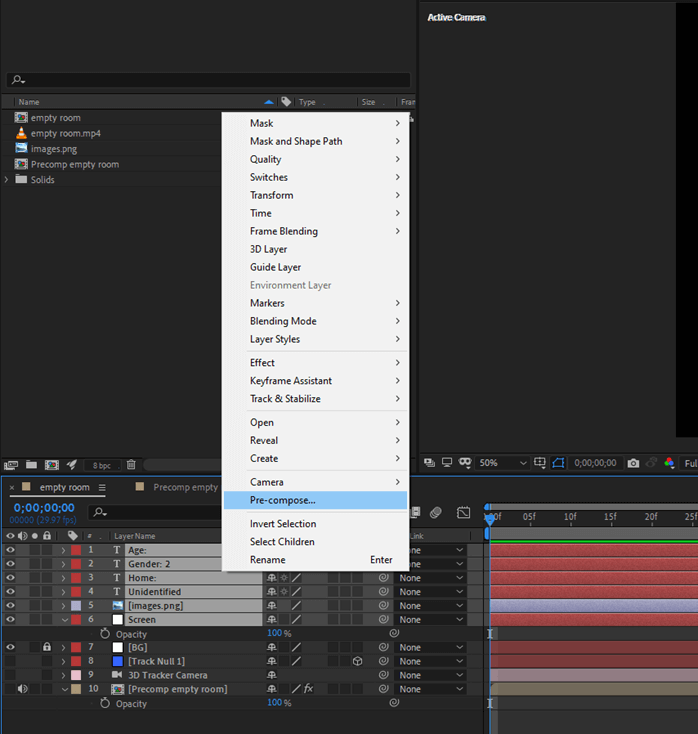
Make a precomp of the video and also move all the attributes.
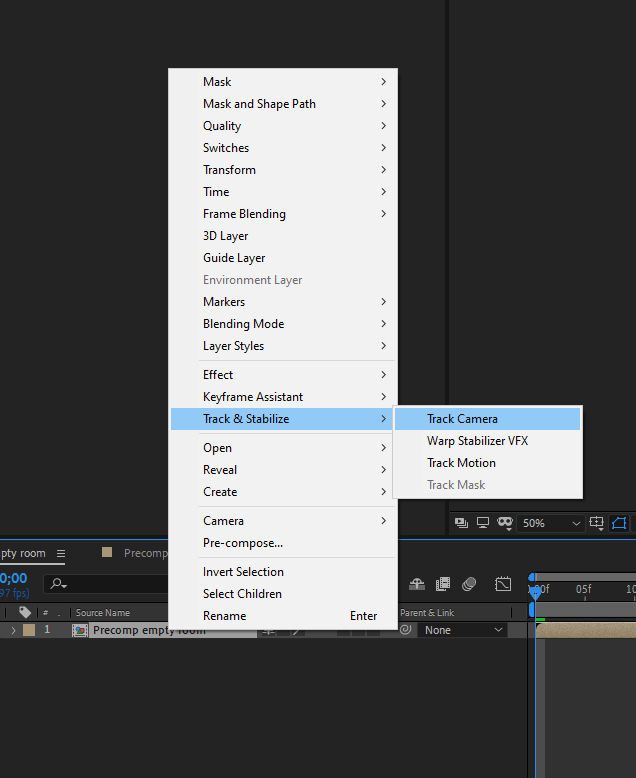
After Effect Hologram output 3

After Effect Hologram output 3.2

Step #4

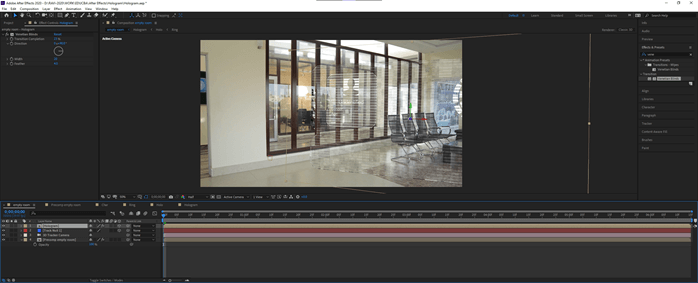
Apply track camera effect on the precomp
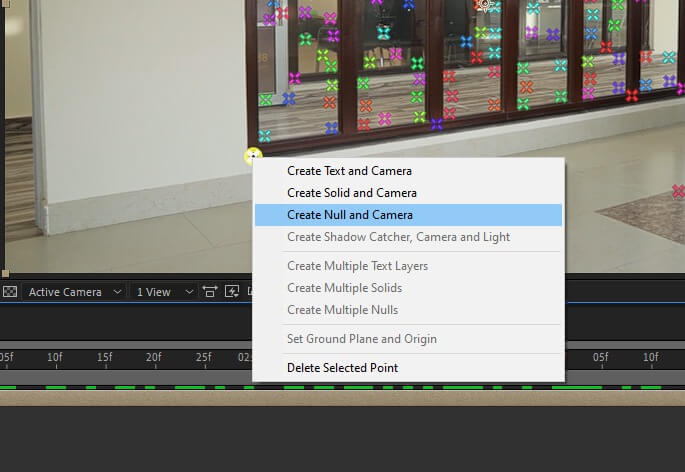
After Effect Hologram output 4

Step #5

Select a point created by camera tracking and create null and camera

After Effect Hologram output 5

Step #6

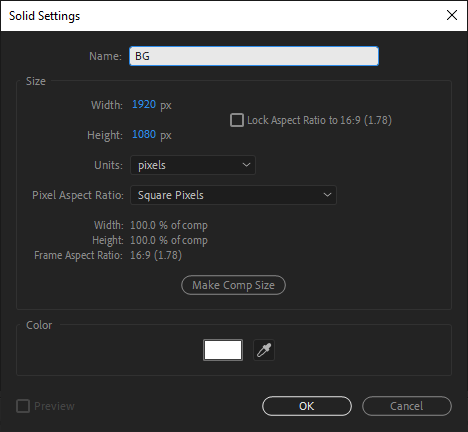
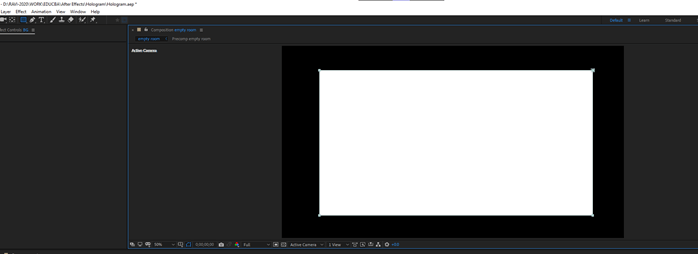
Then hide all the layers and create a solid name BG with white color.
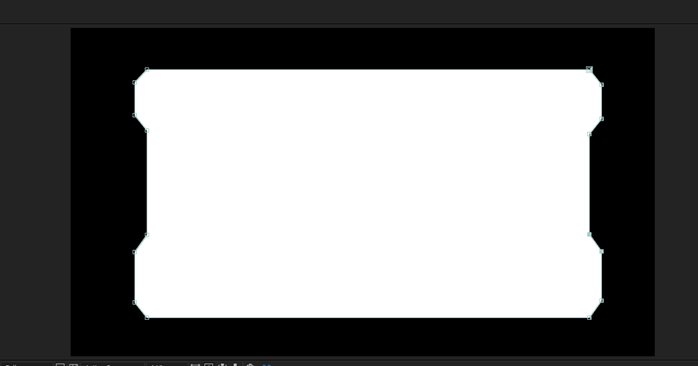
After Effect Hologram output 6

Step #7

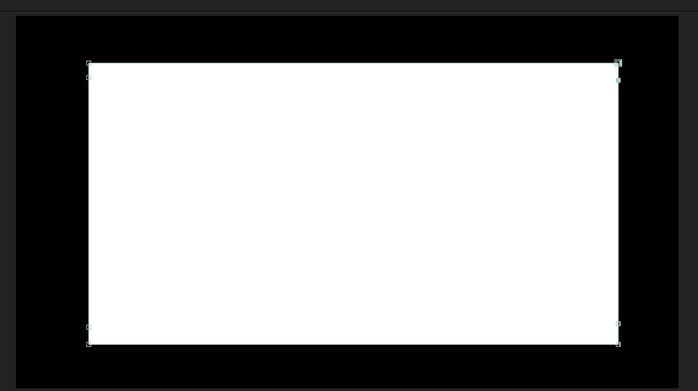
Using a rectangle tool, create a rectangle on the BG, which will create a mask.

After Effect Hologram output 7

Step #8

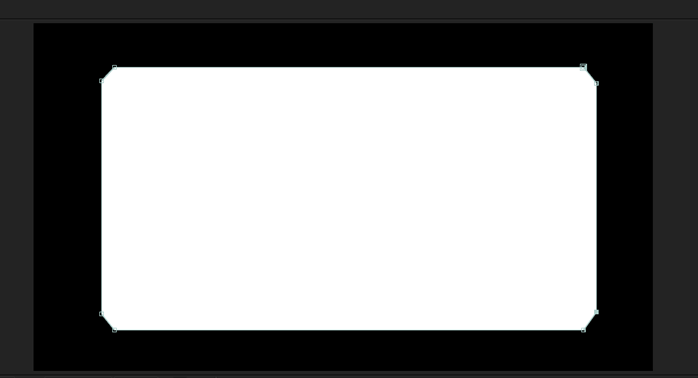
Create the points as shown using the pen tool.

After Effect Hologram output 8

Step #9

Then create the following shape using the selection tool and arrow keys.

After Effect Hologram output 9

Step #10

Similarly, create more points using the pen tool and create this shape.
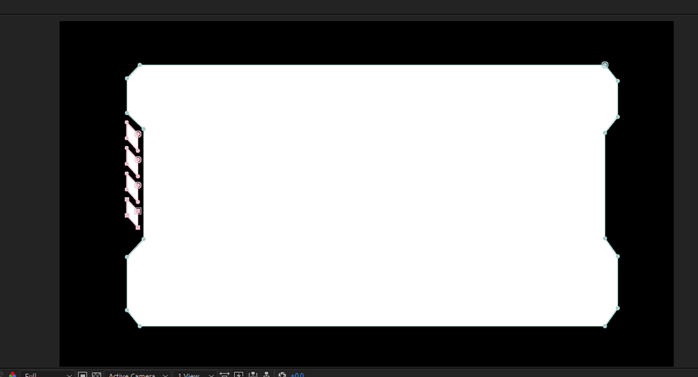
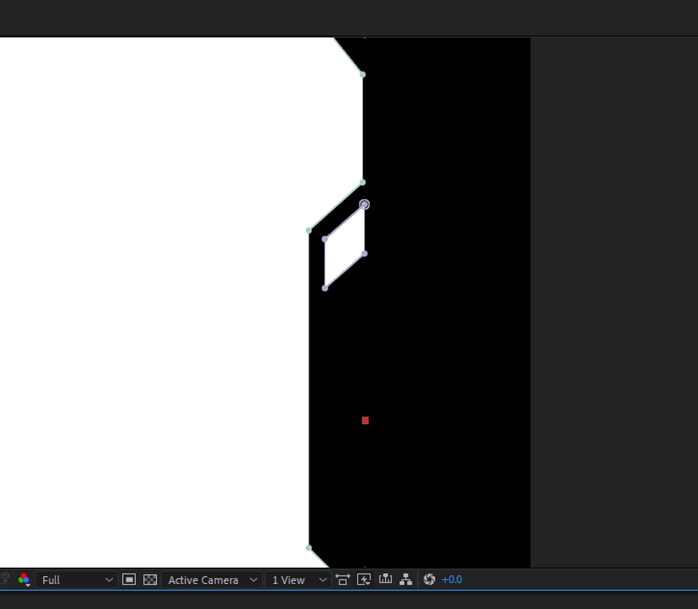
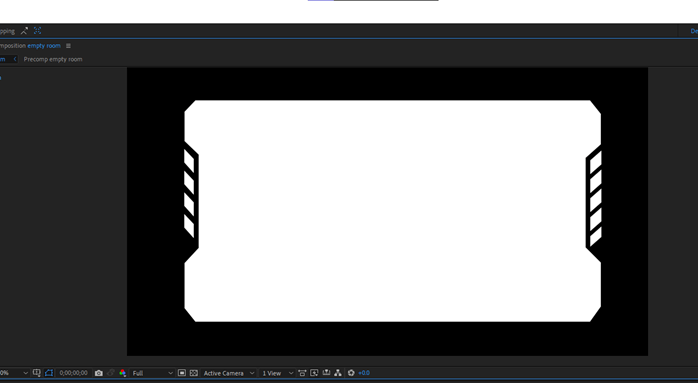
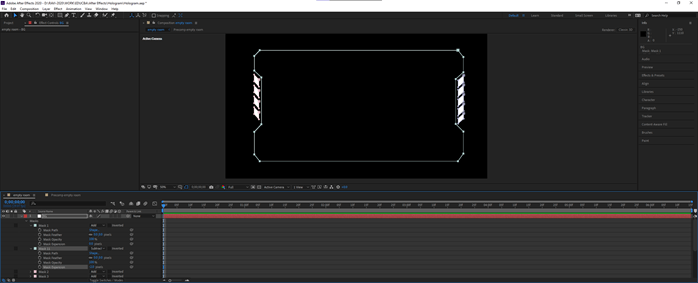
After Effect Hologram output 10

Step #11

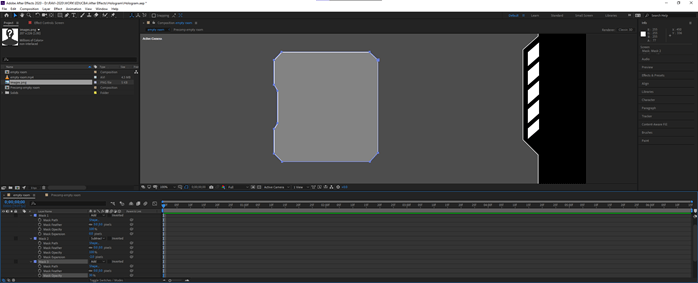
Again, select the rectangle tool and create a rectangle and then select its points to create a slanted shape as shown. Then, duplicate it multiple times and adjust its position.

After Effect Hologram output 11

Step #12

Similarly, create it on the other side.
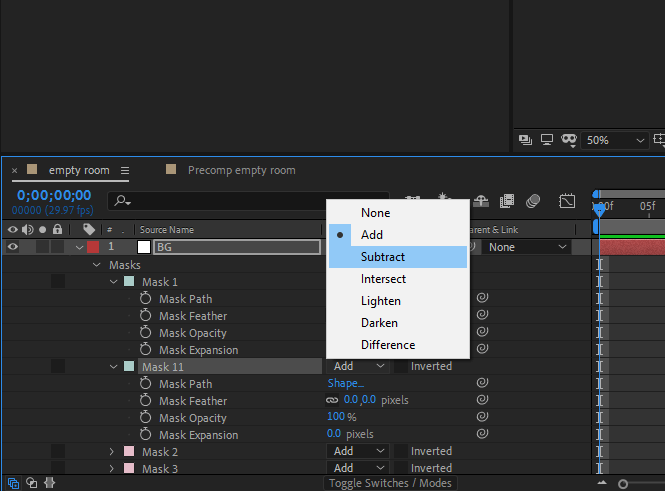
After Effect Hologram output 12

After Effect Hologram output 12.2

Step #13

Duplicate Mask 1 and set the mode to subtract and set the mask expansion to -2
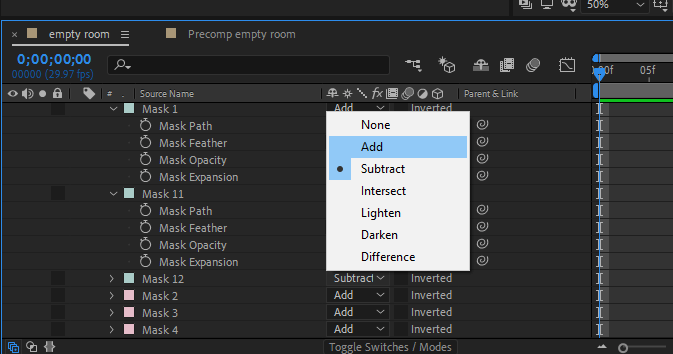
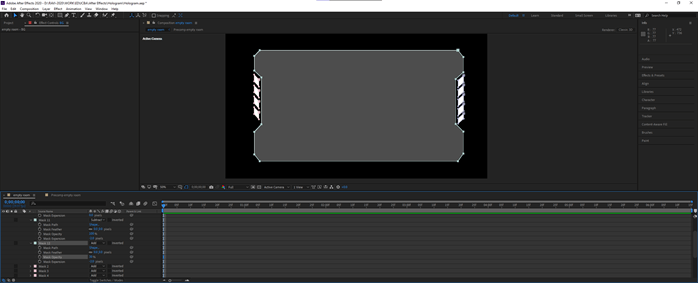
After Effect Hologram output 13

After Effect Hologram output 13.2

Step #14

Duplicate Mask 11 and set the mode to add and set the mask opacity to 30%, and now our background is ready.

After Effect Hologram output 14

After Effect Hologram output 14.2

Step #15

Create a new solid and called screen and create a small rectangle as shown.

After Effect Hologram output 15

After Effect Hologram output 15.2

Step #16

Using the same trick done previously, use the pen tool to add points and create the following shape.
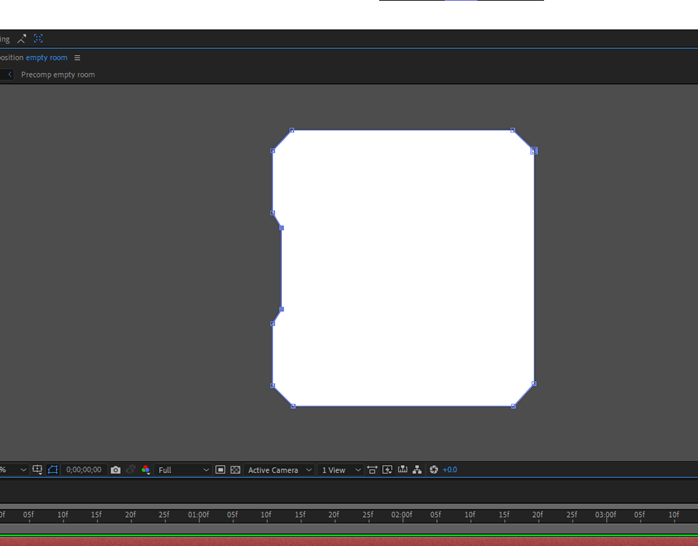
After Effect Hologram output 16

Step #17

As done before, duplicate mask 1 and set the mode to subtract and mask expansion to -2px and then duplicate it to create Mask 3 with mode to add an opacity of 30%
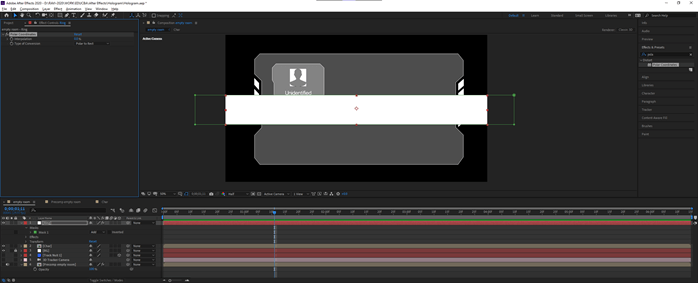
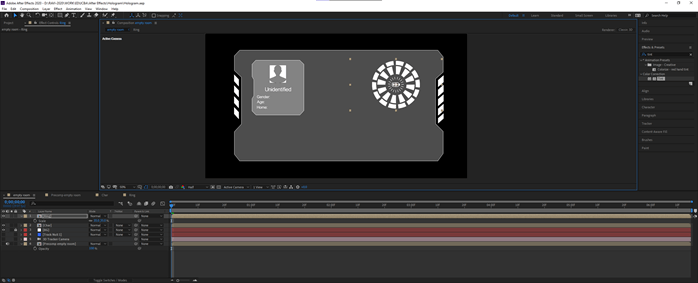
After Effect Hologram output 17

Step #18

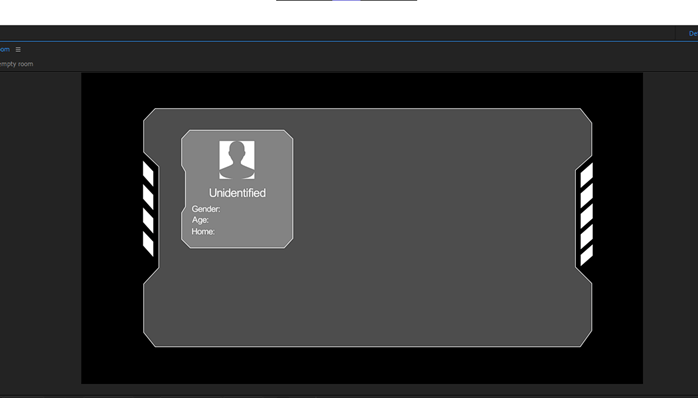
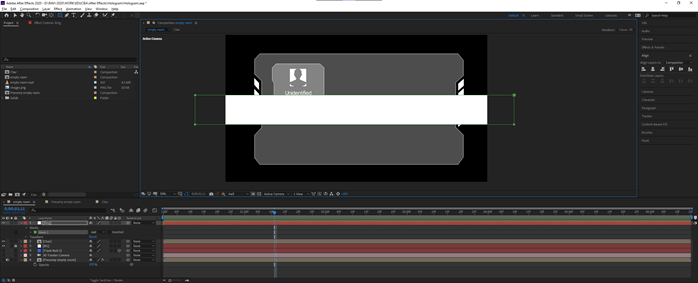
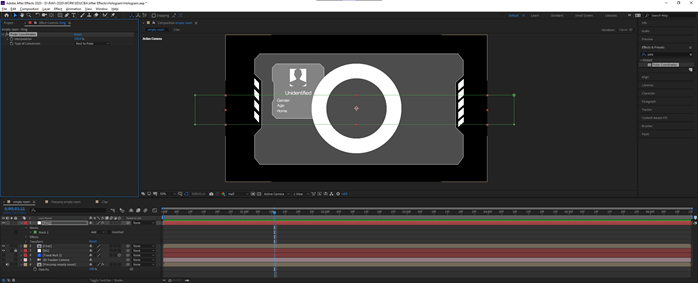
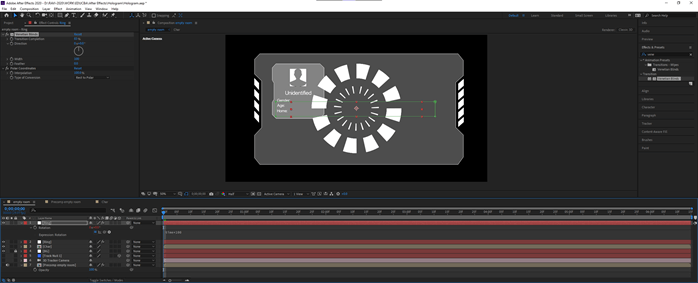
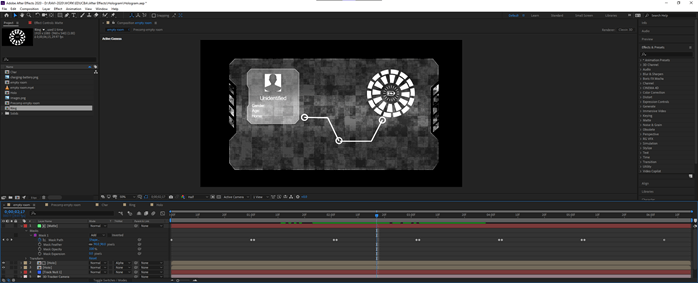
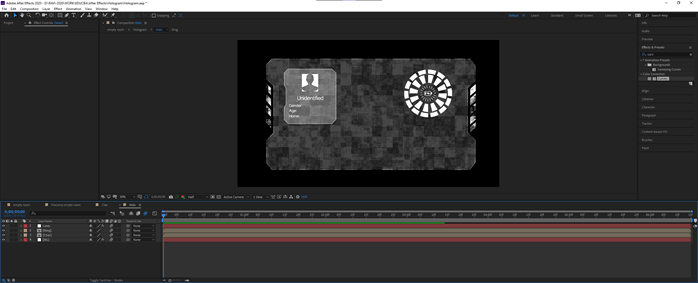
Then we have dragged an image on it and some text fields and dragged on the top left of the BG.

After Effect Hologram output 18

Step #19

Create a precomp named char for this block.

After Effect Hologram output 19

Step #20

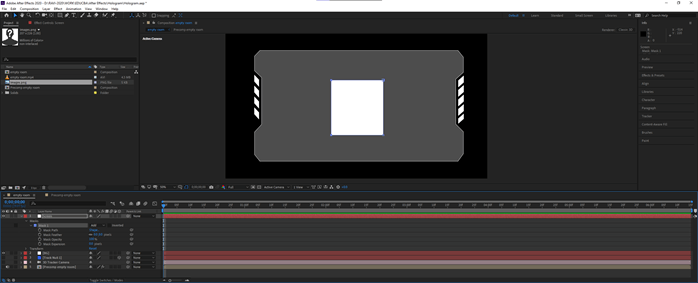
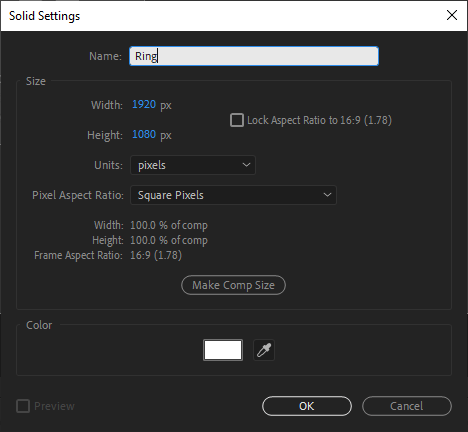
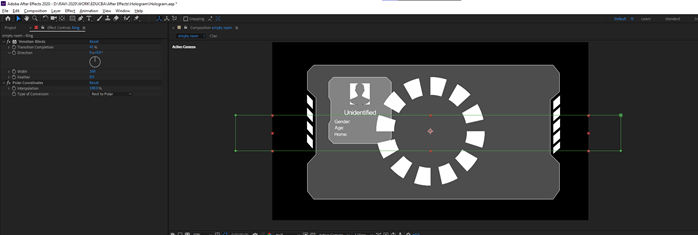
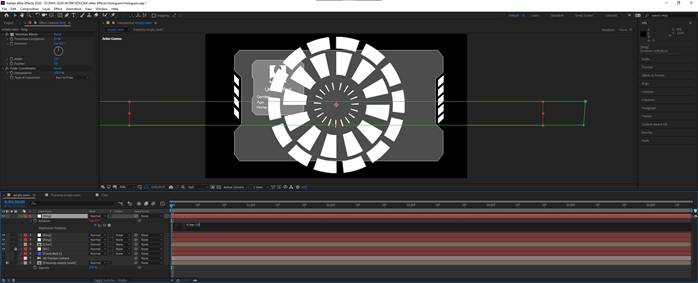
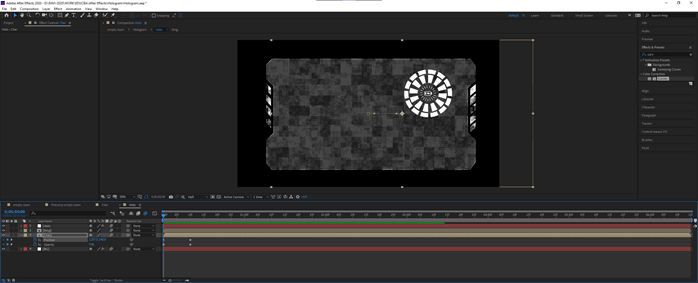
Create another solid named ring.

After Effect Hologram output 20

Step #21

Create a rectangle as shown as a mask.

After Effect Hologram output 21

Step #22

Add a polar coordinate effect to it.

After Effect Hologram output 22

Step #23

Set Interpolation to 100% and type of conversion to Rect to Polar.

After Effect Hologram output 23

Step #24

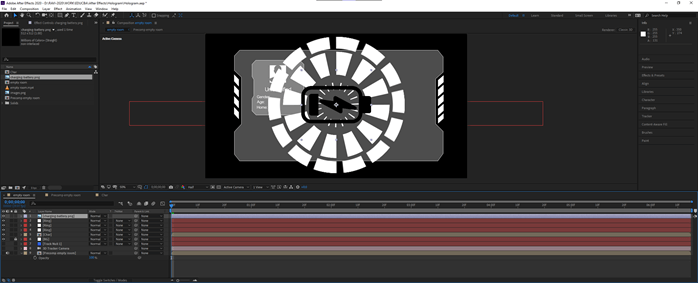
Add Venetian Blinds effect and adjust the parameters as shown.

After Effect Hologram output 24

Step #25

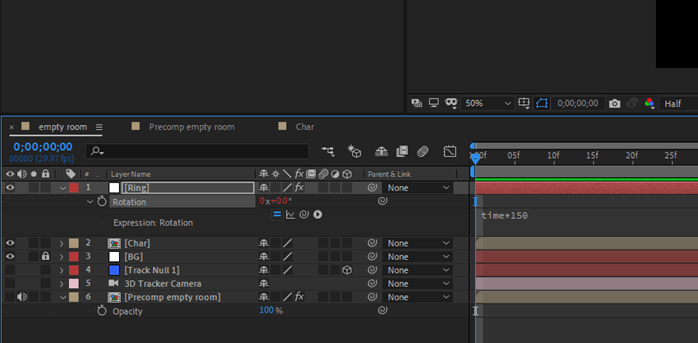
Alt-click the rotation property stopwatch and set the expression to time * 150 so that it will have rotation.

After Effect Hologram output 25

Step #26

Duplicate the ring twice and adjust the parameters.

After Effect Hologram output 26

After Effect Hologram output 26.2

After Effect Hologram output 26.3

Step #27

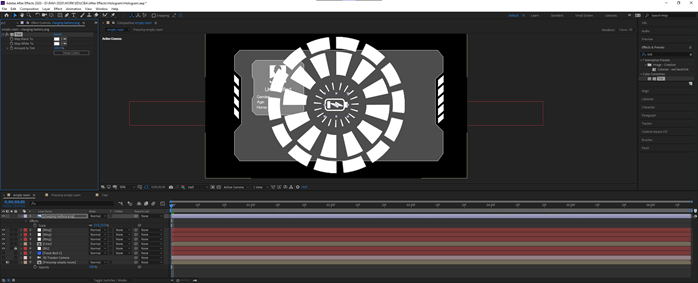
Add a battery icon, then scale down properly and add a tint effect to make it white.

After Effect Hologram output 27

After Effect Hologram output 27.2

Step #28

Then make a precomp and move it to the top right by scaling it.

After Effect Hologram output 28

After Effect Hologram output 28.2

Step #29

Create a new solid named Lines and set its visibility off.
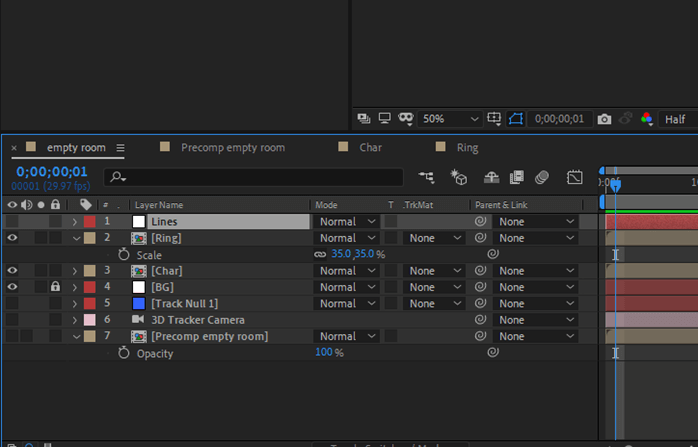
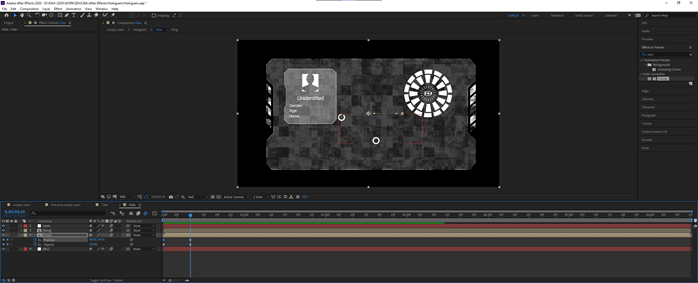
After Effect Hologram output 29

Step #30

Using pen and ellipse tool create follow
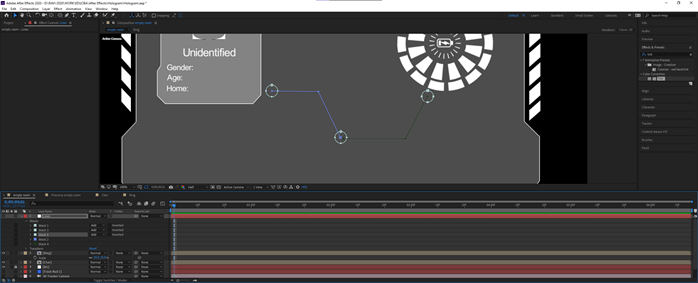
After Effect Hologram output 30

Step #31

Add a stroke effect to it and turn on the visibility, and set the properties as shown.

After Effect Hologram output 31

Step #32

Set a keyframe for the end key for lines starting at 0% and ending at 100%

After Effect Hologram output 32

Step #33

Then set mask expansions to negative values to get the following effects.
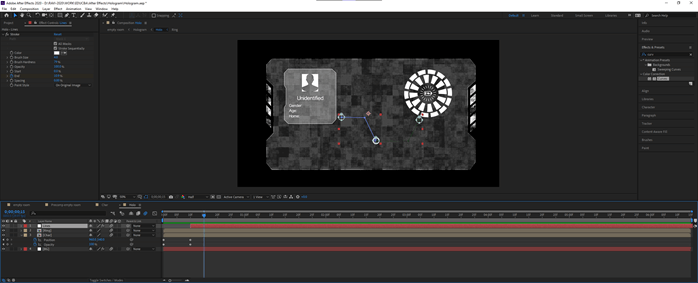
output 33

Step #34

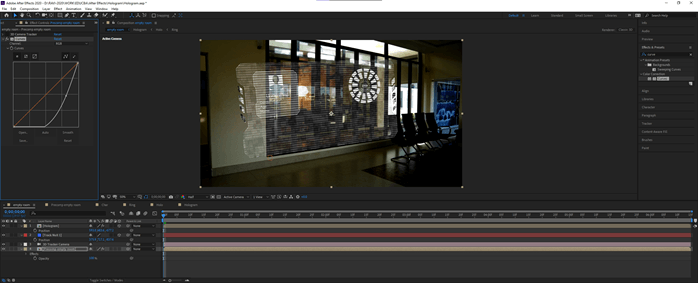
Add the Fractal noise effect to BG, set the properties as shown, and add an expression to evolution. Then add the Find Edges effect to get the edges.
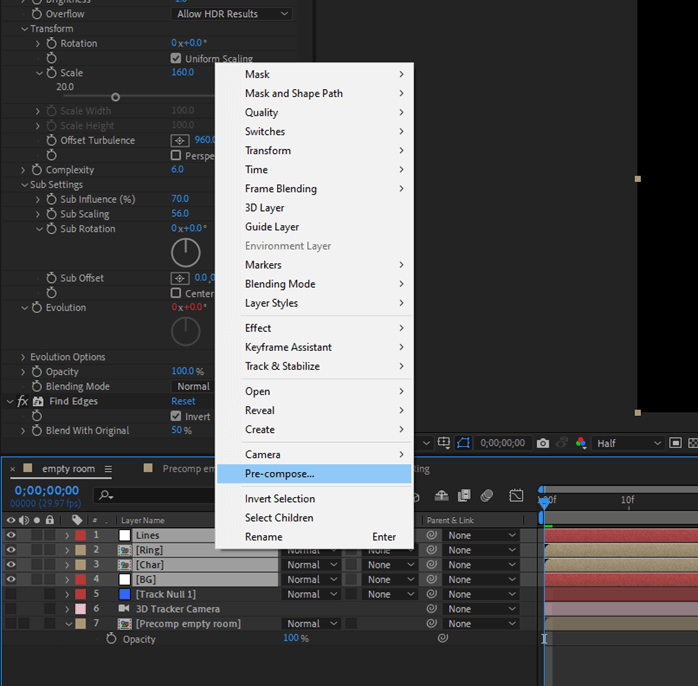
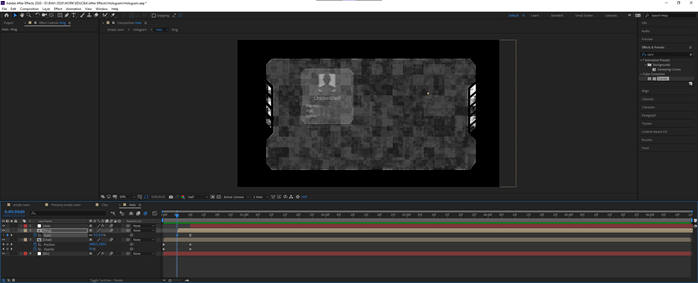
output 34

Step #35

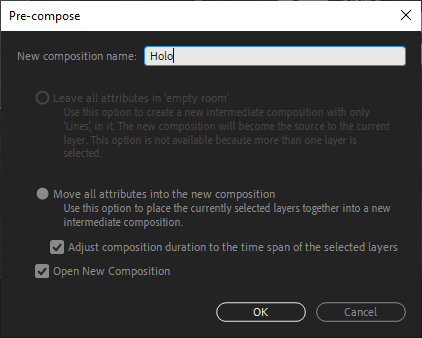
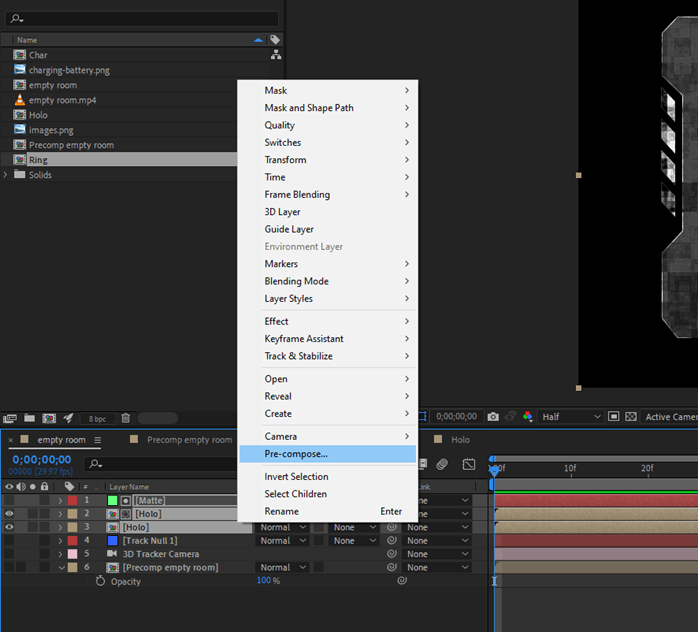
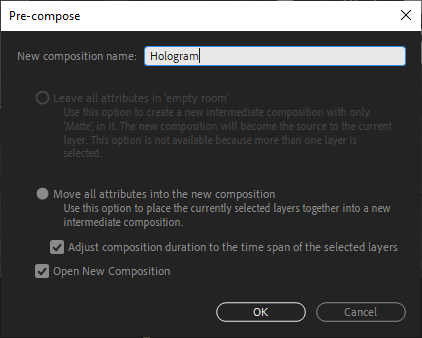
Precompose all the components and name it holo.

output 35

output 35.2

Step #36

Create a new comp named Matte and make it green in color.
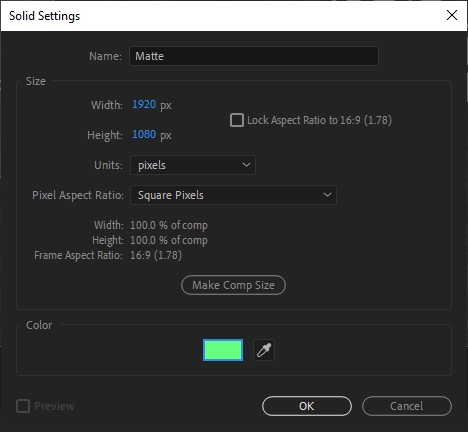
output 36

Step #37

Then create a rectangle and set the feather to 80

output 37

Step #38

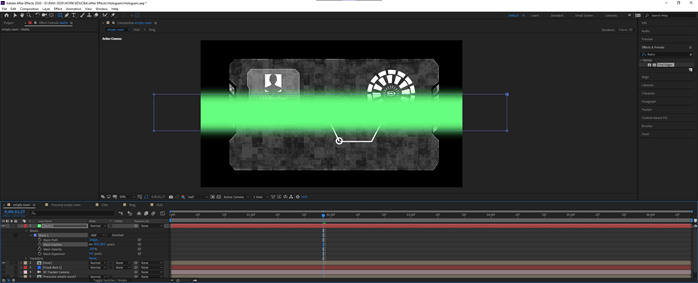
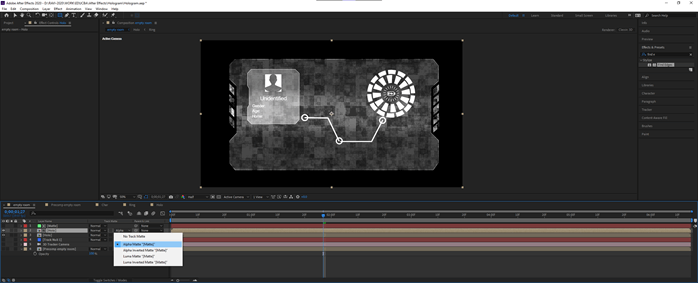
Duplicate Holo and set it to Alpha Matte

output 38

Step #39

Animate the mask path property at 0 frames, set it to the top, and at around 1 second, set it to the bottom.
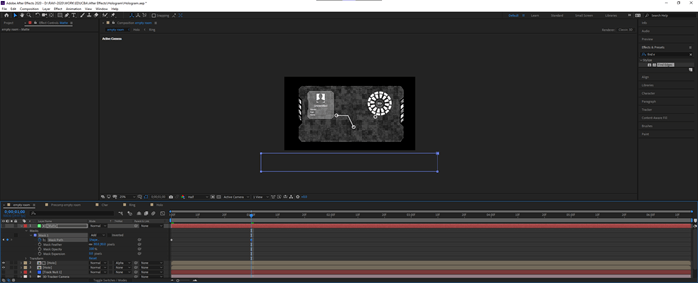
output 39

Step #40

Copy and paste the first two keyframes for the entire video.

output 40

Step #41

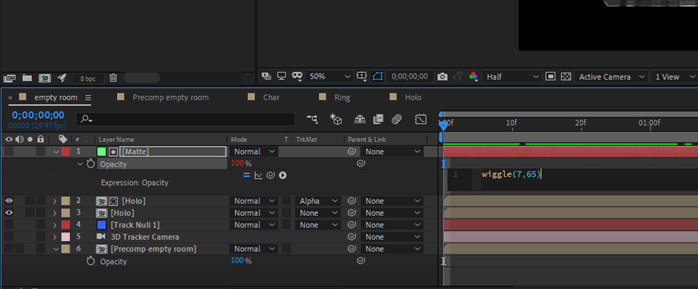
Add the expression as shown to give it a flicker.

output 41

Step #42

Create a precomp named Hologram

output 42

output 42.5

Step #43

Unhide all layers and turn on 3D options.

output 43

Step #44

Use the pan behind the tool to set the anchor of the hologram to the bottom.
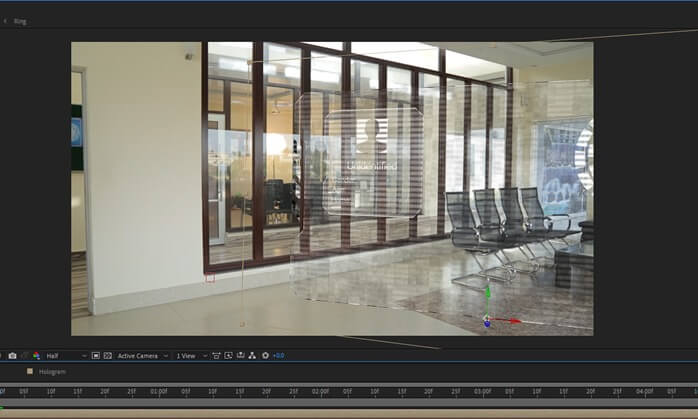
output 44

Step #45

Copy the position of track null to the hologram
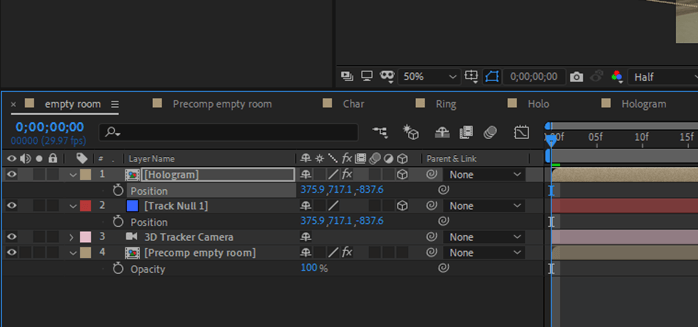
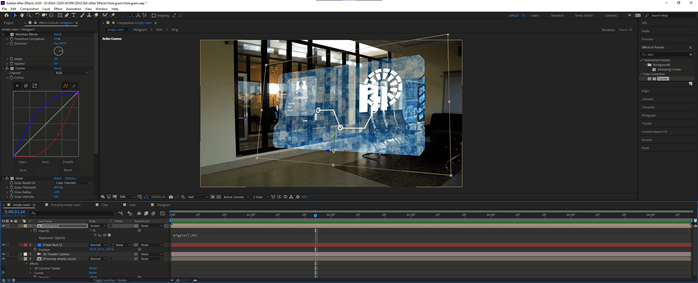
output 45

Step #46

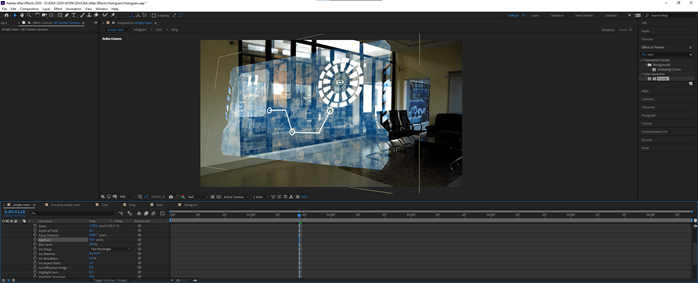
Then adjust the position of the hologram and add curves to the footage to make it darker.
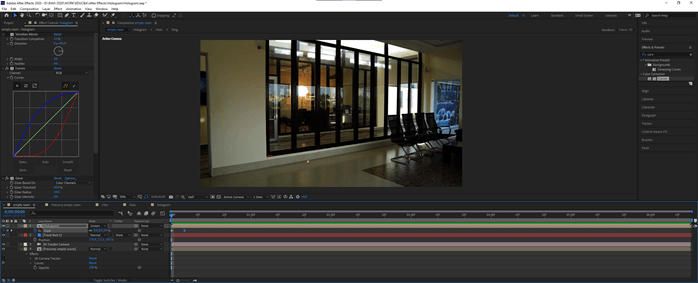
output 46

Step #47

In the 3D Tracker Camera, set Depth of field to on and adjust the aperture and blur level to get the effect of depth.
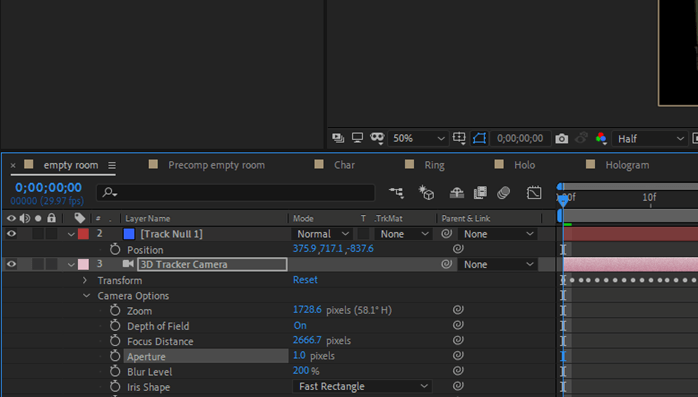
output 47

Step #48

As we can see, there is a bit of depth by adjusting the aperture and blur.
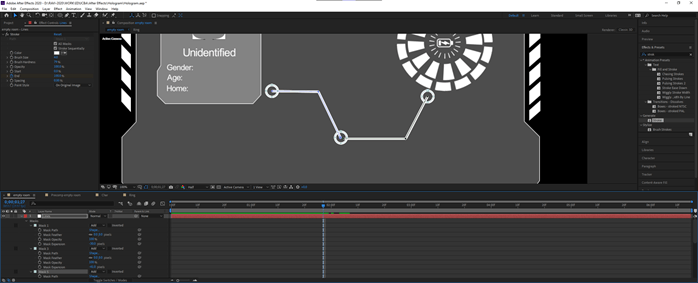
output 48

Step #49

Going back in the holo precomp, turn on the motion blur option and also set it for all components.

output 49

Step #50

Animate position and opacity of the char so that it fades in from the right.

output 50

output 50.2

Step #51

Delay the animation of lines, so it starts after the char has moved in.
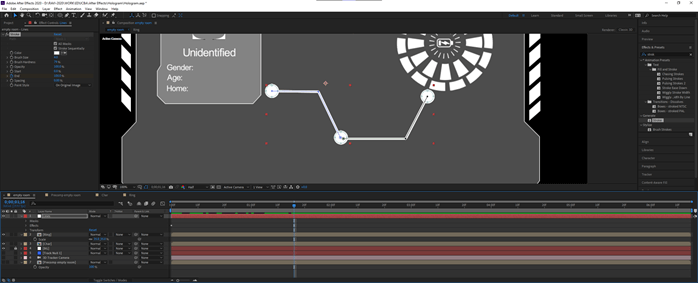
output 51

Step #52

Then delay the animation of the ring and set the keyframe to a scale of 0 at the start, and after 5 frames, increase the scale and select the second keyframe and press F9, which do the easing of the animation.

output 52

output 52.2

Step #53

We have applied to-scale animation to the hologram so that it appears to pop from the bottom.

output 53

Step #54

Let’s adjust the position of the hologram and add an expression wiggle(7,50) which will add a flicker to the hologram for added realism to it.

output 54

Conclusion – After Effect Hologram

In this article, we have learned how to make a surreal hologram that fits seamlessly into the scene to give a cyberpunk vibe like the Hollywood superhero movies. Apart from that, we also have seen how to use various animation effects and also the 3D Camera options to tweak the scene.

Recommended Articles

This is a guide to After Effect Hologram. Here we discuss how to use various animation effects along with the Steps of the After Effect Hologram. You may also have a look at the following articles to learn more –

  1. Crop in After Effects
  2. After Effects Repeater
  3. Mocha in After Effects
  4. Twixtor in After Effects
Popular Course in this category
After Effects Training (3 Courses, 3+ Projects)
  3 Online Courses |  3 Hands-on Projects |  25+ Hours |  Verifiable Certificate of Completion
4.5
Price

View Course

Related Courses

Adobe Premiere Pro Tutorial (4 Courses, 7+ Projects)4.9
All in One Design Bundle (280+ Courses, 100+ projects)4.8
0 Shares
Share
Tweet
Share
Primary Sidebar
Footer
About Us
  • Blog
  • Who is EDUCBA?
  • Sign Up
  • Live Classes
  • Corporate Training
  • Certificate from Top Institutions
  • Contact Us
  • Verifiable Certificate
  • Reviews
  • Terms and Conditions
  • Privacy Policy
  •  
Apps
  • iPhone & iPad
  • Android
Resources
  • Free Courses
  • Photoshop Tutorial
  • 3ds Max Tutorial
  • All Tutorials
Certification Courses
  • All Courses
  • Design Course - All in One Bundle
  • Photoshop Course
  • Maya Course
  • Unreal Engine Course
  • Unity Course
  • DaVinci Resolve Course
  • Pro Tools Course

ISO 10004:2018 & ISO 9001:2015 Certified

© 2022 - EDUCBA. ALL RIGHTS RESERVED. THE CERTIFICATION NAMES ARE THE TRADEMARKS OF THEIR RESPECTIVE OWNERS.

EDUCBA
Free Design Course

Banner Creation, Object Selection, Sky Replacement, Advance Filters & others

*Please provide your correct email id. Login details for this Free course will be emailed to you

By signing up, you agree to our Terms of Use and Privacy Policy.

EDUCBA Login

Forgot Password?

By signing up, you agree to our Terms of Use and Privacy Policy.

EDUCBA
Free Design Course

3D animation, modelling, simulation, game development & others

*Please provide your correct email id. Login details for this Free course will be emailed to you

By signing up, you agree to our Terms of Use and Privacy Policy.

EDUCBA

*Please provide your correct email id. Login details for this Free course will be emailed to you

By signing up, you agree to our Terms of Use and Privacy Policy.

Let’s Get Started

By signing up, you agree to our Terms of Use and Privacy Policy.

This website or its third-party tools use cookies, which are necessary to its functioning and required to achieve the purposes illustrated in the cookie policy. By closing this banner, scrolling this page, clicking a link or continuing to browse otherwise, you agree to our Privacy Policy

Loading . . .
Quiz
Question:

Answer:

Quiz Result
Total QuestionsCorrect AnswersWrong AnswersPercentage

Explore 1000+ varieties of Mock tests View more