Introduction to Adobe Illustrator Tools
Adobe Illustrator has colossal assortments of tools fused in it, and when Adobe Illustrator is launched then we go over certain tools which we use to apply the changes; the various instruments utilized here are clarified beneath with representations, and this Adobe Illustrator Tool is about the selection of items from the pictures and comprises of various sub tools such as draw tool, a type tool, paint tool, magic tool, modify the tool, navigate tool, artboard tool, layers panel and A most significant aspect regarding this is we can utilize shortcuts to initiate these tools.
Adobe Illustrator Tools
One of the most important things about this is that we can use shortcuts to activate these tools.
1. Select the tool
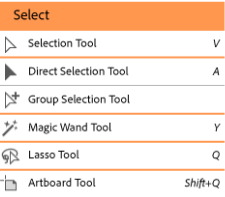
The “artboard” tool is activated by pressing Shift + Q; in this, we can select and modify there within the selection.
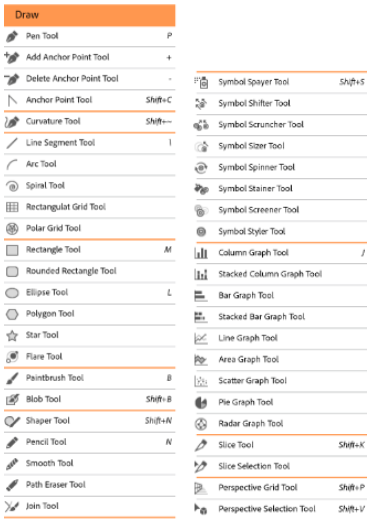
2. Draw
When it’s the time to show the talent and draw an image in Illustrator, then all needed tools are bonded together in this tool. From the Pen tool to Pie Graph, we can take startup by using all of these tools. While drawing, we need some of the easy blended tools like polygon, start tool, ellipse tool, rounded rectangle tool, and rectangle. We just have to click on this tool, and we can make use of these ready-made shapes.
There are some other tools for making and editing symbols and graphs; we don’t have to play with the tools used above. Here we can place a symbol and edit by 8 different types of tools just for the symbol. To show some mathematical values, we need to place a pie chart or bar graph, then we get the readymade tools where we just have to enter the values, and the graph is ready. We can modify it in the way we want and adjust the values as per.
https://helpx.adobe.com/in/illustrator/using/tools.html
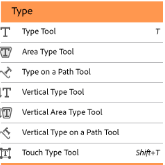
3. Type Tool
https://helpx.adobe.com/in/illustrator/using/tools.html
This Adobe Illustrator Tool is used to enter the text in between the illustrations wherever we want. We get a chance to write anything anywhere, and mainly, we can write in any position we want as we have a vertical type tool, Vertical type on path tool, Type on path tool, and Vertical area type tool. One of the lovely tools is the Touch-type tool; by using this, we can click anywhere on the screen and write text there; also, we can access this tool by pressing Shift + T.
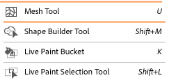
4. Paint tool
![]()
https://helpx.adobe.com/in/illustrator/using/tools.html
The Paint tool consists of the Gradient tool, mesh tool, shape builder tool, live paint bucket, and lives paint selection tool. The gradient tool is used to show the shades of color and can make a new one by mixing two or more colors. Similarly, to help this tool, it has a live paint bucket that even consists of combining various colors.
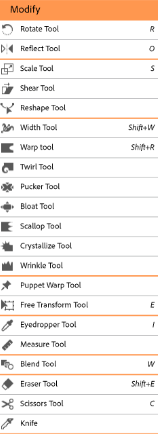
5. Modify Tool
The modification is a key part of the software as it has to make changes in the existing without affecting the original object. Here in this, we can do lots of changes like rotate, making the mirror of the original, scaling images, reshaping the existing shapes, adjusting the width & height, and warping it.
The tool which I like is a Twirl tool; as in this tool, as long as we hold our click, the more twirl we’ll come to see. This twirl is used to create more complex shapes by repeating them again and again. We can use it on the edges of the circle also; we can change the options by double-clicking on the tool.
Even there is a Warp tool which is used to deflate the object by controlling the points. Further Pucker tool can be used to squash everything towards the center.
https://helpx.adobe.com/in/illustrator/using/tools.html
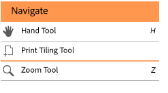
6. Navigate Tool
Here we go with the navigation tool, which we can say plays an eternal part, as it is used every minute. If we make some changes in the design, then we need to zoom in and zoom out the illustration to see how changes affect. While applying the effects or while applying the colors, we need a hand tool for panning objects. As we need these tools continuously in command, we can access these by pressing “H” and “Z”.
https://helpx.adobe.com/in/illustrator/using/tools.html
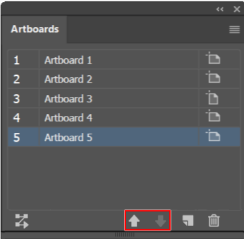
7. Artboard Tool
It is the tool which is the platform for the printable section or a platform for an object to be exported. Before creating the artboard, we can choose different preset sizes or define our own custom artboard. We can create a seamless artboard for a single document and can modify its size, width, and length and can place it anywhere on the screen.
To access this tool, we need to open this tool and directly add objects by dragging and dropping them. Each artboard is bounded by a thick solid line and shows the maximum printable area. The canvas is the region outside the artboard that can be extended up to a 220-inch square window.
https://helpx.adobe.com/in/illustrator/using/tools.html
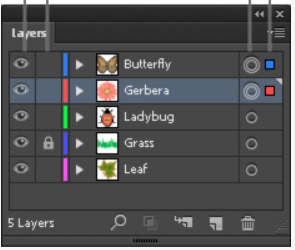
8. Layers Panel
Usually, in any photo editing software’s layers are the common tool which is used to make a duplicate copy of the image or illustration. By using this tool, we can keep the original copy unaffected by the changes. As if we didn’t like any changes made, we don’t have to do undo all the time; we can directly remove the layer and can start with the fresh work.
Another use of the layer is that we can hide, lock and can save the appearance. We can even create the template of layers that we can use to track the artwork and exchange layers with the other softwares like Photoshop.
Usually, in layers, Adobe Illustrator assigns a special color to each layer as it can be done up to 9 different colors. The same color has been reflected in the window of the box, path, anchor points and center of the object.
We can see in the below image how the different layers are created and how they are named. We can see the four columns as well named from the left side of the page as 1. Visibility column 2.Edit column 3.Target column 4.Selection column. We can control the characteristics by clicking on them.
https://helpx.adobe.com/in/illustrator/using/tools.html
Recommended Articles
This has been a guide to know What is Adobe Illustrator Tools. Here we have discussed the basic concepts and the characteristics. You may also look at the following articles:
