


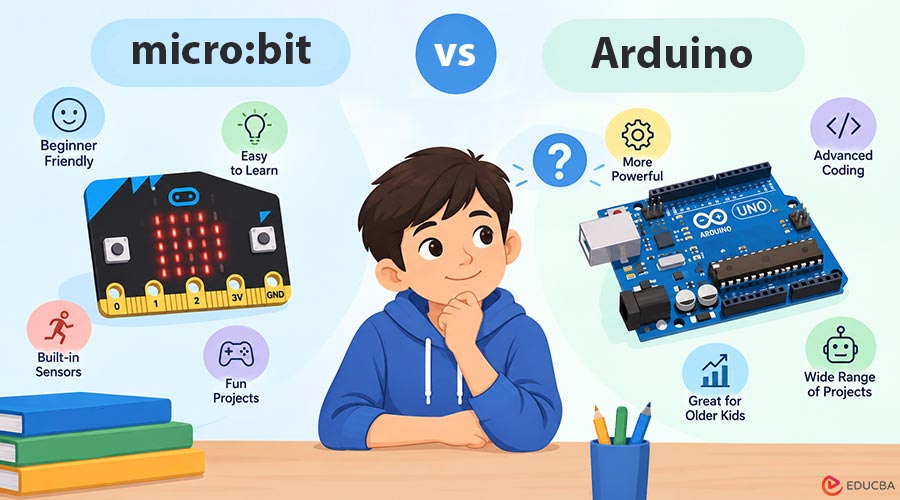
Choosing a first electronics board for a STEM classroom usually comes down to two names: the BBC micro:bit V2 and the Arduino UNO R3. Both are affordable, beginner-friendly options with plenty of teaching resources, but they support different learning approaches. The micro:bit V2 helps students explore coding, sensors, and interactive projects quickly, while the Arduino UNO R3 provides a practical introduction to electronics and circuit design. Understanding micro:bit vs Arduino can help teachers select the right platform for their students’ learning objectives, classroom resources, and curriculum requirements.
This article compares them feature by feature, focusing on classroom teaching, curriculum planning, learning objectives, and hands-on STEM activities. The goal is to help teachers choose the right board for their students and classroom environment.
The Quick Comparison
| Feature | BBC micro:bit V2 | Arduino UNO R3 |
| Built-in sensors and features | Motion sensor, compass, microphone, touch-sensitive logo, 25 LEDs, and buttons | Built-in LED, digital and analog pins, and other basic hardware features; no comparable collection of onboard sensors |
| Wiring needed | None for basic projects | None for the first Blink project; breadboard and jumper wires for many external circuits |
| Languages | Blocks, Python, and JavaScript | C++ using the Arduino IDE |
| Best age range | Generally 8–13 | Generally 13 and above, depending on experience |
| Learning focus | Coding logic, data collection, and interactive design | Circuit design, programming, and electronics fundamentals |
| Ease of classroom setup | Very easy | Moderate |
| Curriculum applications | Coding, physical computing, data, and interdisciplinary projects | Electronics, engineering, prototyping, and control systems |
| Classroom management | Quick deployment and simple project setup | More component handling, wiring, and troubleshooting |
These age ranges are general guidelines, not strict limits. You can use either board with younger or older students when the activities and level of support are appropriate. Let us examine how these differences affect classroom teaching and curriculum planning.
Built-in Sensors: Ready-to-Use Features vs Electronics Fundamentals
The BBC micro:bit V2 is a compact computer with a 5×5 LED display, two buttons, an accelerometer, a compass, a microphone, a touch-sensitive logo, and Bluetooth connectivity. These built-in features let students collect information and create interactive programs without connecting additional sensors. The Arduino UNO R3 takes a different approach. It includes a built-in LED for simple projects, but it lacks the same onboard sensors as the micro:bit V2.
Students can connect external sensors to measure temperature, light, distance, or other environmental conditions. For classroom teaching, this difference affects how teachers plan learning activities. With the micro:bit for STEM education, a lesson can begin with students collecting movement data or building a digital compass. With the Arduino, students can explore how sensors connect to a circuit, how readings are processed, and how hardware communicates with software.
Wiring Needed: Quick Activities vs Circuit-Building Practice
The micro:bit V2 is easy to introduce in a classroom. Connect it to a computer using USB, open the programming editor, and students can begin creating simple projects. Basic activities require no breadboard, jumper wires, or soldering. You can also introduce the Arduino UNO R3 without external wiring. Its built-in LED lets students complete the classic Blink project by uploading a program that switches it on and off.
More advanced activities usually require a breadboard, jumper wires, resistors, LEDs, or external sensors. For teachers, the choice depends on the learning objective. If the goal is to introduce programming concepts to an entire class in a short lesson, micro:bit for STEM education reduces setup time. If students are learning how to assemble and test electrical circuits, Arduino provides more opportunities to work directly with electronic components.
Languages: Blocks vs C++
The micro:bit V2 supports block-based programming, Python, and JavaScript through beginner-friendly educational tools. Teachers can introduce programming with visual blocks before gradually moving students toward text-based coding. The Arduino UNO R3 is commonly programmed in C++ using the Arduino IDE. Students write code, select the correct board and port, and upload their programs.
This introduces a more traditional development workflow, including syntax, variables, functions, and compiler errors. For curriculum design, the micro:bit supports a gradual progression from basic sequencing and loops to variables, conditionals, events, and data collection. Arduino lessons can build on those same concepts while introducing hardware-specific programming, digital outputs, analog inputs, and sensor control.
Best Age: Matching the Board to Student Readiness
The micro:bit V2 is often a strong starting point for students aged 8–13 because its built-in features and visual programming tools reduce the number of technical steps required to complete a project. Students can focus on problem-solving and experimentation instead of spending most of the lesson troubleshooting wiring. The Arduino UNO R3 works well for students aged 13 and above, especially when they are ready to explore circuits, sensors, and engineering design. However, younger students can also use Arduino with appropriate instructions, prepared components, and teacher support.
In a school curriculum, readiness matters more than age alone. Teachers should consider students’ prior coding experience, mathematical understanding, ability to follow circuit diagrams, and confidence with practical tasks. Rather than assigning one board to a particular age group, schools can use the micro:bit for introductory physical computing in STEM education and introduce Arduino when students are ready for more detailed electronics work.
Learning Focus: Coding Logic vs Electronics and Engineering
The biggest difference between these boards is how they support hands-on learning. The micro:bit V2 helps students explore programming through immediate physical feedback. They can build step counters, reaction-time games, digital dice, simple data loggers, and interactive classroom demonstrations. These projects connect abstract coding concepts to visible results.
The Arduino UNO R3 is particularly useful for investigating how electronic systems work. Students can build circuits, connect sensors, measure inputs, control outputs, and test how changing one component affects a system.
Both boards support STEM learning, but they offer different entry points. The micro:bit makes it easier to combine coding with science, mathematics, and creative design. Arduino gives students more direct experience with electrical circuits, component selection, and engineering prototypes.
Ease of Start: Managing a Whole Classroom
In a classroom, ease of use is not just about how quickly one student can start coding. Teachers must also consider setup time, lesson duration, equipment distribution, troubleshooting, and how many students can work independently. With the micro:bit V2, students can begin with a short program that displays a heart, scrolls their names, or responds to movement. Teachers can demonstrate the activity once and allow students to adapt the same code to meet different challenges. With the Arduino UNO R3, students can also complete a simple Blink lesson quickly.
However, lessons involving external circuits require more preparation. Teachers may need to distribute components, check connections, help students select the correct board and port, and manage problems caused by incorrect wiring. For a class of thirty students, these differences can affect how much practical work fits into a lesson. Preparing starter files, using clearly labeled equipment trays, and providing troubleshooting guides can make either board easier to manage.
Curriculum Design and Hands-on STEM Projects
A good STEM lesson should have a clear learning objective, a practical challenge, and a way to evaluate what students have learned. Choosing a board is only one part of the planning process. Here are examples of how each board can support a structured classroom activity.
1. micro:bit V2 — Movement and Physical Activity Tracker
- Learning objective: Use sensor data, variables, and conditional statements.
- Activity: Students program the accelerometer to detect movement and create a simple activity counter or movement-triggered display.
- Assessment: Students explain how the sensor input changes the program’s behavior and test whether their program responds consistently.
2. micro:bit V2 — Classroom Noise Investigation
- Learning objective: Collect and interpret sensor data.
- Activity: Students use the onboard microphone to record relative sound levels during different classroom activities, where appropriate.
- Assessment: Students compare results, create a simple graph, and discuss how the classroom environment affects the readings.
3. Arduino UNO R3 — LED Circuit Investigation
- Learning objective: Understand basic circuits, current, and the role of a resistor.
- Activity: Students build an LED circuit on a breadboard with a suitable resistor, then modify the program to control the LED.
- Assessment: Students draw the circuit, identify its components, and explain why the resistor is needed.
4. Arduino UNO R3 — Automatic Plant-Watering Prototype
- Learning objective: Use sensor readings and conditional logic to control an output.
- Activity: Students connect a suitable soil-moisture sensor and use its readings to trigger an indicator or, with appropriate additional hardware, a small pump.
- Assessment: Students test different moisture readings, set a threshold, and explain how the system decides when to water.
These projects can be adapted to different subjects. Mathematics lessons can focus on measurement and graphs, science lessons can explore environmental data, and design lessons can ask students to improve an existing prototype. For teachers planning to use micro:bit for STEM education, these activities can also become group challenges where students compare designs, explain their decisions, and present their results.
Classroom Device Management and Preparation
When choosing technology for a school, teachers should also consider how they will store, distribute, maintain, and reuse the equipment. For micro:bit classroom sets, organize labeled boards, USB cables, battery packs, and project instructions. Teachers can prepare starter programs and let students work in pairs, reducing the number of devices required. Arduino UNO R3 sets need more component management when lessons involve external circuits.
Store boards, breadboards, wires, LEDs, resistors, and sensors in labeled kits. A simple component checklist helps students return equipment correctly and reduces the risk of missing parts between lessons. For both boards, teachers should consider computer compatibility, USB connections, access to programming software, and school policies on installing applications.
The micro:bit’s browser-based workflow can simplify deployment, while Arduino’s desktop IDE may require more initial configuration depending on the school’s IT setup. Pair programming is another useful classroom strategy. One student can operate the computer while the other checks the circuit or records observations. Students can then switch roles, ensuring that everyone practices both coding and problem-solving.
Cost and Room to Grow
The total cost depends on the kit, accessories, supplier, and number of students. The boards may have similar entry-level prices, but schools should compare the full cost of a classroom setup rather than a single board. A micro:bit classroom kit may include USB cables, battery holders, or accessories, depending on the package. Its built-in features minimize the need for extra components in beginner lessons.
An Arduino UNO R3 starter kit may include a wider selection of loose electronic components, making it useful for teaching circuits and prototyping. Additional sensors and compatible modules can support increasingly complex engineering projects. The Arduino ecosystem offers a broad range of compatible components, libraries, and expansion options.
The micro:bit also supports external accessories and expansion boards, with a strong emphasis on educational projects. When planning a school budget, include the number of boards, shared components, replacement parts, storage, teacher preparation, and the expected lifespan of the equipment. A slightly more expensive kit may provide better classroom value if it includes everything needed for the planned curriculum.
Building a Progressive STEM Curriculum
Schools do not necessarily need to choose only one board. A staged curriculum can use each platform where it offers the greatest educational value. At the introductory level, students can use micro:bit for STEM education to explore sequencing, loops, events, variables, sensors, and simple data collection. Once students are comfortable designing and debugging programs, they can move to Arduino UNO R3 to investigate circuits, sensor connections, and hardware control.
A possible progression is:
- Stage 1. Introduction to coding: Students create animations, respond to buttons, and use simple loops.
- Stage 2. Physical computing: Students use sensor inputs to build interactive projects and collect data.
- Stage 3. Electronics fundamentals: Students assemble circuits, work with resistors and LEDs, and explore digital and analog inputs.
- Stage 4. Engineering design: Students combine sensors, code, and outputs to solve a practical problem, then test and improve their prototype.
This approach gives teachers a clear progression of learning objectives while letting students transfer their coding knowledge across platforms.
micro:bit vs Arduino: Which One Should Your STEM Classroom Choose?
The choice between micro:bit vs Arduino depends on the skills students need to develop and the resources available in the classroom. Choose the micro:bit V2 if your priority is introducing coding and physical computing quickly, supporting mixed-ability groups, and running hands-on projects with minimal wiring. Choose the Arduino UNO R3 if your curriculum emphasizes circuit design, electronic components, sensor integration, and engineering prototypes.
For many schools, the most effective approach is to use both boards at different stages of the curriculum. The micro:bit can help students develop confidence with programming and experimentation, while Arduino can extend those skills into electronics and engineering. Ultimately, the best board supports your learning objectives, fits your classroom resources, and gives students meaningful opportunities to design, test, and improve their ideas.
Recommended Articles
We hope this guide to micro:bit vs Arduino helps you choose the right platform for your STEM classroom. Explore these recommended articles for more insights into coding, electronics, and hands-on STEM education.