


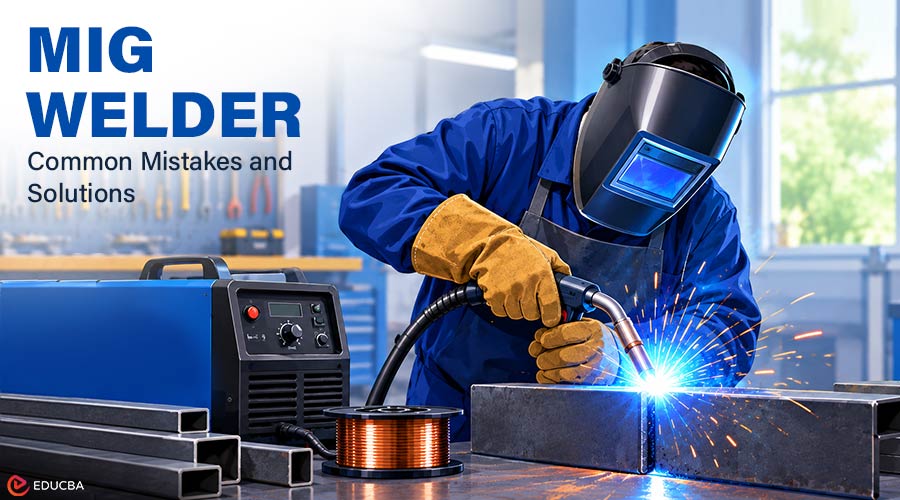
Using a MIG welder requires the right equipment setup and technique to achieve clean, strong welds. Common problems include excessive spatter, weak or porous welds, and tangled wire in the drive rolls. These issues often stem from incorrect settings, equipment mismatches, or improper setup, not a lack of welding skill.
The problem often is not a lack of talent. It is a mismatch between the machine, the setup, and the material. Choosing the right tool is the first step, and it can be overwhelming. A quick look at the available IOC MIG welders shows the sheer range of options. Understanding the core differences between a 120V sheet metal machine and a 240V unit for thicker plate is fundamental. Choosing incorrectly means you are fighting the equipment from day one.
With welding as a skilled trade where median pay can exceed $53,000, according to the U.S. Bureau of Labor Statistics, learning to do it right matters. Avoiding common equipment and setup errors can save time, reduce material waste, and make welding projects less frustrating.
Quick Answer
Most MIG welding problems for beginners come from a mismatch between the machine’s capabilities, the setup, and the material being welded. The key is to choose a welder with the right power and duty cycle for your projects and master the fundamentals of gas flow, wire speed, and gun maintenance.
What is the Real Cost of Getting Welding Wrong?
Beyond wasted materials, poor welding technique costs you time, creates safety hazards, and can limit your career opportunities in a skilled trade. For a hobbyist, the price is frustration and abandoned projects. For a professional, the stakes are much higher, involving reputation, profitability, and client safety. Every failed weld can become a point of structural failure. Welding is a profession with significant earning potential. The median annual wage for welders was $53,750 in May 2025, according to the U.S. Bureau of Labor Statistics. Reaching and exceeding that income level depends on producing consistent, high-quality work that meets specifications.
Learning to diagnose and fix setup issues is not just about making pretty beads; it is a core professional skill. The field is also competitive. The same report from the U.S. Bureau of Labor Statistics projects that welder employment will grow 2 percent from 2025 to 2035. This slower-than-average growth means more efficient welders who produce higher-quality work will have a distinct advantage. Employers value technicians who can lay down a sound weld the first time, minimizing costly rework and inspection failures.
A common shop rule of thumb is that fixing a bad weld takes at least three times as long as making a good weld in the first place. You have to grind out the old material, prep the surface again, and then re-weld it. That directly hits productivity and profit on any job. Even if you are not pursuing a career, the costs add up. Shielding gas, filler wire, and practice metal are not free. When you spend an afternoon fighting a machine that is not set up correctly, you are burning through consumables and getting nothing but frustration in return. Mastering the fundamentals respects your time and money.
How to Choose the Right MIG Welder?
Choosing the right MIG welder starts with matching its power supply, duty cycle, and wire-feed system to the materials and projects you will handle most often. The first major decision is the core technology: an older transformer-based machine or a modern inverter.
Transformers are heavy, simple, and incredibly durable, which is why many industrial shops still use them. Inverters use sophisticated electronics to convert power, making them much lighter, more energy-efficient, and able to produce a stable, controllable arc. For most users outside of heavy fabrication, an inverter offers more flexibility.
| Feature | Transformer Welder | Inverter Welder |
| Weight | Heavy (often 100+ lbs) | Lightweight (often under 50 lbs) |
| Portability | Low; typically on a cart | High; many are easily carried |
| Power Efficiency | Lower; draws more power | Higher; uses less electricity |
| Arc Control | Good, but less adjustable | Excellent; highly adjustable |
| Initial Cost | Can be lower for basic models | Generally higher, but prices are falling |
Why Does Your MIG Welder Keep Shutting Off? (Understanding Duty Cycle)
A welder’s duty cycle is one of its most important, and most misunderstood, specifications. It tells you how long the machine can run within 10 minutes at a specific amperage before it must shut down to cool. A welder rated for a 30% duty cycle at 140 amps can run for 3 minutes in a 10-minute period, then needs 7 minutes to cool.
A common mistake is buying a machine that can just barely handle your thickest material. A 140-amp welder might weld 1/4-inch steel, but its duty cycle at that power will be very low, maybe 10% or 20%. You will spend most of your time waiting for the machine to cool. A 200-amp machine, however, might have a 60% or higher duty cycle at 140 amps, letting you work much more efficiently. Buying a little more machine than you need pays off in productivity.
Is Your Shielding Gas Causing Bad Welds?
Your shielding gas is just as critical as your wire or voltage setting. Using the wrong gas or an incorrect flow rate is a primary cause of porous, weak, spattery welds. The gas creates an atmospheric shield around the molten weld pool, protecting it from oxygen and nitrogen that would otherwise contaminate the weld.
For steel, the two most common choices are 100% CO2 and a 75% Argon/25% CO2 mix (often called C25).
- 100% CO2: It is the cheapest option and provides deep penetration, which is good for thicker materials. However, it tends to produce a harsher arc and more spatter.
- 75/25 (C25) Mix: This is the all-around workhorse for MIG welding steel. It produces a more stable arc, less spatter, and a better-looking weld bead than pure CO2. It is the standard choice for auto body work and general fabrication.
Your gas flow rate is also crucial. Too little flow would not protect the weld pool, leading to porosity (tiny holes in the weld). Too much flow creates turbulence, which can pull in outside air and also cause porosity. A good starting point for most indoor work is 20 to 25 cubic feet per hour (CFH), measured with a flowmeter at the regulator.
How Do You Stop MIG Welder Wire From Jamming?
Constant wire-feeding problems, known as “bird nesting,” are incredibly frustrating and almost always point to an issue between the drive rolls and the gun tip. The wire drive system is the mechanical heart of your welder, and its quality makes a huge difference.
Look closely at the drive roll assembly itself. Lower-cost machines often use plastic components that can flex or wear out, causing inconsistent wire pressure. More robust machines use cast aluminum or steel drive systems that provide more reliable, consistent feeding over the long term. When evaluating a machine, this is a key component to inspect.
Here are the most common culprits for wire jams:
- Incorrect Drive Roll Tension: Too little tension and the rolls slip. Too much tension deforms the wire, causing it to jam inside the liner. The tension should be just tight enough to feed the wire without slipping.
- Wrong Size or Worn Contact Tip: The hole in the contact tip must match your wire diameter exactly. A worn, oversized tip will cause an erratic arc and poor contact.
- Kinked or Clogged Gun Liner: The liner is the coiled tube that guides the wire through the gun cable. If it kinks or clogs with debris, the wire will jam. Keep the gun cable as straight as possible during welding.
- Poor-Quality Wire: Cheap wire can have an inconsistent diameter and a rough surface, both of which cause feeding problems.
Finally, consider your setup’s overall safety. A properly functioning machine is a safe one. The Occupational Safety and Health Administration (OSHA) provides clear standards for welding equipment, including requirements for proper grounding to prevent electrical hazards. Meeting these basic safety guidelines is a non-negotiable part of the process.
How Do You Dial In the Right MIG Welder Settings?
You dial in a MIG welder by balancing voltage with wire feed speed, and then maintaining a consistent gun position. Most welders have a reference chart inside the wire-spool door. This chart is an excellent starting point, but it is not the final word. Think of it as a baseline that gets you close, after which you must fine-tune the settings for your specific material and joint. Your ears are the most important tool for fine-tuning. A properly set MIG welder makes a consistent, sharp crackling sound, often compared to frying bacon. This sound indicates a stable short-circuit transfer, where the wire is melting smoothly into the weld pool. If you hear loud, intermittent pops and see excessive spatter, your voltage is likely too high for your wire speed.
If you hear a dull hiss and feel the wire stubbing into the metal, your wire speed is too high for your voltage. The goal is to adjust one setting at a time until you achieve that steady sizzle. A critical variable that you control with your hands is the “stickout,” also known as Contact Tip to Work Distance (CTWD). This is the length of wire extending from the end of the copper contact tip to the workpiece. For most short-circuit MIG welding on steel, a 3/8-inch to 1/2-inch stickout is ideal. Deviating from this distance changes the wire’s electrical resistance, which directly affects heat and weld penetration, even if the machine’s dials stay the same.
Many welders who struggle with consistency are actually varying their stickout without realizing it. A longer stickout preheats the wire, lowering the amperage delivered to the workpiece. This creates a wider, flatter bead with less penetration. A shorter stickout does the opposite, increasing amperage for a narrower bead with deeper penetration. Mastering a consistent stickout is just as important as setting the machine correctly.
Finally, more advanced inverter machines may have an inductance setting. This control adjusts how quickly the current rises when the wire contacts the workpiece. A higher inductance setting creates a softer, more fluid arc with a “wetter” puddle, which can help flatten the weld bead and reduce spatter. A lower inductance setting creates a stiffer, more forceful arc. This can help when welding in vertical or overhead positions where you need the puddle to freeze faster. If your machine has this feature, test it on scrap metal to understand its effect.
Final Thoughts
Choosing the right MIG welder and getting a clean weld involves more than just matching amperage to metal thickness. Most frustrations come from overlooking the complete system. The wrong shielding gas, a kinked gun liner, or inconsistent wire feed can easily defeat a powerful machine. Each component, from the drive rolls to the contact tip, plays a critical role. Seeing the process as a chain of dependencies is the first step to troubleshooting effectively instead of just cranking up the voltage.
The real goal is not just a strong weld, but a repeatable one. Consistency comes from two places: quality equipment and practiced technique. A machine with a robust metal drive system and sufficient duty cycle provides a stable platform and removes equipment-related variables. This lets you focus on mastering the key operator-controlled factors, like maintaining a steady travel speed and a consistent contact-tip-to-work distance. This control over the small details separates a frustrating experience from a productive one.
Ultimately, learn to trust your senses. The reference chart inside the welder door is only a starting point. A perfect weld has a distinct, steady sizzling sound. It lays a uniform bead. When things go wrong, resist the urge to blame the machine first. Instead, work backward from the weld pool. Check whether the gas flow is correct, the wire feeds smoothly, and the stickout remains consistent. By treating every bad weld as a puzzle to be solved, you move from simply operating a machine to truly understanding the process.
Frequently Asked Questions (FAQs)
Q1. What amperage range is typical for .035-inch solid wire?
Answer: For .035″ solid wire on mild steel using a C25 gas mix, a common working range is between 130 and 180 amps. The exact setting depends entirely on the thickness of the metal you are welding. For example, 1/8-inch steel might weld well at around 140 amps, while 1/4-inch steel will require closer to 180 amps and a higher wire feed speed.
Q2. How do I choose the right first welder for a home garage?
Answer: Look for a dual-voltage inverter machine that can run on both 120V and 240V power. This gives you the flexibility to work on thinner materials with a standard household outlet and tackle thicker projects with a 240V circuit. A machine in the 180 to 200 amp range is a versatile sweet spot that can handle everything from sheet metal to 3/8-inch steel, providing enough power so you are not constantly limited by a low duty cycle.
Q3. Can I run a modern MIG welder on a generator?
Answer: Yes, but you must use a generator that produces “clean power” with low Total Harmonic Distortion (THD), typically less than 5%. The sensitive electronics in modern inverter welders can be damaged by the “dirty” power from a standard construction-site generator. As a rule of thumb, the generator should have a continuous wattage rating at least twice your welder’s maximum power draw to handle the initial current surge.
Q4. Do I really need a spool gun to weld aluminum?
Answer: For any serious aluminum work, a spool gun is essential. Aluminum wire is very soft and will constantly jam and “bird-nest” if you try to push it through a standard 10 or 15-foot MIG gun liner. A spool gun solves this by mounting a small 1-pound spool of wire directly on the gun, reducing the push distance to just a few inches. You will also need to switch your shielding gas to 100% Argon.
Q5. How Does Flux-Cored Wire Differ From Solid Wire?
Answer: Solid wire is used in conventional MIG welding and relies on an external shielding gas to protect the weld from atmospheric contamination. Gas-shielded flux-cored wire also uses external gas but has flux in the center for higher deposition rates. Self-shielded flux-cored wire contains flux compounds that create their own shielding gas when burned, making it ideal for outdoor welding in windy conditions where a gas shield would blow away. However, it produces more smoke and spatter and leaves a slag coating that must be removed.
Recommended Articles
We hope this guide to choosing and using a MIG welder helps you improve your welding skills and achieve better results. Check out these recommended articles for more insights and practical tips on welding equipment, techniques, and safety.