Excel VBA Set
“Set”, is a keyword used in VBA programming to assign a reference to an object or cell range which is going to remain fix throughout the program or code in Excel. VBA Set basically helps us in avoiding repetitive input of range we need to select while executing the code. In excel, “Set” is mostly applied on worksheets/cell range in a particular sheet.
Syntax
Set object-name/variable = Object/Range
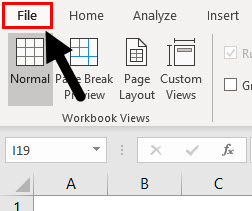
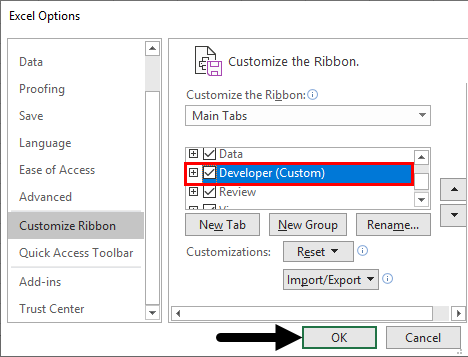
If you do not see the “Developer” tab in excel, refer below steps:
Step 1: Click on File Option.
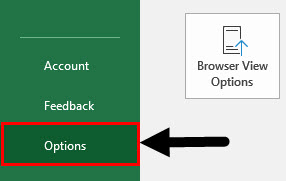
Step 2: Drop-down appears, Click on Options tab.
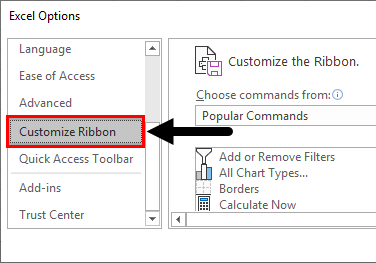
Step 3: Once you click on “Options”, a dialog box appears as shown below and click on the Customize Ribbon option.
Step 4: When we drag down in the customize ribbon options we will find an option for Developer we need to check that box which will enable us to use VBA in excel.
How to Use a Set Keyword in VBA?
Below are the different examples to use set keyword in Excel VBA.
Excel VBA Set – Example #1
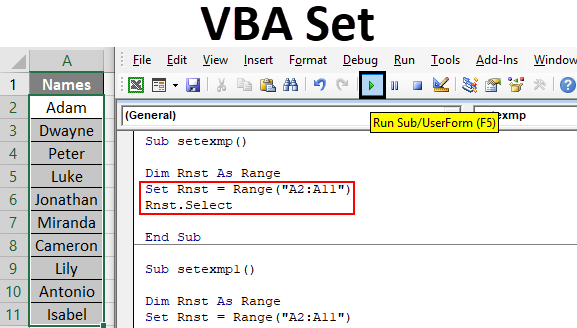
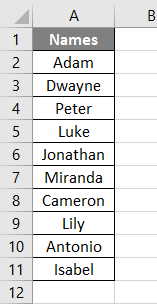
We shall take a simple example of a Set keyword in Excel VBA. Suppose we would like to select a range and set it as fix range so as to avoid the repetition. Below is the cell range containing the names:
Follow the below steps to use set keyword in Excel VBA:
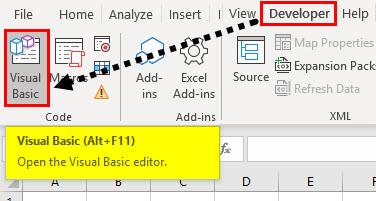
Step 1: Click on “Developer” tab and then click on the “Visual Basic” option on the left-hand side (first option) as shown below.
Once you click on it, a new window appears as shown below:
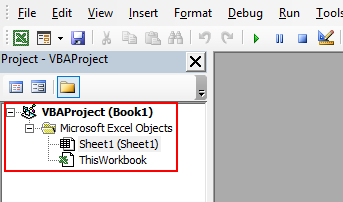
You will notice that it contains two tabs on the left-hand side, “Sheet1(Sheet1)” and “ThisWorkbook”. The only difference is “Sheet1” when you want to execute code for this particular sheet only and in “ThisWorkbook”, we can write a code and execute which can be applied for the whole excel workbook.
Step 2: Double Click on “Sheet1(Sheet1) and you will see a blank screen where we need to write the code. First, declare a subset as Sub name and press enter and you will see a subset created as shown below:
Code:
Sub setexmp()

End Sub
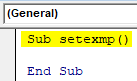
This is the way we create a subset and automatically “End Sub” appears. This is by default feature of excel. If “End Sub” does not appear the code will not execute and throw an error.
Step 3: Now, we shall declare variables to be used in the code.
Type Dim variable name and variable type. Here, the name will be like the identity of the range and type would be whether as Integer, Long, String, Range, etc.
Code:
Sub setexmp()

Dim Rnst As Range

End Sub
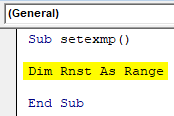
Here “Rnst” is a variable name and assign(As) it as Range function. This will alert the system that, a range selection would be done.
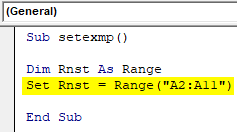
Step 4: Then type “Set” keyword and give a range using the format: Set variable = Range(“cell range”).
Code:
Sub setexmp()

Dim Rnst As Range
Set Rnst = Range("A2:A11")

End Sub
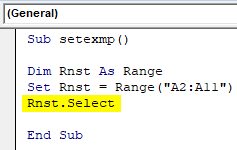
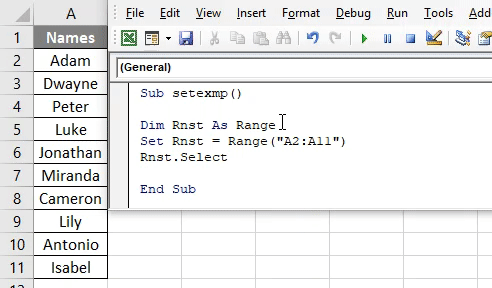
Step 5: We have to select this row range specified. Hence, type select as Rnst.Select Refer screenshot below:
Code:
Sub setexmp()

Dim Rnst As Range
Set Rnst = Range("A2:A11")
Rnst.Select

End Sub
Step 6: Run the code by hitting F5 or Run button and see the output.
It will select the Range specified which is from cells A2 to A11.
Excel VBA Set – Example #2
Suppose we want to paste these cells or range in another cell. We shall use the same code as above and add code for pasting that data in multiple columns.
Follow the below steps:
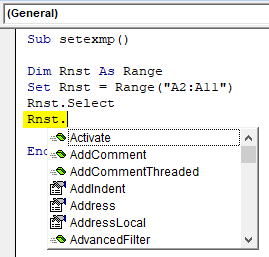
Step 1: Now we will copy the range of cells which is the name column. Type copy i.e. “Rnst.Copy”, when you type “Rnst.”a kind of drop-down appears. It contains various functions like copy, paste, etc.
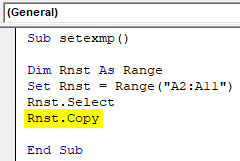
Step 2: You can scroll down and select the desired function you want to perform. Here just type “Copy” as shown in the screenshot below:
Code:
Sub setexmp()

Dim Rnst As Range
Set Rnst = Range("A2:A11")
Rnst.Select
Rnst.Copy

End Sub
Step 3: Compile the code by pressing F8 Key.
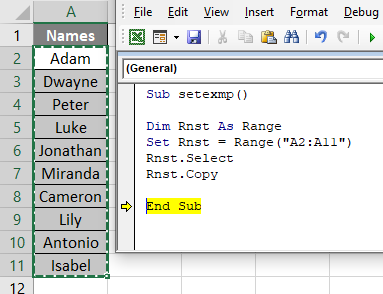
Once, you execute this copy function, you will see that in excel the range is copied and dotted lines appear around the cell range as shown below:
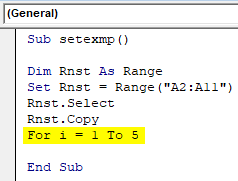
Step 4: Now, we need to paste this cells, say in adjacent columns one by one, so we need to use a loop function “For” and suppose 5 times we need to paste so we will type it as shown below:
For Integer i = 1 to 5 -> this specifies how many times we need to paste the data. If 5 then 1 to 5 else whichever count you prefer.
Code:
Sub setexmp()

Dim Rnst As Range
Set Rnst = Range("A2:A11")
Rnst.Select
Rnst.Copy
For i = 1 To 5

End Sub
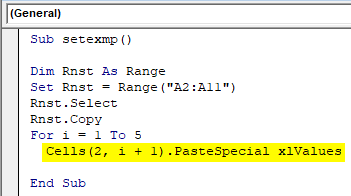
Step 5: Select a cell in which you want to paste this cell range. Suppose we want to start pasting from column B2 and then pasting the data should be dynamic i.e. it should automatically select adjacent columns one by one without overlapping. Hence, the syntax would be “Cell(row number, column number).PasteSpecial”.
Cells(2, i + 1).PasteSpecial, Here, 2-> represents the row number and, i+1 -> represents column number. i+1 means the first value of I declared in “For” loop is i=1, hence column value will become 2, it specifies that it start pasting from column B. And as and when i value increases it will keep selecting adjacent columns one by one.
Code:
Sub setexmp()

Dim Rnst As Range
Set Rnst = Range("A2:A11")
Rnst.Select
Rnst.Copy
For i = 1 To 5
  Cells(2, i + 1).PasteSpecial xlValues

End Sub
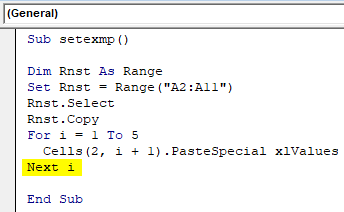
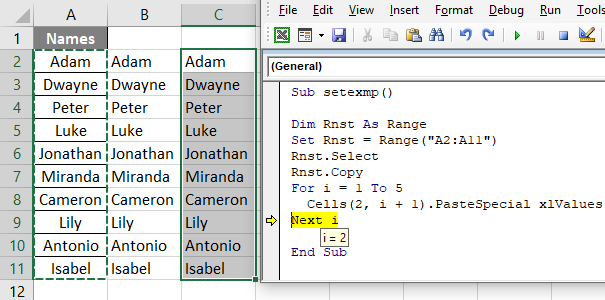
Step 6: Type “Next i” which means that you are increasing the value of “i” one by one so that the column pasting remains dynamic.
Code:
Sub setexmp()

Dim Rnst As Range
Set Rnst = Range("A2:A11")
Rnst.Select
Rnst.Copy
For i = 1 To 5
  Cells(2, i + 1).PasteSpecial xlValues
Next i

End Sub
Step 7: Press “F8” to see the code execute line by line and will show you the pasting of cell in adjacent columns one by one.
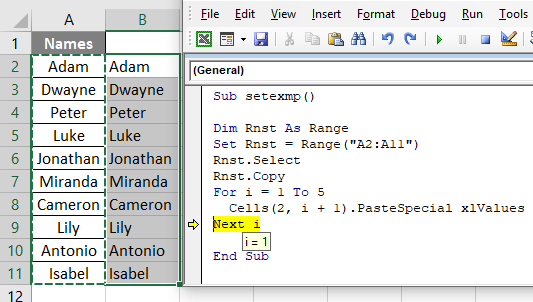
Here you can see the value of i is 1 and data has been pasted in column B as desired.
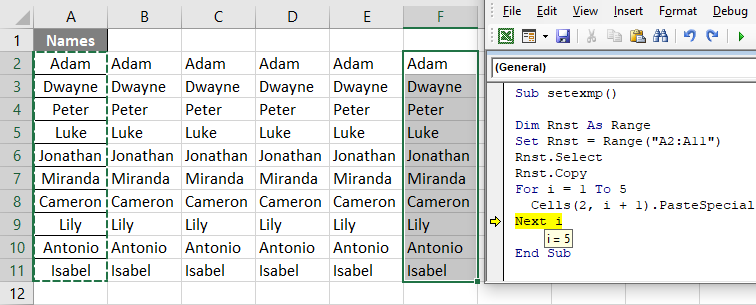
Step 8: Now when you press “F8” again you will see that now the value of i is 2. Hence, 2+1 will become 3 and data will be pasted in Cell (2,3) i.e. row value is same but column number changes as shown in the screenshot below:
After repeating loop completes you will see the data pasted 5 times i.e. from count 1 to 5 starting to paste from Column B till Column F as shown below:
Excel VBA Set – Example #3
Suppose we would like to show a count of the number of cells in that range in a message box appearing on click of a button. We shall take the same data as shown below.

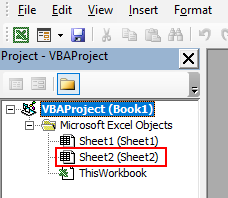
Also, we will run this example’s code in the new sheet. Hence, add a new sheet and in VBA window it will appear as below:
We will have to insert a command button option. It’s a feature of excel, so follow the below steps:
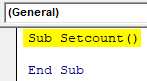
Step 1: Enter a subset name say “Setcount()” as shown in the screenshot below:
Code:
Sub Setcount()

End Sub
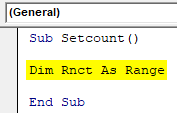
Step 2: Declare the same variable “Rnct” as a range in the subset as shown in the screenshot below:
Code:
Sub Setcount()

Dim Rnct As Range

End Sub
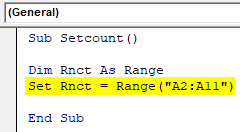
Step 3: Then type “Set” keyword and give a range.
Code:
Sub Setcount()

Dim Rnct As Range
Set Rnct = Range("A2:A11")

End Sub
Step 4: Now, after fixing the range, we need to see pop up box or dialog box showing the count of cells in the range. Hence, use “MsgBox” function which upon execution a count will appear in the dialog box. Type “MsgBox variable name.count”. The moment after typing the variable name then dot(.) a drop-down appears containing various functions and we would select “count” or manually type “count”.
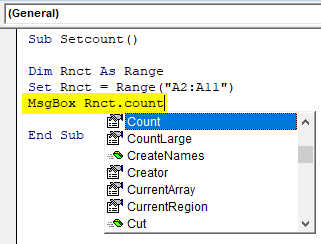
Type “MsgBox Rnct.count” and upon execution, it will appear count.
Step 5: Now, we want to insert a command button and on click, on that button that message box should appear.
Click on “Insert” in the “Developer” tab as highlighted in the red box and you will see a drop-down of category “Form Controls”. Click on the very first rectangle box-like shape which we will have to manually draw and insert in excel sheet:

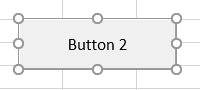
Step 6: Upon click on the rectangle box, draw and insert the box in sheet and once you start drawing a dialog box appears as shown below. It’s an “Assign Macro” window button and select the “Setcount” subset macro. Click on “OK”.
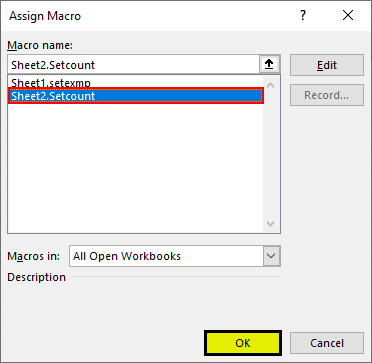
This signifies that we have assigned count macro to this button. And upon click, it will execute.
Step 7: It will appear as shown below in excel.
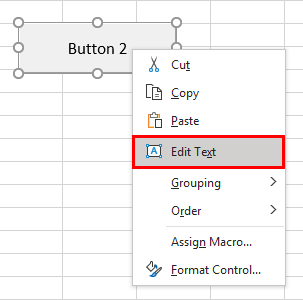
Step 8: Right-click on it and rename it using the “Edit Text” option as shown below:
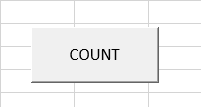
Step 9: Give it a name as “COUNT” and you will see it in excel as count as shown below.
Step 10: Then click on the “COUNT” button: Once you click on “COUNT” button a message box appears as shown below:
As we can see there are 10 names and have shown the correct number from range A2 to A11.
Things to Remember
- Make sure you have the “Developer” tab inserted in Excel ribbons to run this VBA codes.
- ‘Set’ is mostly applied on worksheets/cell range in a particular sheet.
Recommended Articles
This is a guide to VBA Set. Here we discuss how to assign a reference to an object or cell range using excel VBA Set Keyword along with practical examples and downloadable excel template. Below are some useful excel articles related to VBA –
