

Updated October 29, 2026
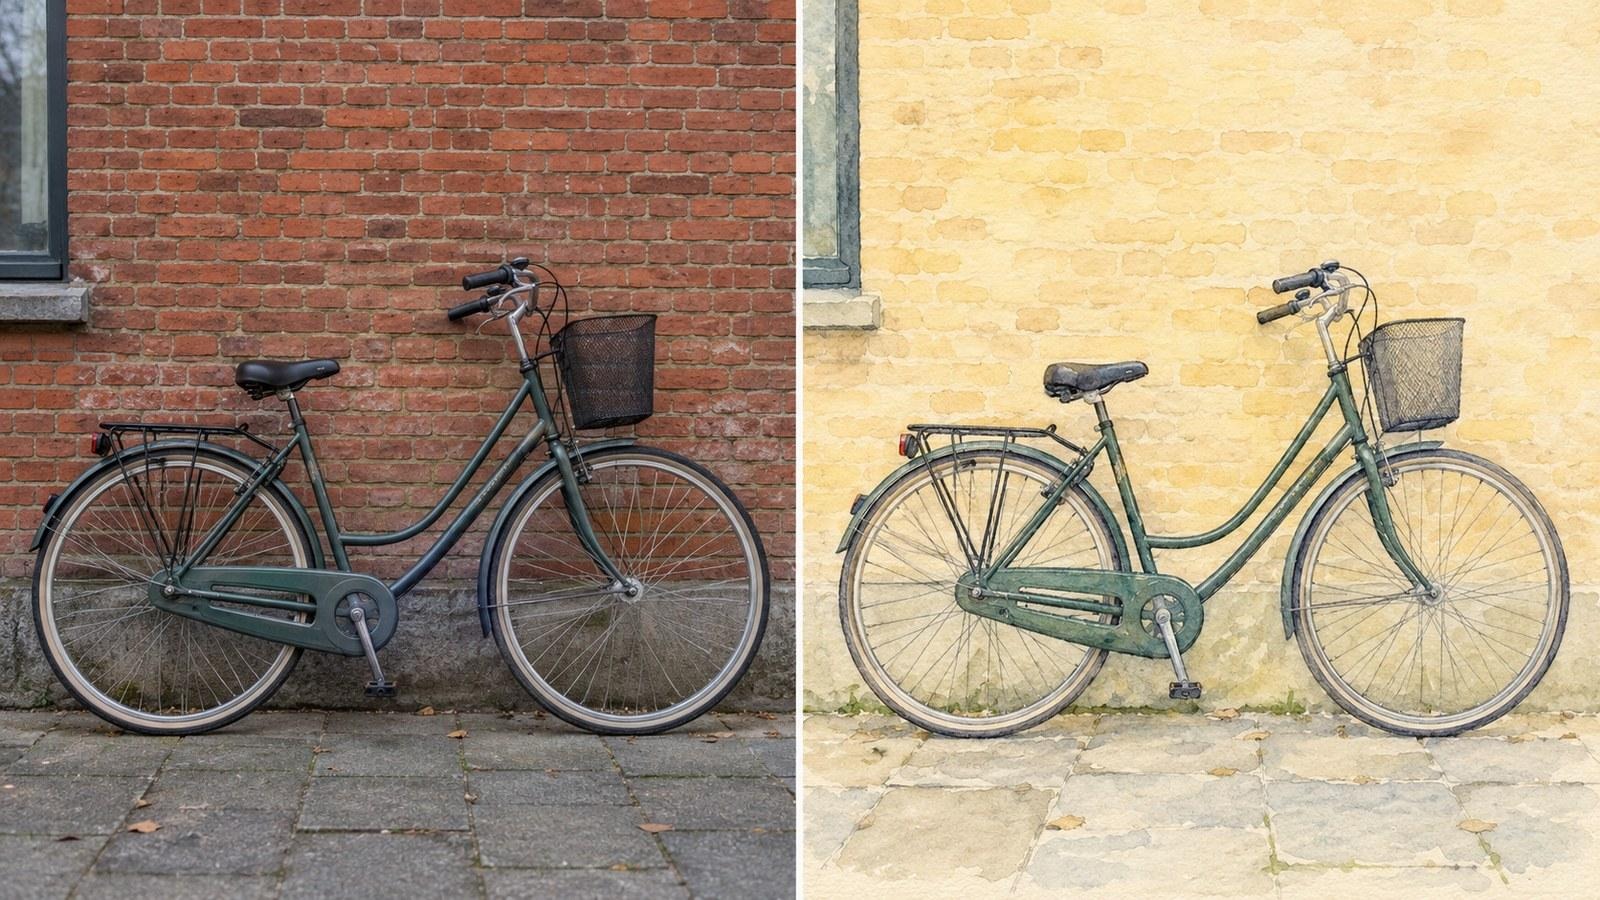
Image-to-image AI lets you change a photograph’s visual style while preserving its core composition. Instead of starting with a blank text prompt, the tool uses an existing picture as a reference. This approach helps designers, marketers, and creators restyle photos with AI without rebuilding a scene from scratch.
What Image-to-Image AI Does?
Image-to-image generation uses an input image as a visual reference alongside a text prompt. The tool then generates a new image from the reference plus your written description. You can preserve the subject, pose, product shape, or camera framing while modifying properties such as visual medium, lighting, background, or overall mood. Typical uses include turning a photo or sketch into a watercolor, editorial, anime, or concept-art look, moving a subject into a new setting, and testing product variations. What works depends on the model you pick.
Before You Start
Select a reference photo with clear lighting and a well-defined subject. A subject that stands out from its background is easier to describe and to keep in place. Check whether your tool requires an account before generating images. If you want to try the steps below with a free AI image generator, Videm AI lets you prepare a prompt and upload a reference before signing in, but generating an image requires an account. The generator shows the free daily credits, and additional tasks may require credits. Only use a source photo you have the right to alter.
Step-by-Step Workflow to Restyle Photos with AI
Results vary across different software, reference photos, and prompts. Because models interpret images differently, the practical technique is to name what must stay the same directly in the prompt.
Step 1: Pick and Prepare the Reference Image
Choose a photo that clearly displays the pose and outlines you want to retain. If the subject is small or crowded by visual clutter, crop the photo closer to the subject before uploading it. The number of reference images you can add depends on the model you select, so check the available slots in your tool.
Step 2: State What to Preserve Before Describing Changes
Upload the reference in an image-to-image generator, then open your prompt with the elements that must not change, such as the subject, body posture, product shape, or camera angle. After stating what stays intact, describe the changes you want, such as the visual medium or lighting.
Step 3: Change One Main Idea at a Time
Avoid changing the style, the background, and small details in a single prompt. Make the most important change first, such as switching from a standard photo to a watercolor illustration. Once the broad style matches your expectations, add secondary changes such as a new background or a different color palette in later passes.
Step 4: Describe the Final Framing and Composition
Specify your framing requirements in the prompt to prevent unwanted crops. Note whether the final image should be a tight portrait, medium shot, or wide landscape. If you plan to add typography or marketing copy later, mention the need for negative space around the subject.
Step 5: Review the Result and Refine Gradually
Compare the generated output against your source image. Check if the subject position shifted, if proportions remained accurate, and if the requested style was applied. If an element looks incorrect, adjust only that specific part of your text description and run the prompt again.
A Worked Example: Restyling an Object
To see the workflow in practice, take a photograph of a bicycle leaning against a brick wall. The goal is to turn the photo into an illustration while keeping the bicycle in the same spot.
For the first pass, upload the photograph and provide a prompt that anchors the main subject before requesting the style shift:
Keep the bicycle, its components, and its position exactly as in the reference image. Change the photographic style into a soft watercolor illustration with a pale yellow wall.
If the first result keeps the bicycle but the wall looks flat, upload that result as the new reference and refine one detail:
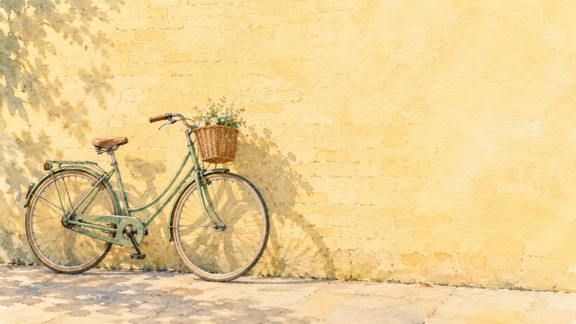
Keep the bicycle, its position, and the watercolor look exactly as in the reference. Add soft morning light from the left and a gentle shadow on the yellow wall.
Common Problems and Suggested Fixes
Results vary from run to run, so treat these fixes as suggestions, not rules.
- Subject drifts or changes shape: If the subject changes posture, proportions, or identity, your prompt may have too many competing instructions. Try shortening the prompt, explicitly stating what parts of the subject must remain unchanged, or using a tighter crop of the original reference image.
- Background changes unexpectedly: If the background alters when you only asked for an art style change, the model may be reinterpreting the whole scene. Try telling the tool to keep the background unchanged, and describe only the style you want.
- Details like hands or small parts look wrong: Small or intricate parts can come out with irregularities. Try generating a few variations from the same prompt, or split your instructions into smaller steps.
Research Background on Image Translation
Researchers studied mapping one image to another with a neural network, such as in the pix2pix paper on conditional adversarial networks. Today’s generators use a range of model designs, so results depend on the reference image, the prompt wording, and the model you select.
Image-to-Image Generation vs AI Image Editor
Image-to-image generation and dedicated AI image editors serve different functions in a design workflow. An image-to-image tool starts with a reference image. It generates a new visual direction from the reference and prompt, making it well suited for style changes, scene variations, and early concept exploration. In contrast, an image editor usually focuses on targeted edits on an existing canvas, such as removing objects, replacing a specific background, or retouching details. What an editor can do depends on the specific editor you choose.
Rights and Responsible Publishing
Only upload reference images you have the right to use, and remember that restyling does not remove intellectual property or likeness concerns. Review people, brands, characters, and generated content before any commercial publication.
If you remember one habit from this tutorial, make it this: say what stays, change one thing, and check the result against the reference before the next pass.
Final Thoughts
To restyle photos with AI while preserving the subject and pose, start with a clear reference image, identify what must remain unchanged, and introduce one major visual change at a time. Then compare the output with the original and refine the prompt gradually. This simple workflow can help you explore new artistic styles, test creative concepts, and produce useful variations without rebuilding the entire scene from scratch.
Recommended Articles
We hope this comprehensive guide to restyle photos with AI helps you transform your images while preserving the subject and pose. Check out these recommended articles for more tips and techniques to improve your AI image-editing skills.