Updated March 27, 2023

Introduction to React Native ListView
React Native ListView library is of react-native library where we can decide the presentation of listing of the items, It has many library functions and attributes which make our component mobile-friendly, also this library component can be used for displaying a large amount of data, basically, in this component, we have to pass array of lists to the component and it will be capable to display all the data in format which you want (like listing with separator or listing without separator), with pagination(we can define number of items which can be displayed for each page ).
Syntax:
In the below syntax we can see that we are using ListView components where we are passing arrays of lists to it to display any of listing for some items of the list.
const SL = new ListView.DataSource({
rowHasChanged: (row1, row2) => row1 !== row2
});
this.state = {
initialStatus: SL.cloneWithRows( Array of Data Source)
};
<ListView
dataSource={this.state.initialStatus}//it contains array of list
renderRow={rowData => (
<Text style={Object of style to design each item output here(we can write beautiful custom designs here)}>{rowData}</Text>
)}
/>
Attributes
Below are the different attributes of React Native ListView:
1. dataSource: This is a required attribute in the ListView of react-native. It takes the data array to create the list view.
2. renderRow: It creates renderable components for us. It uses the data coming from the data source and show as row with ids. This attribute provides a mechanism where we can customize every list in different ways according to our requirements, for example, suppose the list which we are displaying in which we want to mark any specific list with different colors for analysis of data than we can write all the login inside it.
3. pageSize: Here we define the size of our pages. This size means how many items can be displayed on one page. For example, many times displaying all the items at once is not feasible in an android app so we can use this attribute where we can decide the number of list items that can be displayed on the app.
4. Style: We can write our own style for displaying components, this style can be used for designing our listing look, it will design our listing color and listing positions, etc.
5. renderSeparator: In case we wanted to create a separator between the list of items or rows we can use it. It gives a better understanding of UI because it creates a separator between all the items which makes better analysis. It creates a component for render purpose where it renders each component as a separator.
6. onEndReached: In case we wanted to display something or if we wanted to perform some activity at the end of the listing of items we can use this attribute. For example, suppose we want to display that all items of list ended and we want to display a message to the customer that list ended then it would be useful.
7. renderFooter: Many times rendering any static attribute each time is an expansive task on React native, so to avoid such operation in react native we use renderFooter and renderheader. In renderFooter it binds the footer element in such a way that it will not render it again and again.
Examples to implement Native ListView
Given below are the examples of React Native ListView:
Example #1
You have seen many times listing some items on websites, here in case of react-native we use ListView. ListView is very popular for listing items on android and IOS.
In the below example are below tasks.
- We created a class with name StudentList and this class is extending react native core component library.
- Inside the component StudentList, we have created a constructor function in which we are performing things like initialization of student data source and clone it with an array of student names.
- Inside the render function, we are returning the list view, where we are calling react native ListView component and passing it required parameters along with student data source which we defined at the time of initialization.
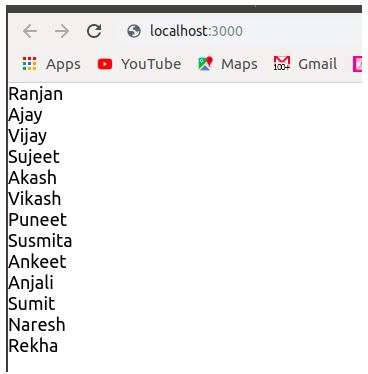
Along with the output screen where we are displaying a list of all students.
Code:
import React, { Component } from "react";
import { Text, ListView } from "react-native";
export default class StudentList extends Component {
constructor() {
super();
const SL = new ListView.DataSource({
rowHasChanged: (row1, row2) => row1 !== row2
});
this.state = {
studentList: SL.cloneWithRows([
"Ranjan",
"Ajay",
"Vijay",
"Sujeet",
"Akash",
"Vikash",
"Puneet",
"Susmita",
"Ankeet",
"Anjali",
"Sumit",
"Naresh",
"Rekha"
])
};
}
render() {
return (
<ListView
dataSource={this.state.studentList}
renderRow={student => <Text style={{ fontSize: 18 }}>{student}</Text>}
/>
);
}
}
Output:
Example #2
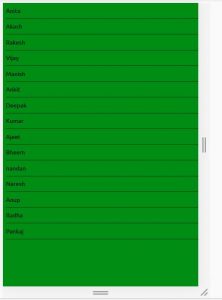
In this example, we are designing a component to display the list of all students and also it has features like if anyone will click on the list of any student an alert box will open with displaying the student name which we clicked.
In the below example we are performing the following tasks.
- First, we created a class with StudentList and this class is extending the react-native core component.
- Inside the class StudentList, we are defining the constructor function and defining initial states for the components.
- We are returning the HTML view by calling ListView Component of react-native and we are passing data source to ListView component.
- Inside ListView component we have written logic for onPress on inner component TouchableOpacity where we are displaying an alert if we click on any names from the list.
Code:
import React from "react";
import { ListView, View, Text, StyleSheet, Alert } from "react-native";
class StudentList extends React.Component {
constructor(props) {
super(props);
const ds = new ListView.DataSource({
rowHasChanged: (row1, row2) => row1 !== row2
});
this.state = {
studentList: ds.cloneWithRows([
"Anita",
"Akash",
"Rakesh",
"Vijay",
"Manish",
"Ankit",
"Deepak",
"Kumar",
"Ajeet",
"Bheem",
"nandan",
"Naresh",
"Anup",
"Radha",
"Pankaj"
])
};
}
displayStudent = rowData => {
console.log("helloooo");
Alert.alert(rowData);
};
render() {
return (
<ListView
dataSource={this.state.studentList}
style={styles.containerStyle}
renderRow={student => (
<Text
onPress={this.displayStudent.bind(this, student)}
style={styles.rowViewContainerStyle}
{student}
</Text>
)}
renderSeparator={(sID, rId) => (
<View key={rId} style={styles.separatorStyle} />
)}
/>
);
}
}
const styles = StyleSheet.create({
containerStyle: {
flex: 1,
backgroundColor: "green"
},
separatorStyle: {
height: 0.5,
width: "100%",
backgroundColor: "red"
},
rowViewContainerStyle: {
flex: 1,
paddingRight: 15,
alignItems: "center",
paddingTop: 14,
paddingBottom: 14,
borderBottomWidth: 0.5,
borderColor: "'#c9c9c9",
flexDirection: "row",
fontSize: 20,
marginLeft: 10
}
});
export default StudentList;
Output:
Conclusion
From this tutorial, we came to learn that we can manage the listing of items on the android and IOS apps without writing too many HTML codes with specifying the predefined attributes.
Recommended Articles
This is a guide to the React Native ListView. Here we discuss the basic concept, attributes, and examples of React Native ListView with code and output. You may also have a look at the following articles to learn more –

