Why Choose Python to Build a Payment System with FastAPI?
A secure and efficient payment system is crucial for businesses of all sizes. Python has numerous libraries and frameworks that provide an excellent foundation for building such systems. FastAPI, in particular, is a powerful tool for developing high-performance web applications. This guide will help you build a payment system with FastAPI in Python, covering everything from initial setup to deployment.
Benefits of FastAPI
FastAPI is a modern, fast (high-performance) web framework for building APIs with Python 3.6 or later versions. It boasts automatic interactive API documentation, easy-to-use dependency injection, and asynchronous request handling, making it a perfect choice for developing robust payment systems.
Its benefits are:
- Performance: Built on Starlette for the web parts and Pydantic for the data parts, FastAPI is one of the fastest frameworks available.
- Ease of Use: With automatic data validation, serialization, and interactive API documentation, development becomes a breeze.
- Asynchronous Capabilities: FastAPI supports asynchronous programming, which is essential for handling high-load applications like payment systems.
- Security: FastAPI provides tools and techniques to secure applications, ensuring that sensitive data like payment information is protected.
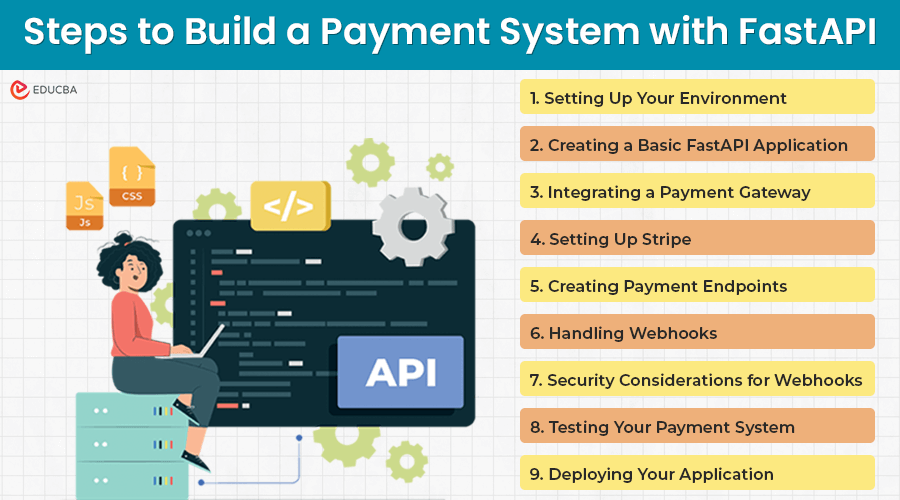
Steps to Build a Payment System with FastAPI
- Setting Up Your Environment
- Creating a Basic FastAPI Application
- Integrating a Payment Gateway
- Setting Up Stripe
- Creating Payment Endpoints
- Handling Webhooks
- Security Considerations for Webhooks
- Testing Your Payment System
- Deploying Your Application
Step #1. Setting Up Your Environment
Before we code, let’s set up our development environment. We will need Python 3.6+ and a few libraries.
Prerequisites:
- Python 3.6+
- Pip (Python package installer)
- A virtual environment (optional but recommended)
Installation:
#1. Create a Project Directory
| mkdir fastapi-payment-system cd fastapi-payment-system |
#2. Set Up a Virtual Environment
| python3 -m venv venv source venv/bin/activate # On Windows use `venv\Scripts\activate` |
#3. Install FastAPI and Uvicorn
| pip install fastapi uvicorn |
#4. Install Additional Dependencies
We will use “requests” to make HTTP requests to the payment gateway and “pydantic” for data validation.
| pip install requests pydantic |
Step #2. Creating a Basic FastAPI Application
First, let’s create a basic application with FastAPI.
#1. Create a Main Application File
Create a file named main.py in your project directory.
| from fastapi import FastAPI import uvicorn payment_app = FastAPI() if __name__ == “__main__”: |
#2. Run the Application
| uvicorn main:payment_app –reload |
You should see an output indicating that your application is running. Navigate to “http://127.0.0.1:8000” in your browser to see the welcome message.
Step #3. Integrating a Payment Gateway
The payment gateway is an interface where users transact via cash or a mobile wallet. We will use Stripe, a popular payment processing platform, for this guide. You can choose any gateway that suits your needs, but according to the coding technicalities of setting up payment gateway APIs, the core principles remain the same.
Step #4. Setting Up Stripe
#1. Install Stripe Python Library
| pip install stripe |
#2. Configure Stripe
Create a file named config.py and add your Stripe API keys.
| import stripe
stripe.api_key = “your_stripe_secret_key” |
Step #5. Creating Payment Endpoints
Now, create endpoints to handle payment intents and process payments.
#1. Create a Payment Intent Endpoint
In main.py, add the following code:
| from fastapi import HTTPException from pydantic import BaseModelclass PaymentIntentRequest(BaseModel): amount: int currency: str description: str = None @payment_app.post(“/create-payment-intent”) |
#2. Process Payments
Let’s assume the front end processes payments using the client_secret provided by the above endpoint. Once the front end completes the process, the next step is to confirm the payment.
| \class ConfirmPaymentRequest(BaseModel): payment_intent_id: str@payment_app.post(“/confirm-payment”) async def confirm_payment(confirm_payment_request: ConfirmPaymentRequest): try: intent = stripe.PaymentIntent.retrieve(confirm_payment_request.payment_intent_id) intent = stripe.PaymentIntent.confirm(confirm_payment_request.payment_intent_id) if intent.status == ‘succeeded’: return {“message”: “Payment successful”} else: return {“message”: “Payment not successful”, “status”: intent.status} except Exception as e: raise HTTPException(status_code=400, detail=str(e)) |
Step #6. Handling Webhooks
Webhooks are an essential component in modern web applications, particularly in payment systems. Setting up webhooks allows your server to receive real-time notifications about events that happen outside your control, such as a completed payment or a canceled subscription. It makes your application more responsive and efficient by eliminating the need to poll an API for updates constantly.
Why Use Webhooks?
- Real-time Updates: Webhooks provide immediate updates, ensuring your application can react to events as soon as they happen.
- Reduced API Polling: Instead of repeatedly querying an API to check for updates, webhooks notify you when something changes, reducing the load on your servers and the external service.
- Event Handling: Webhooks enable your application to handle events such as payment success, refunds, subscription cancellations, and more, allowing for better automation and user experience.
Code to Create a Webhook Endpoint
| from fastapi import Request
@payment_app.post(“/webhook”) try: # Handle the event return {“status”: “success”} |
Step #7. Security Considerations for Webhooks
Webhooks are powerful tools for real-time communication between services. Still, they also introduce security challenges. Security and compliance are critical and legal requirements in payment systems, so ensuring the security of your webhook endpoint is critical to prevent unauthorized access, data manipulation, and other potential threats. Here are the key security considerations and best practices for securing webhook endpoints in your FastAPI application.
1. Validating the Payload and Signature
The most important security measure for webhooks is validating the payload and its signature. It ensures that the webhook events you receive are genuine and have not been tampered with.
Step-by-Step Guide to Validate Payload and Signature:
- Obtain your endpoint secret from the Stripe Dashboard. This secret helps verify the signatures of incoming webhook events.
- Stripe includes a signature (Stripe-Signature) in the headers of each webhook event. Use this signature, along with your endpoint secret, to verify the payload’s authenticity.
- Modify your FastAPI webhook endpoint to include the verification logic.
2. Securing Your Payment System
Security is paramount when dealing with payment systems. Here are some best practices to secure your FastAPI application:
- HTTPS: Always use HTTPS to encrypt data in transit. It prevents attackers from intercepting sensitive information.
- Input Validation: Use Pydantic models to validate all incoming data. It prevents common vulnerabilities such as SQL injection and XSS attacks.
- Authentication and Authorization: Implement proper authentication and authorization mechanisms. Use OAuth, JWT, or other secure methods, so only users with authorization can access your endpoints.
- Environment Variables: Store sensitive information in environment variables, such as API keys and database credentials. Use a library like python-dotenv to manage environment variables.
Do this to manage your environment variables:
#1. Install python-dotenv
| pip install python-dotenv |
#2. Create a .env File
| STRIPE_SECRET_KEY=your_stripe_secret_key STRIPE_WEBHOOK_SECRET=your_webhook_signing_secret |
#3. Load Environment Variables in config.py
| from dotenv import load_dotenv import osload_dotenv() stripe.api_key = os.getenv(“STRIPE_SECRET_KEY”) |
Step #8. Testing Your Payment System
Thorough payment gateway testing is crucial to ensure that it works as expected and to identify lapses that need to be fixed before release.
1. Using pytest
#1. Install pytest
| pip install pytest |
#2. Write Test Cases
Create a file named test_main.py.
| from fastapi.testclient import TestClient from main import payment_appclient = TestClient(payment_app) def test_read_root(): def test_create_payment_intent(): |
#3. Run Test
| Pytest |
Step #9. Deploying Your Application
Deploying your FastAPI application involves several steps. You can use cloud providers like AWS, Google Cloud, Azure, or Platform-as-a-Service (PaaS) like Heroku.
1. Dockerizing Your Application
#1. Create a Dockerfile
| FROM tiangolo/uvicorn-gunicorn-fastapi:python3.8
WORKDIR /payment_app RUN pip install -r requirements.txt CMD [“uvicorn”, “main:payment_app”, “–host”,“0.0.0.0”, “–port”, “80”] |
#2. Build and Run Docker Container
| docker build -t fastapi-payment-system . docker run -d -p 80:80 fastapi-payment-system |
2. Deploying to Heroku
#1. Create a Procfile
| web: uvicorn main:payment_app –host 0.0.0.0 –port $PORT |
#2. Create a requirements.txt
| fastapi uvicorn requests pydantic python-dotenv stripe |
#3. Deploy
| heroku create fastapi-payment-system git push heroku main |
Final Thoughts
Building a payment system with FastAPI in Python is a manageable task thanks to the framework’s ease of use, performance, and flexibility. FastAPI’s asynchronous capabilities and comprehensive documentation make it a top choice for developers looking to build scalable web applications.
Whether developing a small-scale application or a large enterprise system, FastAPI’s tools and community support will help you succeed. By following this guide, you can create a robust payment system that integrates with Stripe, handles webhooks, ensures security, and is ready for deployment.
Recommended Articles
We hope you create a seamless payment system with FastAPI using this guide. Here are some other guides that might interest you.
