Updated May 16, 2023
Introduction to MySQL Backup
The following article provides an outline for MySQL Backup. If you are using MySQL database in the production environment for your clients, then you need to ensure that your database is always working fine and available 24 * 7. For the availability of the database, you must often keep a backup of your client’s database. If the database becomes corrupted, crashes, or is lost, you should be able to restore the data.
For this reason, MySQL provides us with a facility to dump the database using mysqldump utility. You can utilize this utility only if your database is accessible, you have been assigned the select privilege on the tables of that database, and the database is currently running. This utility creates a logical backup and a flat file containing the SQL statements that can be run again to return the database to the state when this file was created. You can use this utility for both single and multiple database backups. The mysqldump utility also allows you to produce data in XML, CSV, or any other delimited text formats. It is advisable to regularly perform database dumps to ensure that an up-to-date backup is available. Restoring the backup will restore the database to the state it was in when the dump file was created using mysqldump.
Pre-requisites for MySQL Backup
There are certain privileges on the tables, views, triggers, and transactions that you should have to use the mysqldump utility. It depends on the content you are backing up. If you are backing up the database that contains tables, then you should have select privilege, for views it is necessary to have SHOW VIEW privilege; for triggers, TRIGGER privilege, and if we use –the single-transaction option while dumping the database, then LOCK TABLES privilege should be there with you.
Similarly, while reloading or restoring the dumped data, you must possess the privilege such as CREATE, INSERT, and ALTER privileges that might be present in your dumped flat file that will be executed. The dumped file may include ALTER statements when stored programs are dumped to preserve encoded characters. Having the ALTER privilege is necessary for executing this ALTER command because it may lead to changes in the database collation.
Syntax
We can create the backup by dumping one or more of the selected tables or by dumping a set of one or more databases, or we can dump the entire MySQL server containing all databases and tables in it along with other objects. You can use the mysqldump command to utilize all three functionalities.
However, the syntax for each of them differs and is as follows:
- Dumping one or more of the selected tables:
mysqldump [specified_options] name_of_database [name_of_table...] > nameOfBackupFile.sql- Dumping one or more of the selected databases:
mysqldump [specified_options] --databases name_of_database ... > nameOfBackupFile.sql- Dumping complete MySQL server:
mysqldump [specified_options] --all-databases > nameOfBackupFile.sqlTo see a complete list of the options that are available and can be used, we can execute the following command:
Command:
mysqldump -u root p –helpOutput:

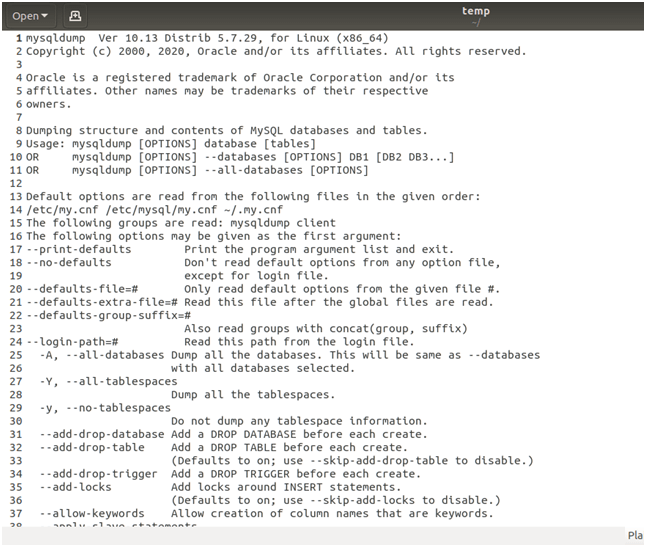
As the list is too big, you can export it to the file and then open it to view the options and search for options that can be used in your context and use case. You can export the output to a file by using the following command:
Command:
mysqldump -u root p --help > tempAnd the temp file, when opened on an editor, looks like the following:
Output:
Examples to Implement MySQL Backup
Let us consider a few examples; I will first query on my database server to display all databases:
Example #1
Command:
show databases;Output:

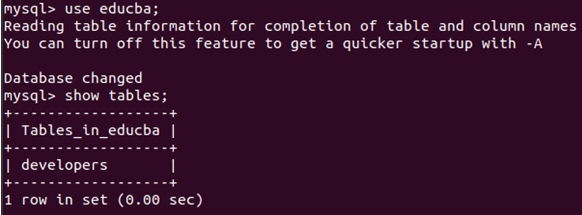
Now, we will use the educba database and check its tables.
Command:
use educba;
show tables;
Output:
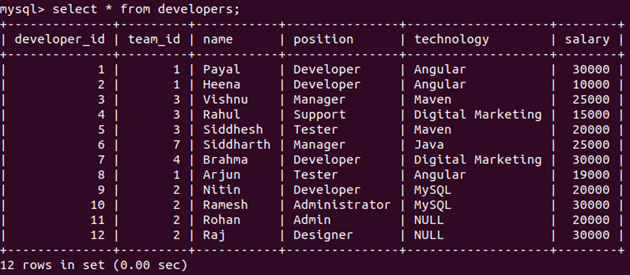
Let us now see all the records present in the developer’s table.
Command:
select * from developers;Output:
Now, let us export the educba database using the mysqldump command:
Command:
sudo mysqldump -u root -p --databases educba > backupOfEducba.sqlOutput:
![]()
Note that you must exit from the MySQL command shell and execute the above command. After, a file named backupOfEducba.sql file will be created on the same path. After opening the file, you will see that it contains all the commands of SQL that will recreate the educba database if we restore this file to a specific database.
Here’s how that file will look like:
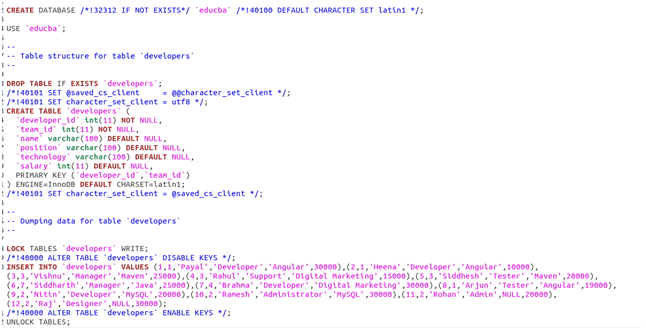
This dumped flat file contains the commands to create a database, create a table, and insert queries to populate the table. IIt was created by dumping the “educba” file.
Example #2
Restoring the Database.
Let us now drop the database educba using the following command:
Command:
DROP DATABASE educba;Output:
![]()
And now, confirm the available databases by using the command:
Command:
show databases;Output:
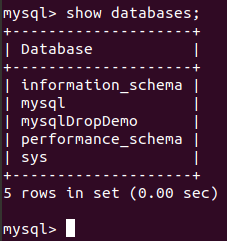
We can see that the educba database does not exist in our MySQL database server.
We will restore the educba database from the backup file backupOfEducba.sql we created by dumping the educba database previously.
You can perform the restoration by using the following command:
Command:
sudo mysql -u root -p backup_educba < backupOfEducba.sqlOutput:

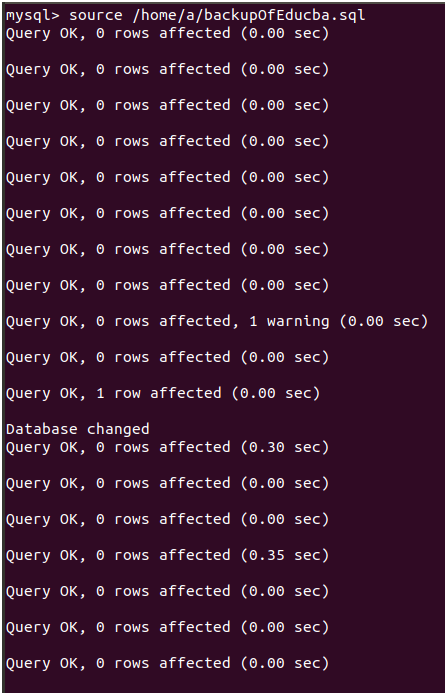
Alternatively, on your mysql command prompt, you can fire the following command to restore the database:
Command:
source /home/a/backupOfEducba .sqlOutput:
Let us check the contents of the backup_educba database:
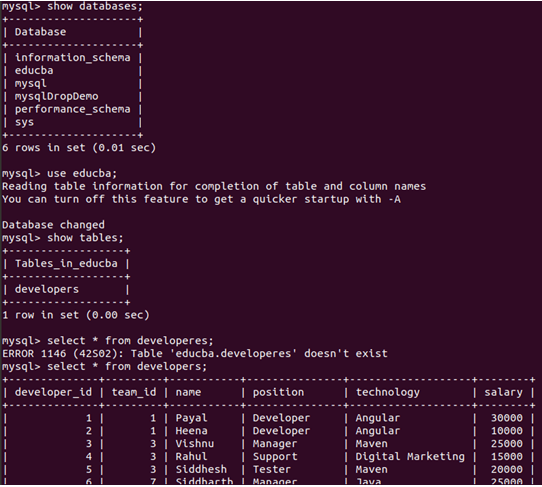
We can see that the database named educba is created again and contains the same content as the developer’s table and all the table records.
Conclusion
We can back up the database or table using the mysqldump utility in MySQL. Different options assist us in operating this utility program, and the dumped flat file can be used at any time to restore the data. The restoration can be done easily using the terminal’s default or mysql command prompt.
Recommended Articles
We hope that this EDUCBA information on “MySQL Backup” was beneficial to you. You can view EDUCBA’s recommended articles for more information.
