Introduction to Morphing in After Effects
It is morphing in After Effects is used to do a seamless transition from one image to another. So, it can be any image or shape or vector graphics. The origin of morphing can be traced back to the 16th century when a painting named Tabula scalata with two images was divided over the ridged or grooved surface, as each image was visible only from a particular angle. Morphing occurs when changing from one angle to another. The mechanical transformation led to morphing in the 18th century, like mechanical magic lantern slides that changed the figure’s appearance.
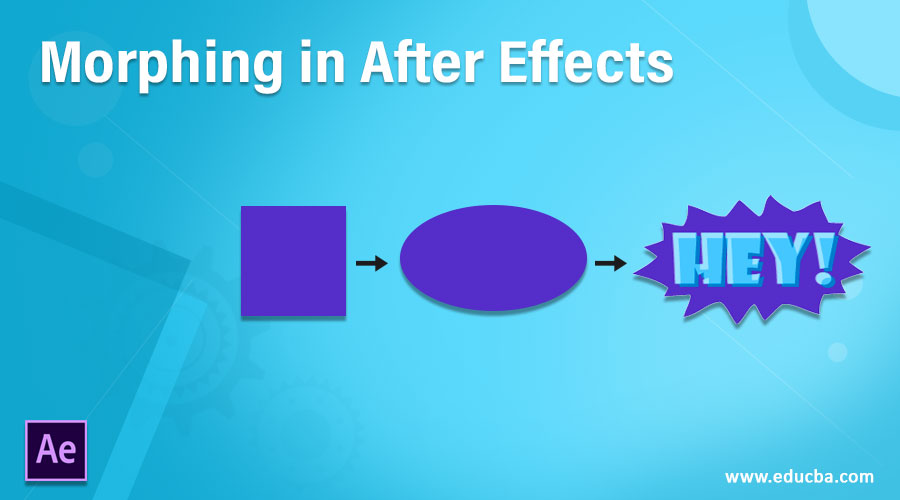
In this article, we will morph shapes into after-effects. We will look at two examples in which we will morph the rectangle into a triangle and then morph the triangle into a rocket.
Examples to Create Morphing in After Effects
Below are the two different examples of creating Morphing in After Effects:
Example #1 – Morphing Rectangle to Triangle
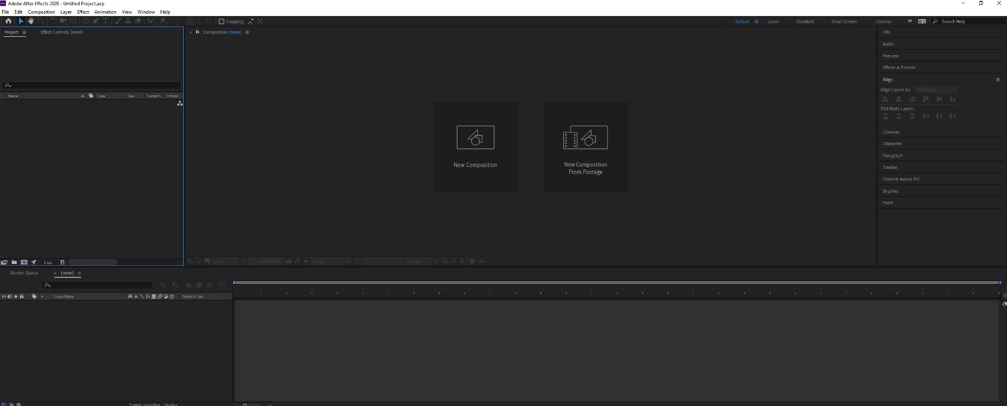
Step 1: Create a new project, and you will get an interface as shown below. If you do not see it as shown below, go to Window > Workspace > Default which should bring us to the same screen.
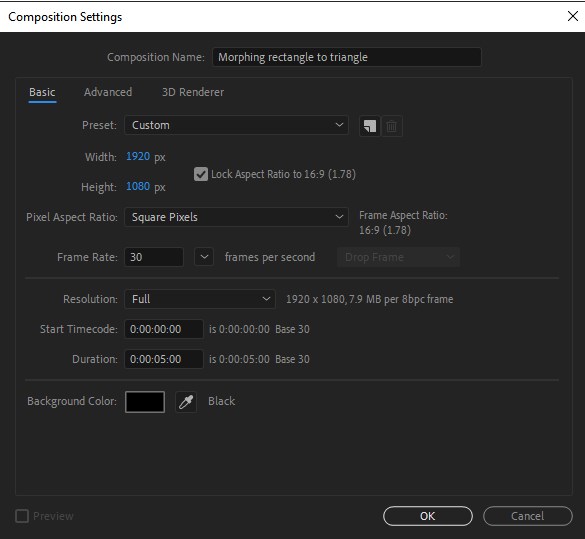
Step 2: Now right-click in the Project window to create a new composition, give a name, and leave other things as default.
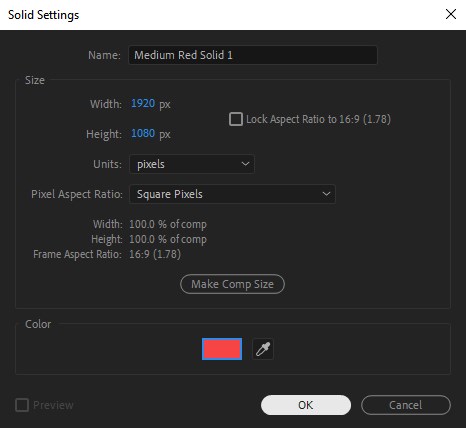
Step 3: Right-click in the timeline window and create a new > Solid.
Step 4: After creating the solid background, click the lock icon and set the shy switch to on so we do not accidentally select the location.
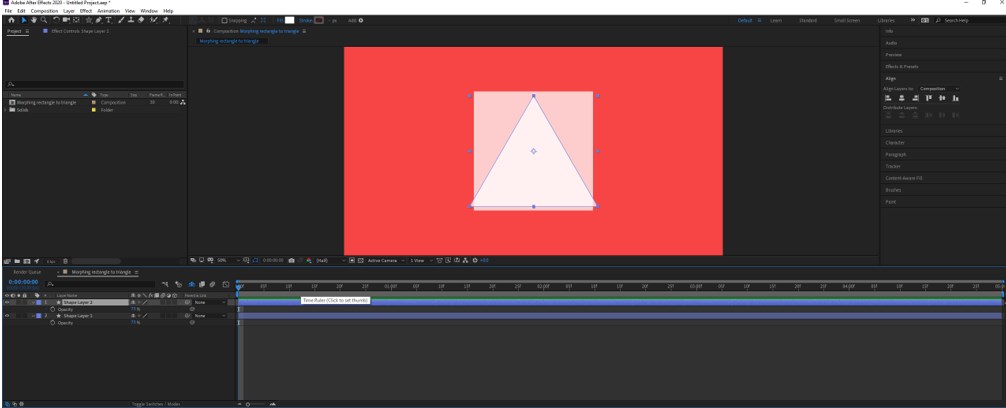
Step 5: Now select a rectangle tool or press Q and create a square by pressing shift if the anchor is not in the center, then choose pan behind the device and adjust the anchor to the center. You can press ctrl to snap to the center. So when we do animation, the transitions are calculated from the center.
Step 6: Now select the polygon tool, match its size to the rectangle, and center everything, aligning square and triangle to the composition. Also, set the polystar path from 1 point to 3, so we get a triangle. Reduce the opacity of both shapes to see how to modify them. Press T for transparency, from which you can directly change the opacity.
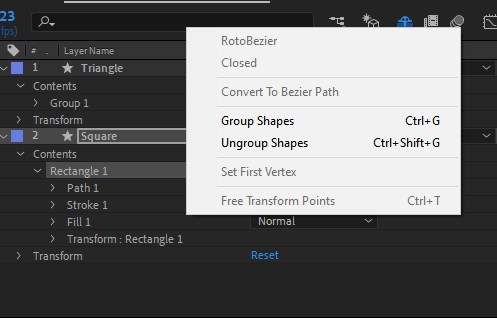
Step 7: This is important to select the path of both layers and convert it to the Bezier path.
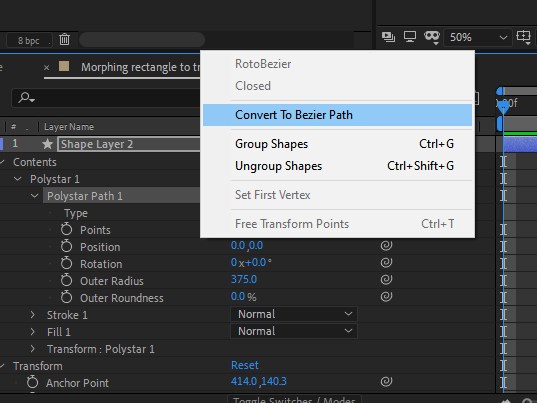
Step 8: Now ungroup the rectangle shape to get the path to animate and rename the shape layers triangle and square, respectively.
Step 9: After ungrouping, set a keyframe for the path attribute at around 15f on the timeline by clicking on the stopwatch icon, and it turns blue, which means the key is set for the frame selected in the timeline. Then move the slider to 20f and adjust the shape of the rectangle to the triangle.
Step 10: After adjusting the path of the rectangle as a triangle. After moving the timeline to about 1 second, press N, which will reduce your work area, and you can repeatedly test without clicking the timeline to zero.
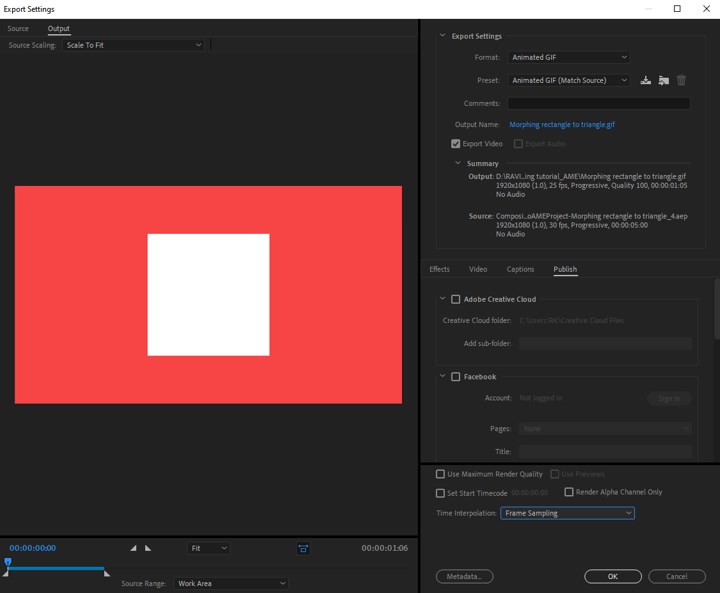
Step 11: To view the final render, we can export it from after-effects or use an adobe media encoder, a separate program for encoding and video rendering.
Step 12: Now, we will use a media encoder to export since we can keep working on the project while the encoding and rendering will happen in the background. If we choose to export from after effects, it would not matter in small projects, but it can take a long time depending upon the settings in large projects.
Example #2 – Morphing Triangle to Rocket
Step 1: Now you know the basics of morphing, you have transformed the rectangle into a triangle. We will now morph a triangle into a more advanced rocket shape.
Step 2: For this section, I will use an illustrator vector file with a rocket’s shape and morph its path into a triangle to get an excellent effect.
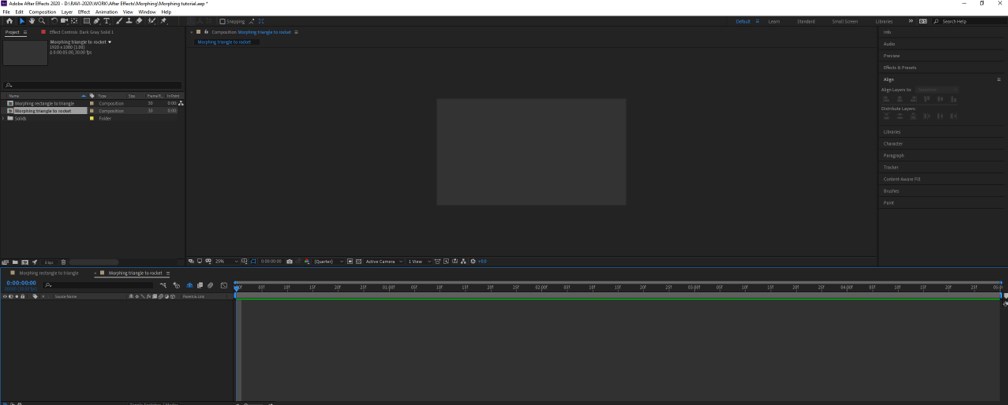
Step 3: We will create a new composition, as multiple compositions can be created in one project.
Step 4: We have created a solid with a dark gray background, hidden it, and set the shy so we do not change the background.
Step 5: Double-click on the project window and import the rocket.ai file. You can create your file or download any ai that contains the rocket’s demo shapes.
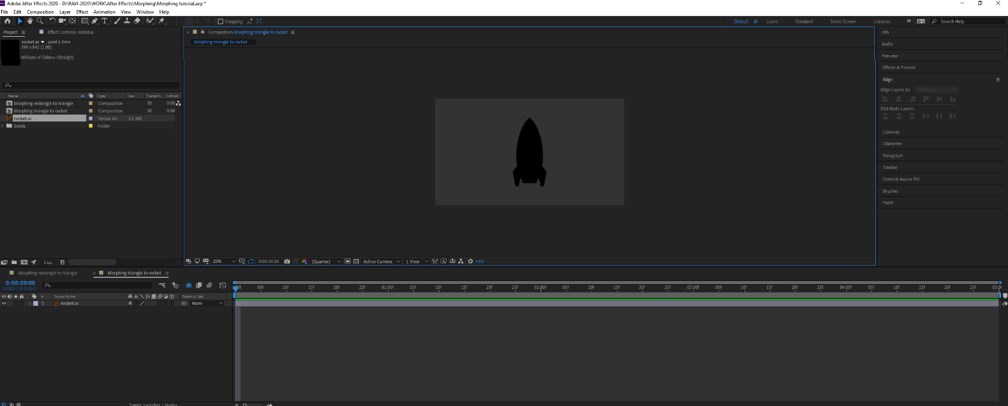
Step 6: Using a polygon tool, creates a triangle as done previously. Then convert the .ai file to shapes by right-clicking the .ai file and creating> create shapes from the vector layer. We can delete the original .ai file.
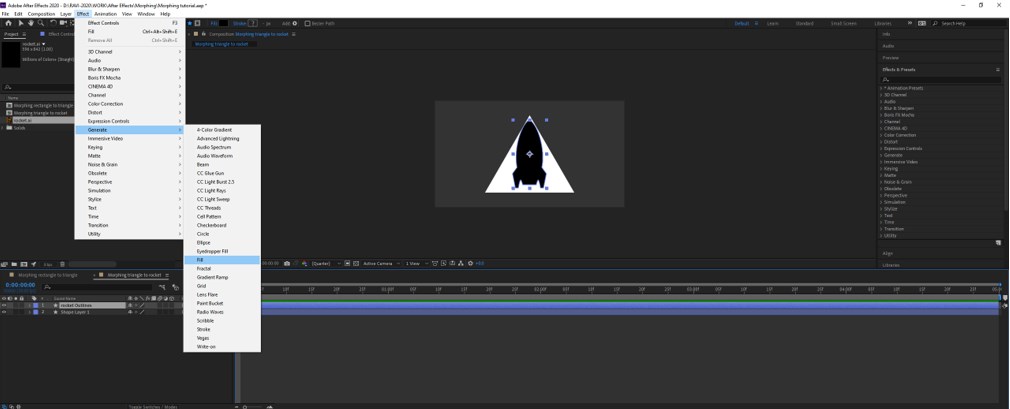
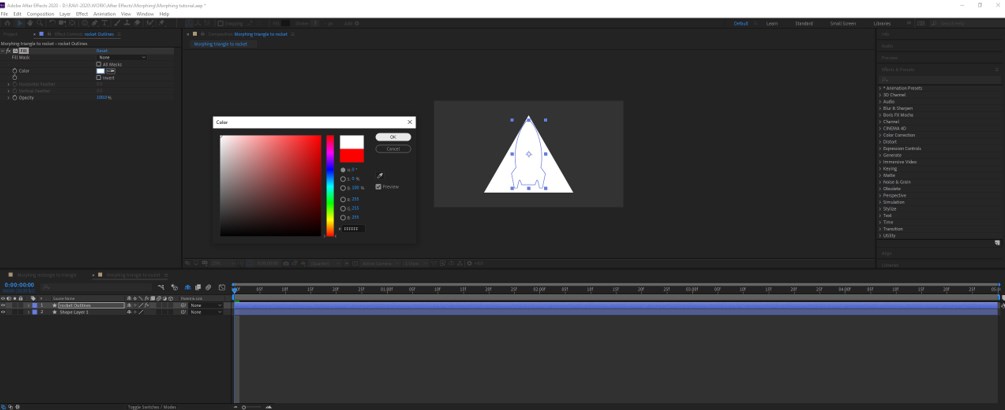
Step 7: Add an effect by going to effect > generate > fill and Select white color.
Step 8: Add a keyframe for the path attribute for the rocket. Now we have to transition those points into a triangle.
Step 9: Adjust the rocket’s path to the triangle, as shown below. Also, reduce the opacity so we can see the changes in the path.

Step 10: All path points of the rocket should be aligned to the triangle, as shown below. It would be best to use the Bezier handle to align, changing the curves ‘ length and angle appropriately.

Step 11: Now hide or delete the triangle shape, as it is not needed anymore. After playing the animation on the timeline, you can now see that the rocket is converted to a triangle. So, what will do is select the keyframe of transition to the triangle and put it ahead of the rocket.
Step 12: After playing the animation, the triangle is morphed into a rocket-like sci-fi movie that shifts the character’s shape to achieve a morph effect.
Step 13: Finally, we can enhance it, as now we can see that the animation is linear. We can add some easing which will give us a nice effect.
Step 14: To do that, add it to select all the keyframes by drag-selecting, right-clicking, and selecting keyframe velocity. In the popup, set the influence to 75% for the incoming and outgoing velocity.

Step 15: Some helpful shortcuts. Hold ALT and double-click on any keyframe; it will bring the keyframe velocity popup. Hold CTRL, and clicking on any keyframe will remove effortless ease.
Conclusion
We have completed the basics of morphing in after-effects, converting shapes from one form to another. Similar techniques can be used to achieve advanced morphing of faces and images.
Recommended Articles
This is a guide to Morphing in After Effects. Here we discuss an introduction and two different examples to create Morphing effects in the step by step manner. You can also go through our other related articles to learn more –
