EDUCBA

EDUCBA

MENUMENU
  • Free Tutorials
  • Free Courses
  • Certification Courses
  • 280+ Courses All in One Bundle
  • Login
Home Design Design Tutorials Illustrator Tutorial Moon in Illustrator
Secondary Sidebar
Illustrator Tutorial
  • Basic
    • What is Adobe Illustrator
    • Install Adobe Illustrator
    • Adobe Illustrator For Windows
    • Adobe Illustrator for Windows 8
    • How to Use Adobe Illustrator
    • Adobe Illustrator for beginners
    • Adobe Illustrator for Students
    • Illustrator Shortcut Keys
    • Illustrator Plugins
    • Illustrator Repeat Action
    • Illustrator auto trace
    • Layers in Illustrator
    • Moon in Illustrator
  • Tools
    • Adobe Illustrator Tools
    • Selection Tool in Illustrator
    • Width Tool in Illustrator
    • Illustrator Grid Tool
    • Pathfinder Tool in Illustrator
    • Pen Tool In Illustrator
    • Measure Tool in Illustrator
    • Mesh Tool In Illustrator
    • Blend Tool in Illustrator
    • Direct Selection Tool Illustrator
    • Illustrator Free Transform Tool
    • Shape Builder Tool in Illustrator
    • Slice Tool in Illustrator
    • Smooth Tool in Illustrator
    • Eyedropper Tool in Illustrator
  • Effects
    • Effects in Illustrator
    • Insert Image in Illustrator
    • Crop in Illustrator
    • Remove Background In Illustrator
    • Remove White Background in Illustrator
    • Shapes in Illustrator
    • Text Effects In Illustrator
    • Watercolor Brushes Illustrator
    • Blending Modes in Illustrator
    • Blur in Illustrator
    • Brushes in Illustrator
    • Change Background Color in Illustrator
    • Graphic Styles in Illustrator
    • Change Artboard Size in Illustrator
    • Logo Design in Illustrator
    • Rasterize in Illustrator
    • Resize Image in Adobe Illustrator
    • 3D Effects in Illustrator
    • 3D Text in Illustrator
    • Filters in Illustrator
    • Reflection in Illustrator
    • How to Make Logo in Illustrator?
    • Transparent in Illustrator
    • How to Add Texture in Illustrator?
    • Neon Effect in Illustrator
    • Create Table in Illustrator
    • Paper Texture in Illustrator
    • Stamp Effect in Illustrator
    • Sun in Illustrator
    • How to Warp Text in Illustrator?
    • Metal Effect in Illustrator
    • Action in Illustrator
    • Illustrator Gold Gradient

Related Courses

Illustrator Training Course

Adobe Flash Training Course

3Ds Max Modeling Training Course

Moon in Illustrator

Moon in Illustrator

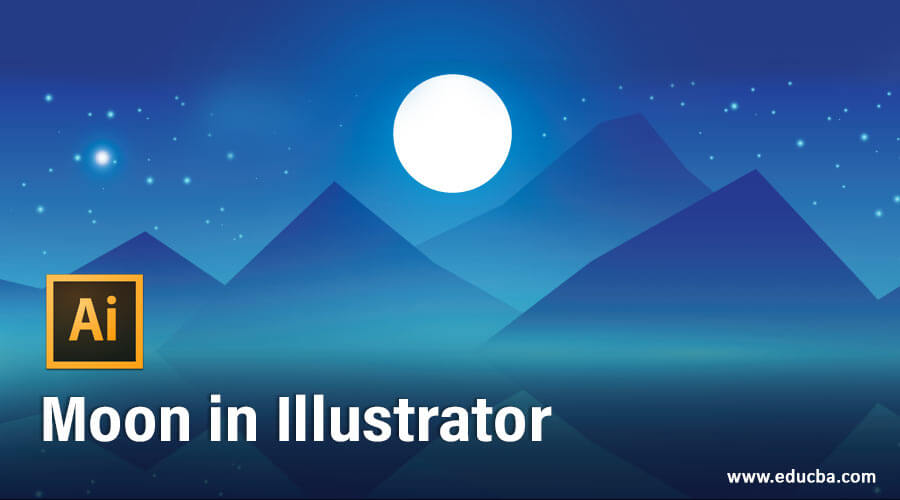
Introduction to Moon in Illustrator

Adobe Illustrator is a vector drawing software and it is the most preferred graphic designing package for vector art by professionals. In this article, we are going to create a graphic design of the moon in adobe illustrator 2020 which will emphasize the use of shapes and fills with gradients. We will also use shape builder tools, pathfinder tools, and brush tools to get an extra effect and also a small rocket to get the perspective. The background of the moon will have the night sky with some stars from which some will be falling down.

How to Create a Moon in Illustrator?

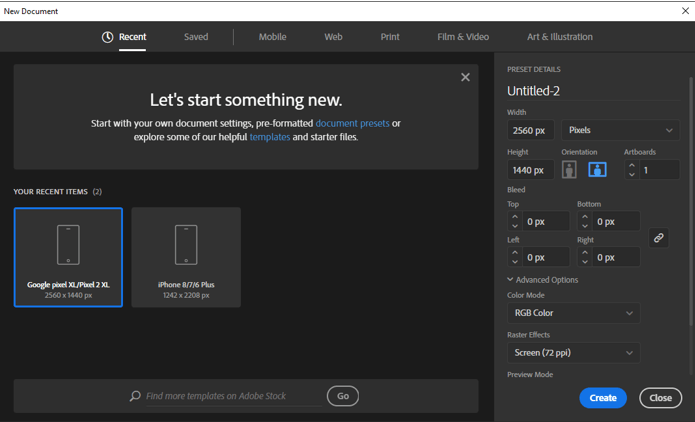
Step 1: We will create a new document with all the standard settings and set the width to 2560px and height of 1440px. Set the orientation to landscape and set the artboard to 1 also the bleed is 0 px with colour mode of RGB Color and there is another option of CMYK which is useful if we are using it to print. But since we are not printing, we leave it in RGB mode. Also, set the raster effect to screen as we are not using any raster effects like drop shadow, etc.

new document

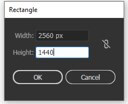
Step 2: Create a rectangle by selecting a rectangle tool or press M and then click on a blank canvas and set the same dimensions as the artboard.

Start Your Free Design Course

3D animation, modelling, simulation, game development & others

rectangle tool

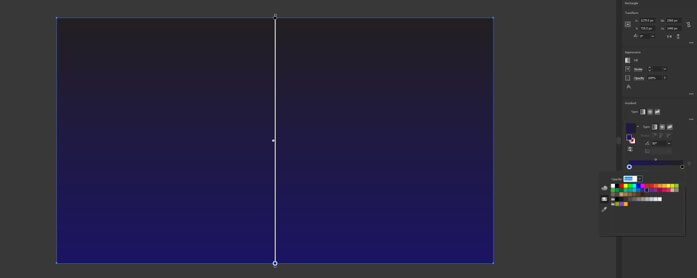
Step 3: Grab the rectangle using the selection tool and align with the artboard, then select the gradient tool or press G to create the background. Set the angle to 90 degrees for the linear gradient and set the white to dark blue color. Also, change the stroke to none.

selection tool

Step 4: Change the name of the current layer to “Background” so we do not change it accidentally and create a new layer and name it “Main Art” on which we will add other objects.

Background

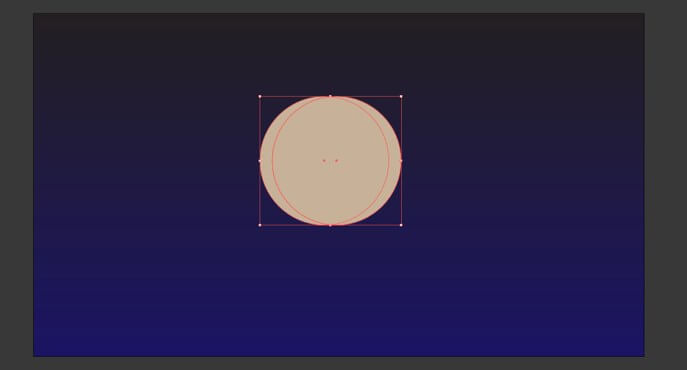
Step 5: Create two circles side by side as shown below and set the width and height to 540px.

width and height

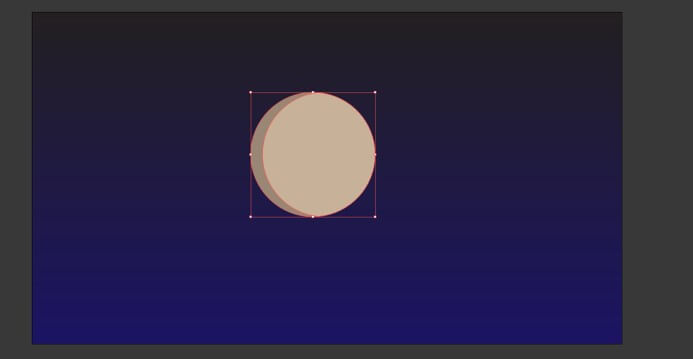
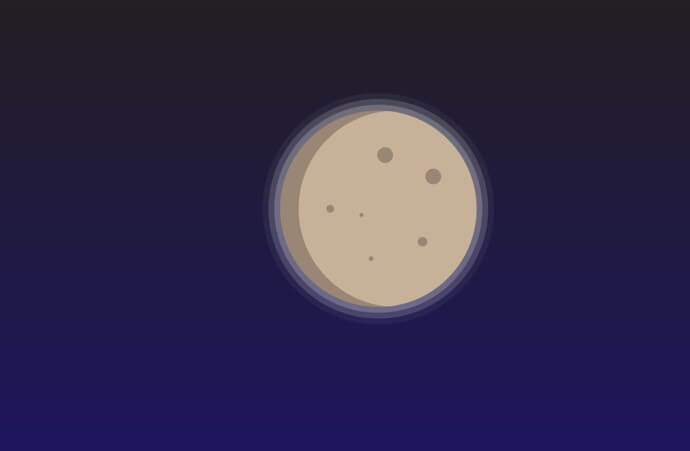
Step 6: Use shape builder tool or click shift + M to activate and remove the right part so we can create a show in the left part. To remove press alt and left click, then fill the first circle to create a shadow.

create a shadow

Moon in Illustrator - 7

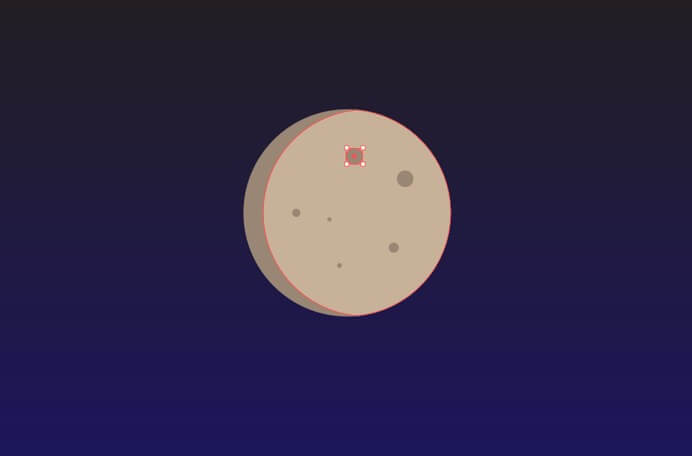
Step 7: Then using the ellipse tool creates spots on the face of the moon.

creates spots

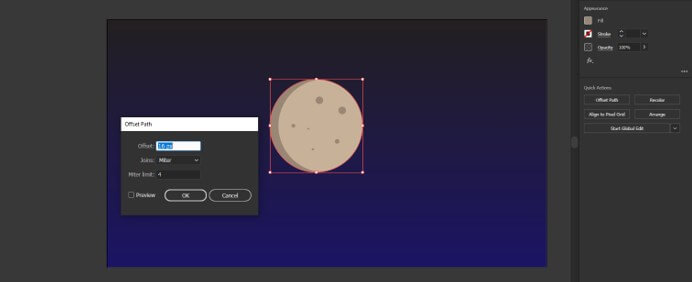
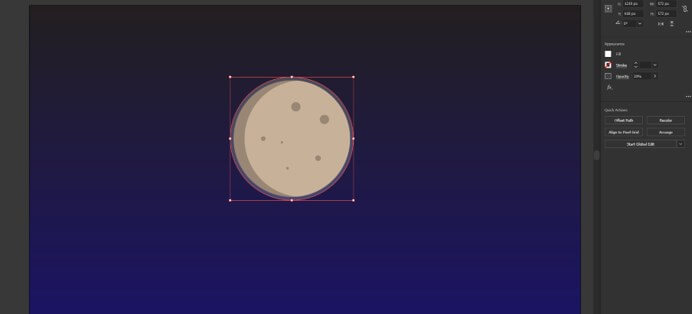
Step 8: Select the offset path in the quick actions section while selecting the circle and then set fill to white and opacity to 20%. Repeat this step 2 more times with opacity 15% and 5%. This will give a glow for the moon. After creating the moon select all and then group.

opacity 15% and 5%

Moon in Illustrator - 10

Moon in Illustrator - 11

Moon in Illustrator - 12

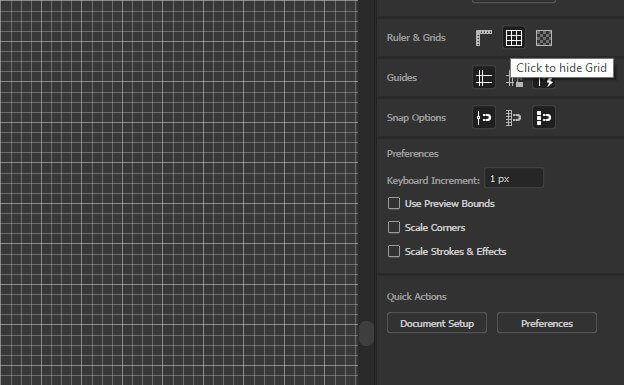
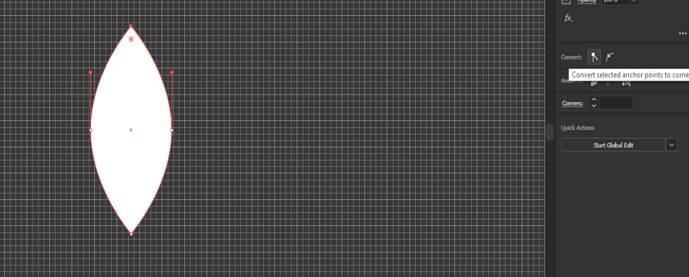
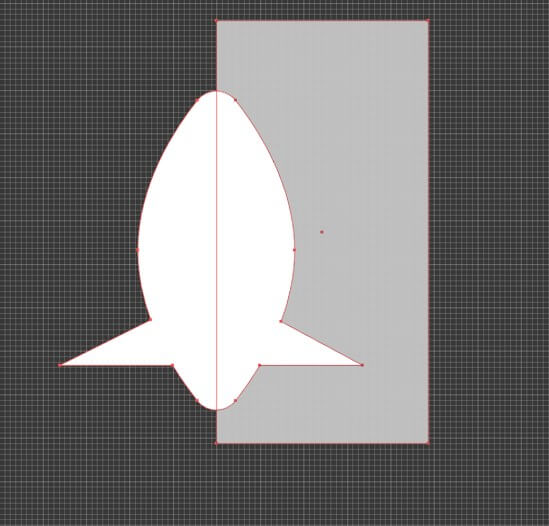
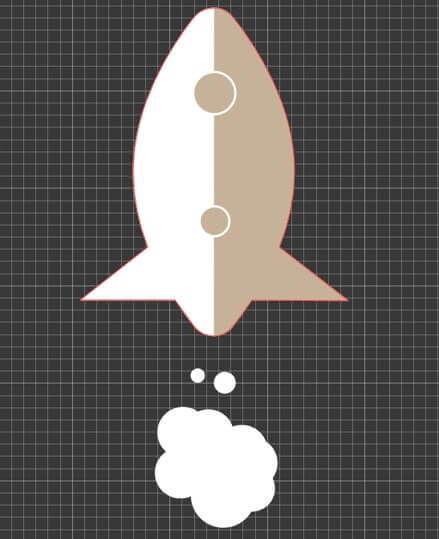
Step 9: Now we will create a small rocket to set the perspective. For that, we first enable the grid in the guide section and then create an ellipse with a width of 260px and a height of 570px.

small rocket

Moon in Illustrator - 14

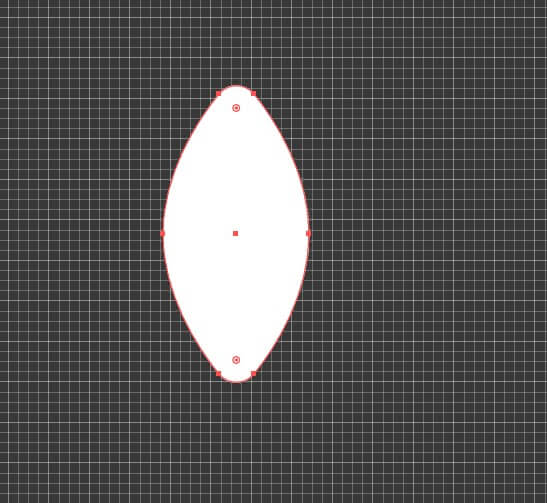
Step 10: We will use the direct selection tool to select the top and the bottom anchor and convert it into a corner anchor point. Then select the control handles to make a curve at the top and bottom.

corner anchor point

Moon in Illustrator - 16

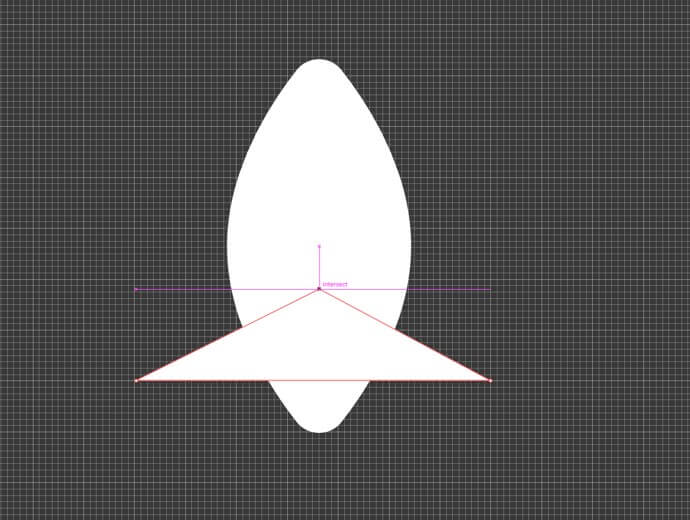
Step 11: Using the pen tool we will create a triangle and then unite the shapes using the pathfinder tool.

Moon in Illustrator - 17

Moon in Illustrator - 18

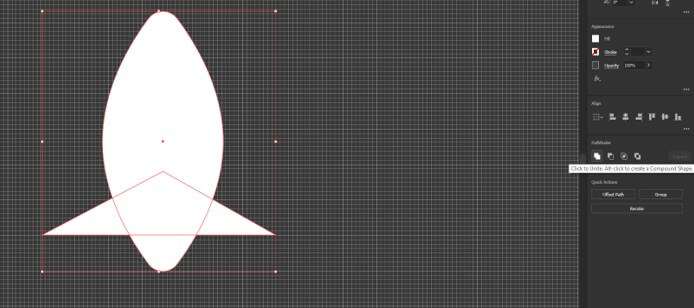
Step 12: Then create a rectangle and using the shape builder tool to remove the highlighted area with alt + click so we can create a shadow.

Moon in Illustrator - 19

Moon in Illustrator - 20

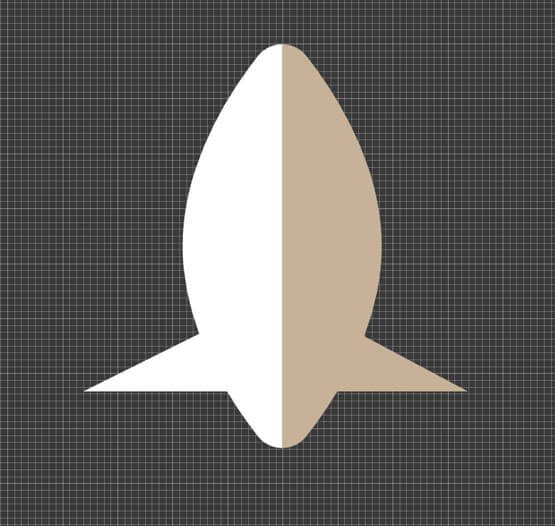
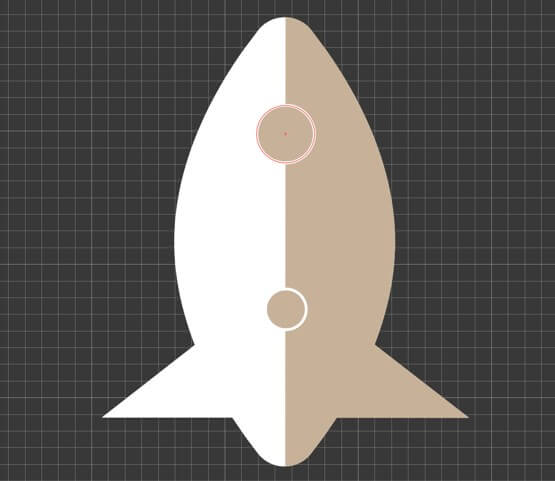
Step 13: Then we will create the windows of the rocket for which we will make two circles as shown and set the fill to the shadow color of the rocket and the stroke to white.

Moon in Illustrator - 21

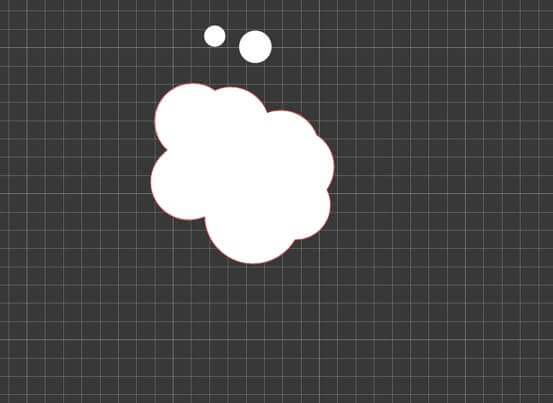
Step 14: Using ellipse we will make the smoke of the rocket and then combine using the pathfinder tool.

Moon in Illustrator - 22

Moon in Illustrator - 23

Step 15: Next select all and make a group (Ctrl + G) and then expand.

Moon in Illustrator - 24

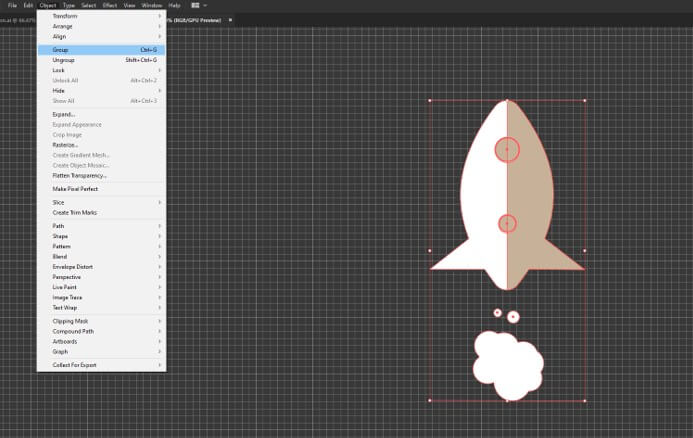
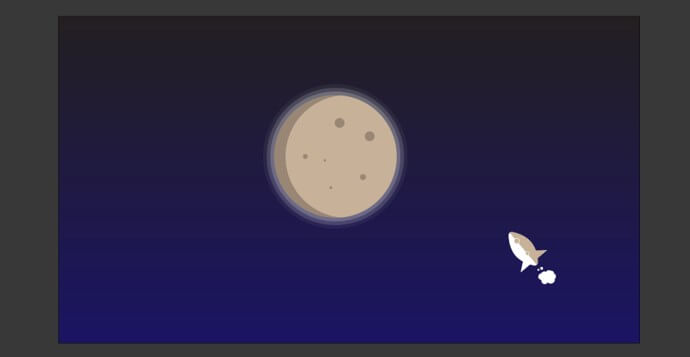
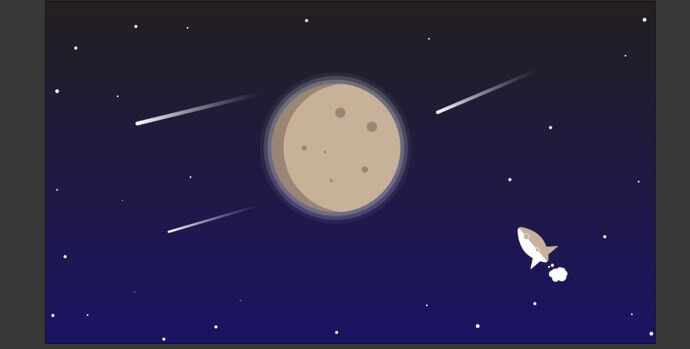
Step 16: Now resize and rotate the rocket and bring it into the main scene

Moon in Illustrator - 25

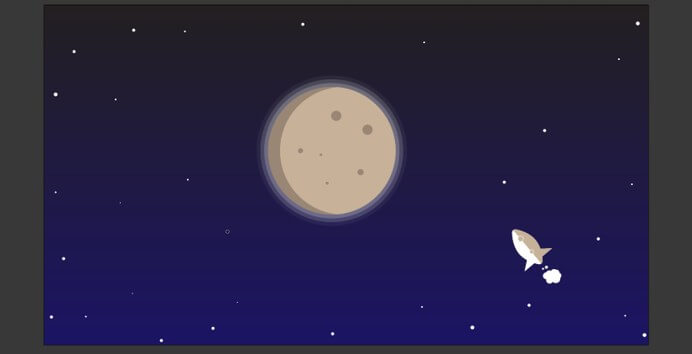
Step 17: Next we create stars and for this, we use the brush tool. Set the fill to none and stroke to white with opacity 100%. Create stars by varying the size of the brush from 1 to 5 points.

Moon in Illustrator - 26

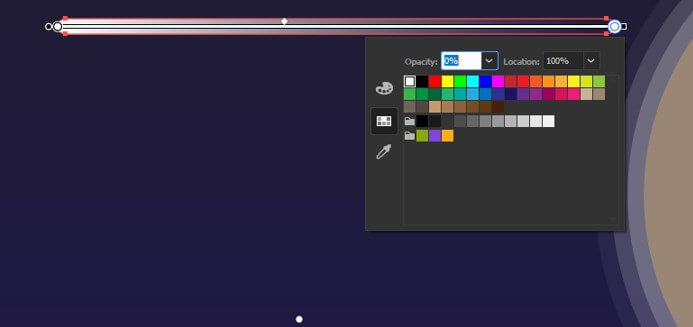
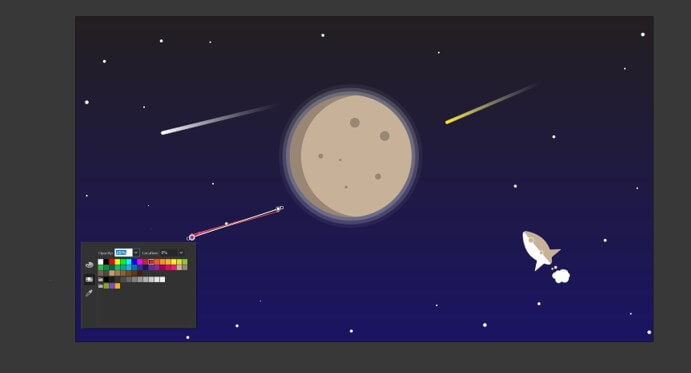
Step 18: Now will create some stars falling from the sky for this we will first create a rectangle strip. Round the corners using the direct selection tool and set the fill to a gradient.

Moon in Illustrator - 27

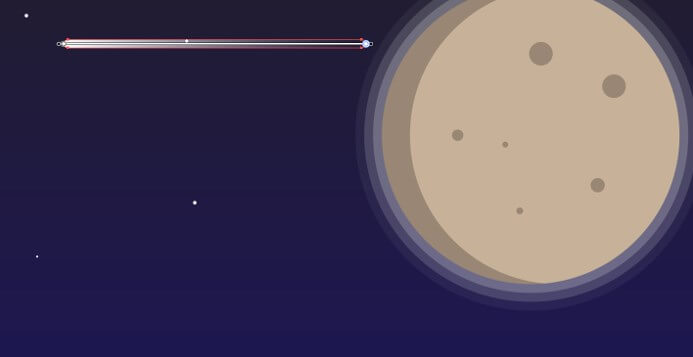
Step 19: Change the black part to white and change the opacity to zero

Moon in Illustrator - 28

Step 20: Give appropriate rotation to make it look like it is falling from the sky

Moon in Illustrator - 29

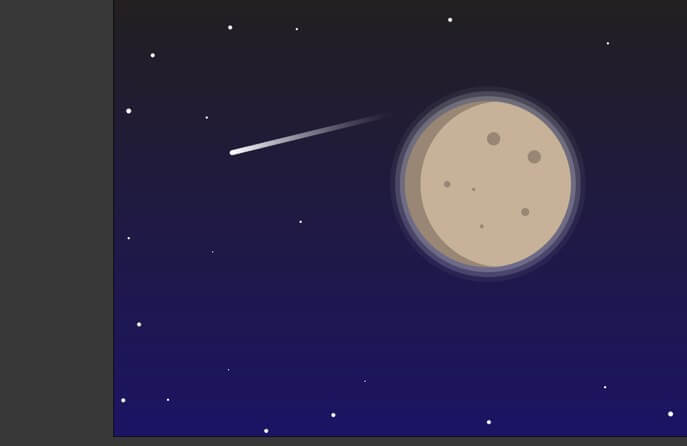
Step 21: Add a couple of more stars and change the size and rotation

Moon in Illustrator - 30

Step 22: Again, using gradient tools we change the color of the stars.

Moon in Illustrator - 31

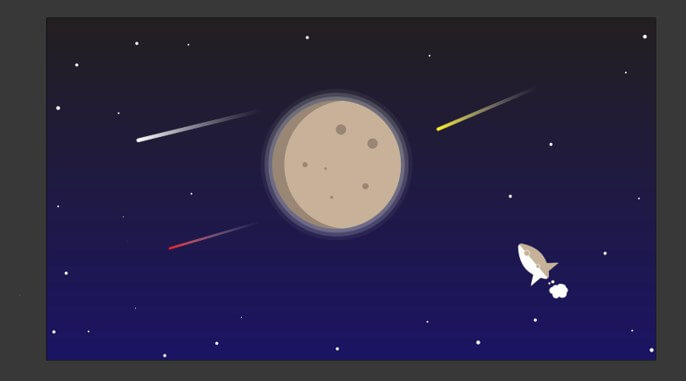
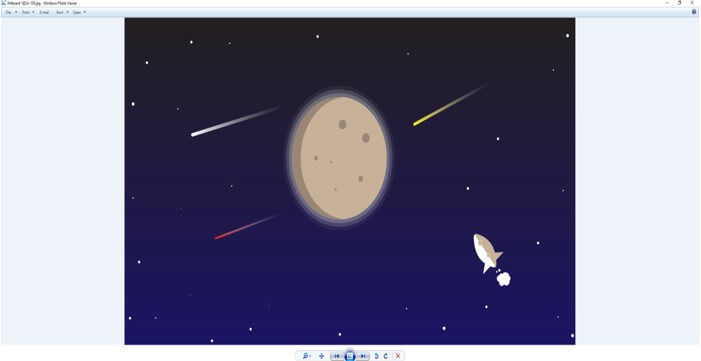
Step 23: So, we have completed the artwork, and below is the finished work.

Moon in Illustrator - 32

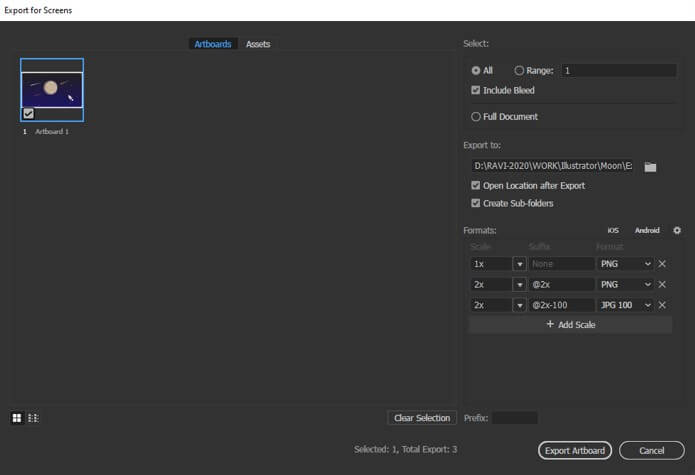
Step 24: Now it is time for the export as we can see below, we have the option to select the artboard and the location. Also, we can select which format we have to export. We have selected png and jpg 100 and the scale of 1x and 2x which will be double the size and click export.

Moon in Illustrator - 33

Moon in Illustrator - 34

Useful Tips and Shortcuts

  • To change the fill and color press “X”. To change to default of white fill and black stroke press “D”
  • If you want to fill a color press “<”, fill a gradient press “>” and the most important to set a no fill or no stroke press “/” as most of the time we want to remove it and we go in the menu and press no stroke or fill.
  • A pathfinder tool is also a useful tool as we can merge shape and subtract as well. In recent versions, the shape builder tool is added which is very powerful and can be used instead of a pathfinder tool.

Conclusion

In this article, we have learned not only how to create a moon in Adobe illustrator but also learned the techniques of using various tools like shapes and gradients along with shape builder tool and pen tool to create an amazing artwork that will enrich your knowledge as well as your portfolio.

Recommended Articles

This is a guide to Moon in Illustrator. Here we discuss an introduction, how to create a moon in illustrator in a step by step manner. You can also go through our other related articles to learn more –

  1. Stamp Effect In Illustrator
  2. Pathfinder Tool in Illustrator
  3. Blending Modes In Illustrator
  4. Change Artboard Size In Illustrator
Popular Course in this category
Illustrator Courses (1 Courses, 2+ Projects)
  1 Online Courses |  2 Hands-on Projects |  12+ Hours |  Verifiable Certificate of Completion
4.5
Price

View Course

Related Courses

Adobe Flash Training (2 Courses, 1+ Projects)4.9
3Ds Max Modeling Training (5 Courses)4.8
0 Shares
Share
Tweet
Share
Primary Sidebar
Footer
About Us
  • Blog
  • Who is EDUCBA?
  • Sign Up
  • Live Classes
  • Corporate Training
  • Certificate from Top Institutions
  • Contact Us
  • Verifiable Certificate
  • Reviews
  • Terms and Conditions
  • Privacy Policy
  •  
Apps
  • iPhone & iPad
  • Android
Resources
  • Free Courses
  • Photoshop Tutorial
  • 3ds Max Tutorial
  • All Tutorials
Certification Courses
  • All Courses
  • Design Course - All in One Bundle
  • Photoshop Course
  • Maya Course
  • Unreal Engine Course
  • Unity Course
  • DaVinci Resolve Course
  • Pro Tools Course

ISO 10004:2018 & ISO 9001:2015 Certified

© 2022 - EDUCBA. ALL RIGHTS RESERVED. THE CERTIFICATION NAMES ARE THE TRADEMARKS OF THEIR RESPECTIVE OWNERS.

EDUCBA
Free Design Course

Banner Creation, Object Selection, Sky Replacement, Advance Filters & others

*Please provide your correct email id. Login details for this Free course will be emailed to you

By signing up, you agree to our Terms of Use and Privacy Policy.

EDUCBA Login

Forgot Password?

By signing up, you agree to our Terms of Use and Privacy Policy.

EDUCBA
Free Design Course

3D animation, modelling, simulation, game development & others

*Please provide your correct email id. Login details for this Free course will be emailed to you

By signing up, you agree to our Terms of Use and Privacy Policy.

EDUCBA

*Please provide your correct email id. Login details for this Free course will be emailed to you

By signing up, you agree to our Terms of Use and Privacy Policy.

Let’s Get Started

By signing up, you agree to our Terms of Use and Privacy Policy.

This website or its third-party tools use cookies, which are necessary to its functioning and required to achieve the purposes illustrated in the cookie policy. By closing this banner, scrolling this page, clicking a link or continuing to browse otherwise, you agree to our Privacy Policy

Loading . . .
Quiz
Question:

Answer:

Quiz Result
Total QuestionsCorrect AnswersWrong AnswersPercentage

Explore 1000+ varieties of Mock tests View more