Updated October 10, 2023
Introduction to Linux Add User
In the Linux operating system, the adduser command creates or adds the user to the Linux server. There are different ways to add users to the Linux environment, like useradd and adduser. The Linux ecosystem supports the multi-user. It is more important to track and control user and group levels properly.

Table of Contents
User in Linux
In Linux, a user is an individual who interacts with the operating system and its resources, such as files and programs. Each user has a unique username and varying levels of permissions and access. Users are essential for system security and organization, and they can be assigned to different groups to manage permissions and access control. The user management commands in Linux, such as useradd, passwd, and usermod, allow system administrators to create, modify, and maintain user accounts. Users typically have a home directory storing their personal files and configurations. Users can also execute commands and run processes on the system, each with their own permissions and restrictions.
Syntax of Adduser command
The useradd command in Linux is used to create user accounts.
useradd [options ] LOGIN
useradd -D
useradd -D [options]
Here are explanations for the provided command variations:
- useradd: We can use the “useradd” keyword in the syntax or command. It will take different arguments like OPTION, LOGIN type, user name, etc. As per the provided arguments, it will create a new user with the required configuration.
- OPTION: We can provide the different flags as options compatible with the “useradd” command.
- LOGIN: We can provide the different LOGIN types to the “useradd” command. Accordingly, It will provide shell access.
How does Adduser Command work in linux?
The Linux environment supports the multi-user session handler. Due to this, the number of users can access the different data. Hence, keeping the proper user in the necessary group with proper access and user-config is mandatory.
When we are creating any new user on the Linux environment. The below process will happen every time.
1. The controller will edit the below files for the new user account.
- /etc/passwd
- /etc/shadow
- /etc/group
- /etc/gshadow
2. It will create the new home directory for the new user (default path is /home/$new_username)
3. It will automatically set up the necessary ownership and permissions on the home directory.
We will get the user’s detailed information in the “/etc/passwd” file. As per the Linux system administrator, it is essential to understand the points below.
![]()
- Username: The user name is “test_user”. The same user name is used in the system login. The login username should be between 1 to 32 characters long.
- Password: The password is displaying the “x”. But the actual password was saved in the /etc/shadow file in an encrypted format.
- User ID (UID): The user ID is 1004. The user has their user ID. It is essential for user identification on the system level. The UID or user-id “0” is default reserved for the root user.
- Group ID (GID): The group ID is “1004”. The primary Group ID, i.e., the GID. The GID information is stored in the “/etc/group” file.
- User Info: Currently, the user information is blank. We can add the user info for further reference as per the requirement.
- Home Directory: The home directory path is “/home/test_user”. But as per the requirement, we can change the home directory path.
- Shell: The shell provided to the user is “/bin/bash”. As per the requirement, we can provide different shell access.
Ways to Add/Create User in Linux
There are two ways of adding a user in Linux.
- From shell/terminal using “useradd.”
- From GUI, using the system setting
1. Create a User from the shell/terminal
Most professionals and experienced Linux users typically use this method. To add a user from the shell/terminal, follow these steps carefully and pay close attention to the syntax provided. It is important to follow each step exactly.
Step 1: Open the shell or terminal.
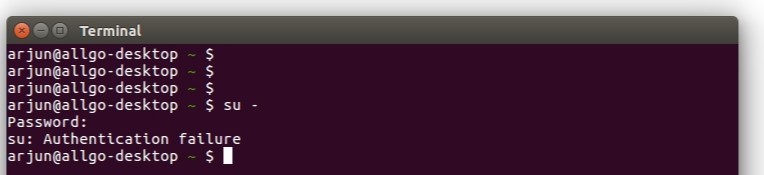
Step 2: To log in as root, type “su -” in the terminal and enter the password.

- If the password is correct, you should have root access to your system. If the password is wrong, you will get a message as shown below.
Step 3: After getting the root access, type “useradd username”.

Step 4: Type “password username”; the terminal will request a new password. Confirm the new password. Enter the new password.
Step 5: You should be able to confirm the new user by typing “cat /etc/password”. Your new username should be visible there.
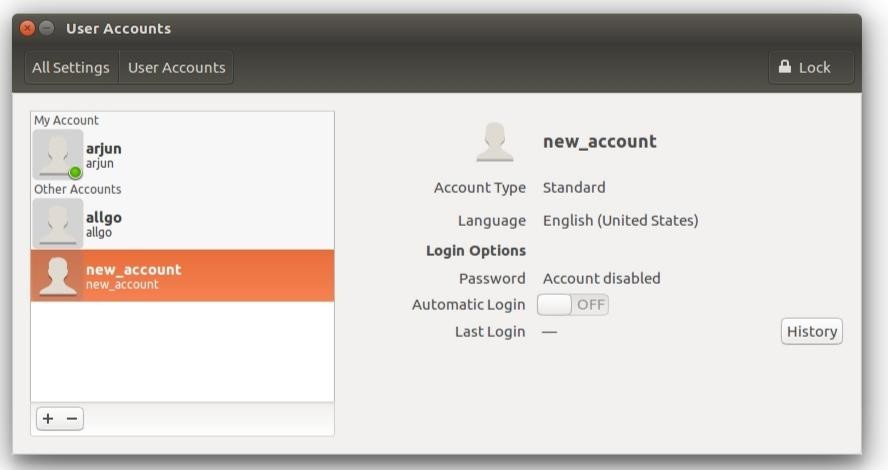
2. Create a User from GUI
Creating a user is easy and used when unfamiliar with Linux.
Step 1: Go to Applications and select System Settings.

Step 2: Click on User Accounts.

Step 3: Find the Dialog of User at the top right corner.
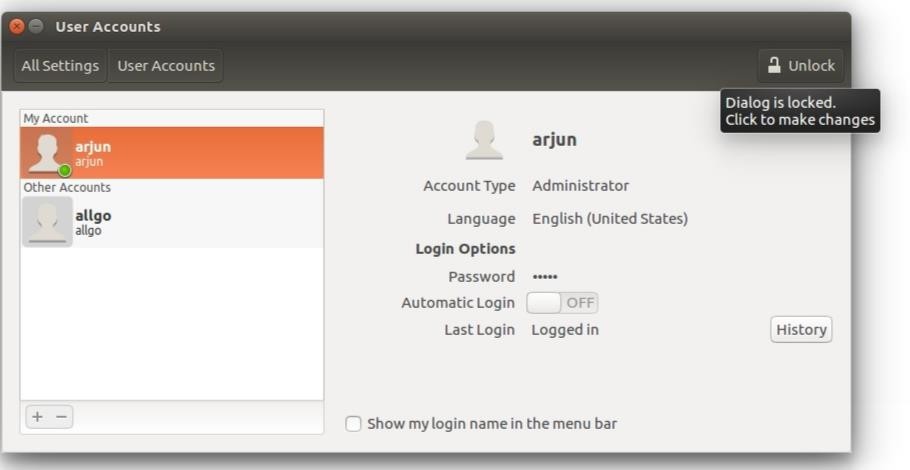
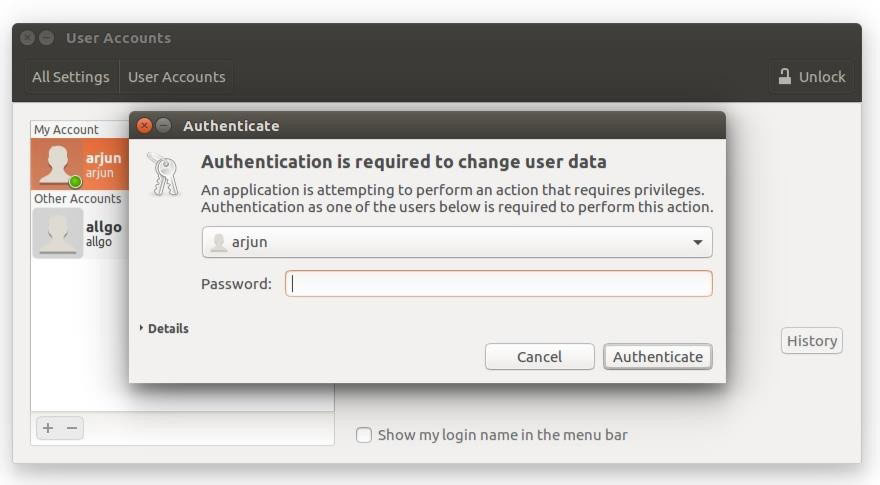
Step 4: The system will ask for the Admin’s password, type the correct password, and Dialog should be unlocked. If it says it’s locked; click on it to open it.
Step 5: After unlocking the dialog, find an add user button at the bottom left of the box and click on it.

Step 6: Type in the name of your account to be created. You can also choose the Account Type, either Standard or Admin.
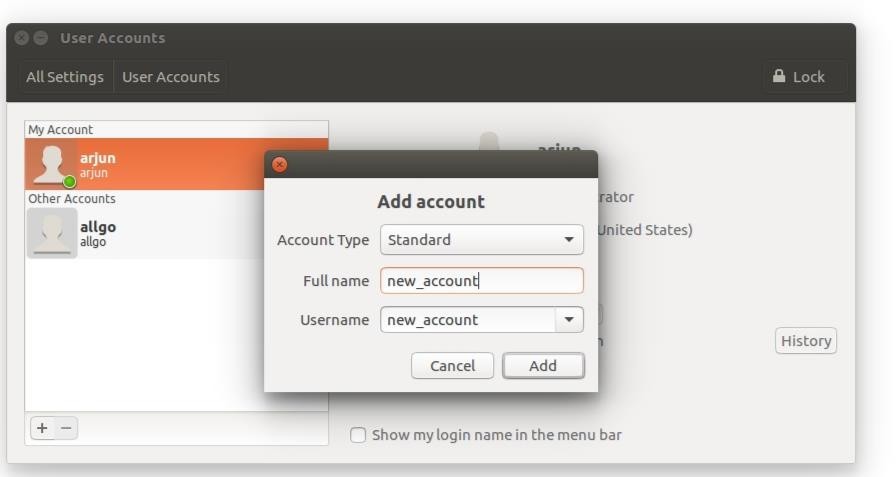
Step 7: Click “Add” to view your username on the left tab.
Examples of Add/ Create User in Linux
Here are the following examples:
Example #1 – Create New User
The “adduser” command is a simple and common way to add or create a new user in a Linux environment.
Command :
adduser demo_userExplanation :
As per the above command, we are adding the “demo_user” with the help of the adduser command.
Output :


Example #2 – Specific User ID
By default, when we are creating a new user. The system will provide the user ID and is in the sequential manager. But as per our requirement, we can also provide the specific user ID.
Command:
adduser -u 2000 demo_user1Explanation :
As per the above command, we are adding the specific user ID for the “demo_user1” user. We use the “-u” option to add the specific user ID, i.e., 2000.
Output :
![]()

Example #3 – Specific Group ID
In the adduser command, we can set our user ID. Similarly, we can also change the group ID as well.
Command :
adduser -u 2010 -g 10000 demo_user5Explanation :
As per the above command, we are adding the specific group ID for the “demo_user5” user. We use the “-g” option to add the specific group ID, i.e., 10000.
Output :

Example #4 – To Add New Users in Multiple Groups
In the Linux environment, we can add a new user to multiple existing groups in a single shot.
Command :
useradd -G data_user,demo_user demo_user6Explanation :
As per the above command, we use the “-G” option in the useradd command. We are adding the “demo_user6” user to the “data_user,demo_user” group.
Output :


Example #5 – Add User without Home Directory
In the adduser command, we can add the new user without a home directory. With proper permission and access, the new user will store their data on the “root” location.
Command :
adduser -M demo_user8Explanation :
The home directory will be added to the newly created user by default. But in the adduser command, we can add the user without the “home directory”. We have added the “demo_user8” without a home directory.
Output :

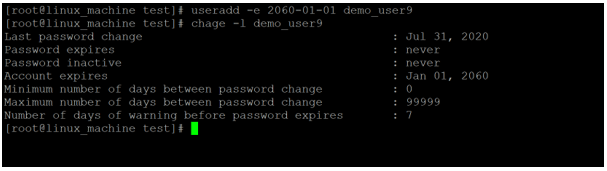
Example #6 – Add User with Account Expiry Date
In the adduser command, we can set the user account expiry date of the user.
Command :
useradd -e 2060-01-01 demo_user9
chage -l demo_user9
Explanation :
We have set the account to expire date “Jan 1, 2060” for the user “demo_user9” user. After the expiration date, the account will stop performing.
Output :
Conclusion
Adding or creating users in Linux is a fundamental administrative task that facilitates multi-user access and resource management. Two primary methods, “useradd” in the terminal and the GUI system settings, offer flexibility and ease of use. Linux users have the option to customize their configurations either through precise command-line input or simple graphical interfaces. A strong emphasis on password security is crucial to maintaining system integrity while enjoying the benefits of Linux’s robust multi-user environment.
Recommended Articles
We hope that this EDUCBA information on “Linux Add User” was beneficial to you. You can view EDUCBA’s recommended articles for more information.

