Updated April 17, 2023

Introduction to JUnit 5 RunWith
JUnit 5 runwith is used to test the application using backward compatibility features. The annotation is very powerful except API of the runner. The annotation helps us create the test cases while combining multiple classes used in testing. Using JUnit 5 runwith, the runner file invokes the test execution on the test suite we created.
What is JUnit 5 RunWith?
- It is an annotation used in JUnit 5; it replaces the annotation name as @ExtendWith.
- Still, we are using annotation for the features of backward compatibility. Therefore, we are using it with the annotation name as @RunWith.
- If suppose we annotate any class by using JUnit 5 runwith annotation or extending any class by using annotation, then JUnit 5 will invoke the class referencing to the class of run tests instead of invoking runner, which was built in JUnit 5.
JUnit 5 RunWith Project Structure
Below is the project structure of JUnit 5 runwith as follows:
The project structure will start from the main module.
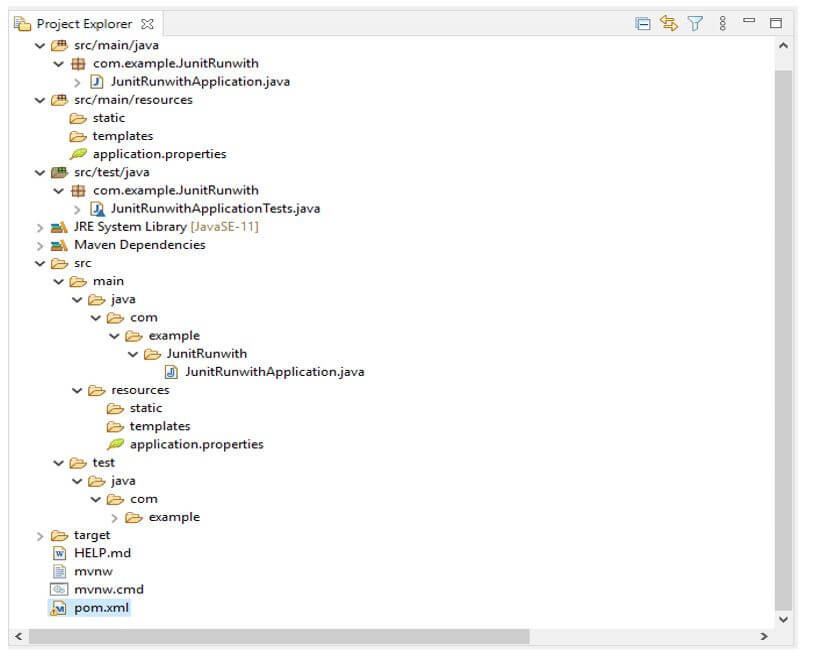
- The above example shows that the project structure starts with the source; the main package in the source module is contained.
- In the main module, the java package is contained. The java module com package and the com module example package contain locations where we can write code and store java files.
- We can save our java files under the src/main/java module. In this folder, we can save all java files.
- Creating a new java file will come under the src/main/java folder. In the above example, we have created a spring boot project.
- The project pom.xml file is separated from all the modules, so we can say that the scope of the pom.xml file is throughout the project.
- The Pom.xml file is very important in any project to add and use the dependency throughout our project.
- For running the JUnit 5 runwith dependency, we need to add the JUnit platform suite engine dependency in the pom.xml file.
- The project structure is beneficial for understanding the project flow; it will flow from one module to another.
JUnit 5 RunWith Class
- The test suite creation of JUnit 5 is quite similar to JUnit 4. We are also using runwith annotation to support the creation of test suites in JUnit 4.
- But the difference is that JUnit 5 uses the JUnit platform class instead of the suite class.
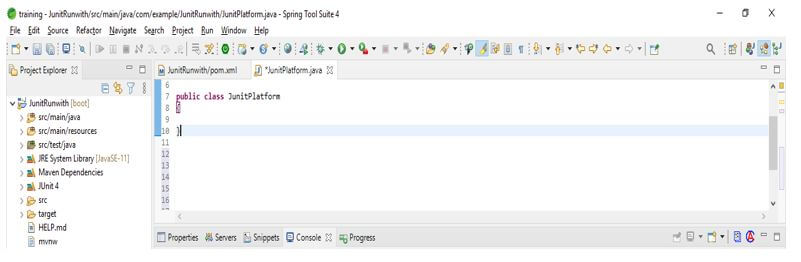
- So we can say that the JUnit platform class uses the annotation. The example below shows how we use the JUnit platform class with JUnit 5 runwith.
- The example below shows that we have used @RunWith annotation with the JUnit platform class.
- After using this annotation with the JUnit platform class, we created a class named JUnitPlatform.
Code:
@RunWith (JUnitPlatform.class)
public class JUnitPlatform
{
}
Output:
- In JUnit 4, we use suite class annotation to group the multiple classes separated by a comma. In JUnit 5, the annotation of select classes is the same as suite class annotation; this is used to group the multiple classes of JUnit.
- Select package annotation is used to group the multiple tests. We need to give a string input value representing the package value.
- The example below shows creating a test suite by using multiple classes. We are also using run with annotation as follows.
- In the below example, we have used two classes named Test1.class and Test2.class. This is because wee using Runwith annotation.
Code:
@RunWith (JUnitPlatform.class)
@SuiteClasses ({Test1.class, Test2.class})
public class JUnit
{
}
Output:
Example of JUnit 5 RunWith
Different example are mentioned below:
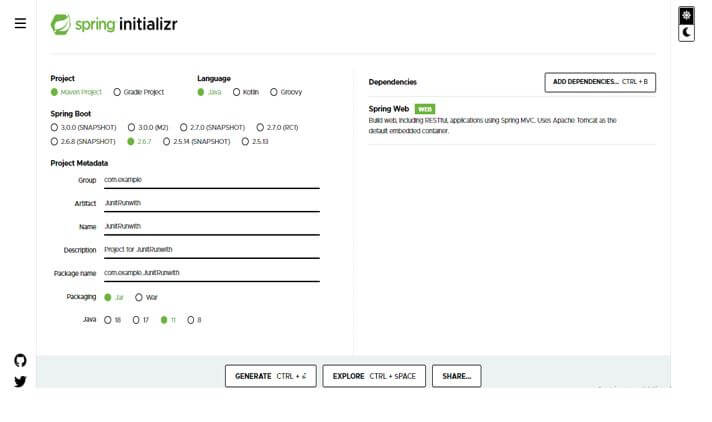
We are creating the project name as JUnitRunwith.
In this step, we create the project template of JUnit 5 runwith in spring boot. We provide the project group name as com. For example, the artifact name is JUnitRunwith, the project name is JUnitRunwith, and the selected java version is 11. We are defining the version of spring boot as 2.6.7.
- Group – com.example
- Artifact name – JUnitRunwith
- Name – JUnitRunwith
- Spring boot – 2.6.7
- Project – Maven Java – 11
- Package name – com.example.JUnitRunwith
- Project Description – Project for JUnitRunwith
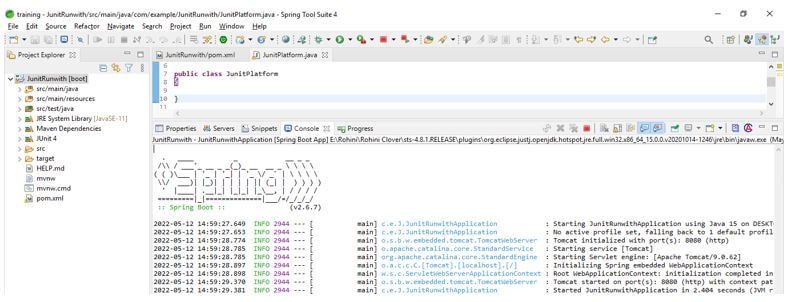
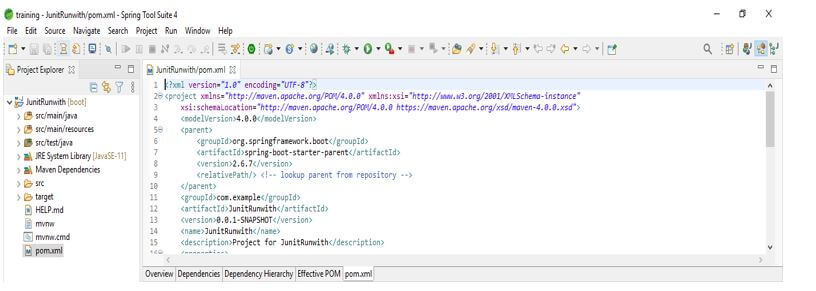
In this step, we extract the downloaded project and open the same by using the spring tool suite.

In this step, we check all project structures and their files. Also, we are checking whether that pom.xml file is created or not. If suppose this file is not created, we need to create the same manually. However, this file is created in the below example, so we do not need to create it manually.
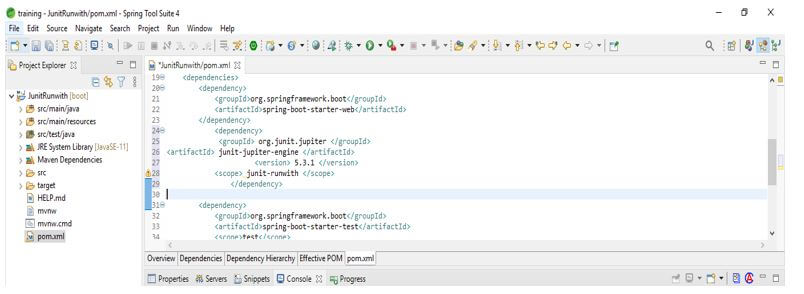
Add the JUnit dependency to the project. We are adding JUnit dependency as follows.
Code:
<dependency>
<groupId> org.JUnit.jupiter </groupId>
<artifactId> JUnit-jupiter-engine </artifactId>
<version> 5.3.1 </version>
<scope> JUnit-runwith </scope>
</dependency>
Output:
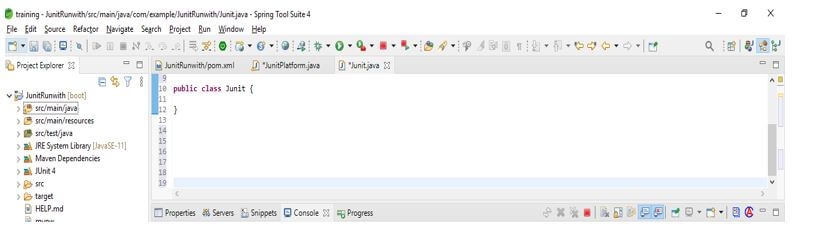
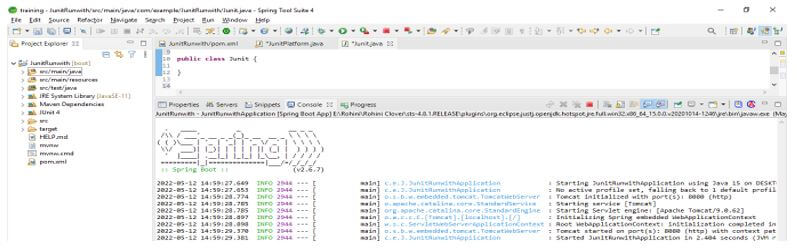
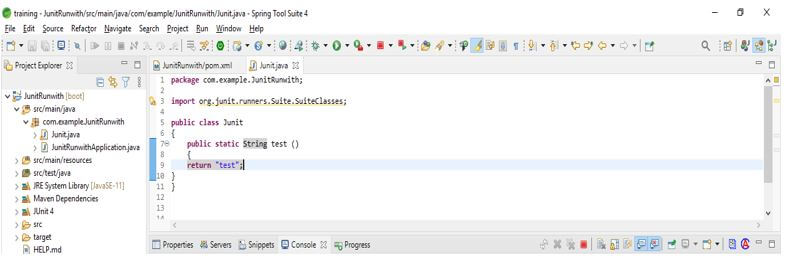
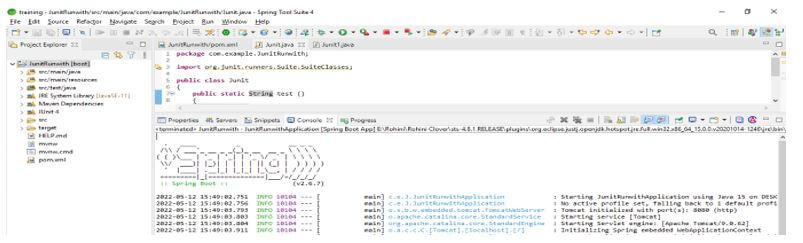
After adding the dependency in this step, we create the class we are testing using the JUnit 5 test suite. In the below example, we create the class name JUnit as follows.
Code:
public class JUnit
{
public static String test ()
{
return "test";
}
}
Output:
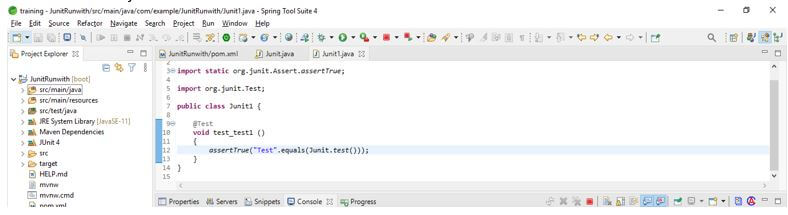
After creating the test class in this step, we create the plain JUnit 5 test using the JUnit class.
Code:
public class JUnit1 {
@Test
void test_test1 ()
{
assertTrue ("Test".equals (JUnit.test ()));
}
}
Output:
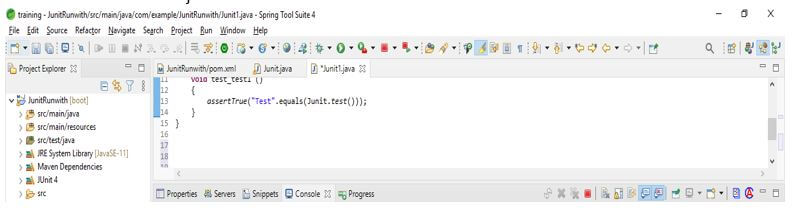
After creating the plain text JUnit class in this step, we add the runwith annotation as follows.
Code:
public class JUnit1 {
@Test
@RunWith(JUnitPlatform.class)
void test_test1 ()
{
assertTrue ("Test".equals (JUnit.test ()));
}
}
Output:
Conclusion
JUnit 5 runwith project contains a tree-like structure. The structure will start from the source module. It is used to test the application by using backward compatibility features. The annotation is very powerful except API of the runner.
Recommended Articles
This is a guide to JUnit 5 RunWith. Here we discuss the introduction, JUnit 5 RunWith project structure, and examples. You may also have a look at the following articles to learn more –
