Updated June 12, 2023
Introduction to CSS cursor options
CSS Cursor Options is defined as the mouse cursor displayed while pointing on an element, which has been a useful tool for developers. It helps to define a cursor type displayed to the respective user. In addition, the cursor option assists in understanding the actions required to explore the pages by hovering over each element with different options. By default, the cursor displays default cursor options, and in the rest of the values, it shows the sign and symbol to perform any actions.
Syntax
The general syntax, which is easy to understand, is as follows:
Cursor: Property value;In the next section, we briefly provide the property value and styles.
Browser Supported: It is pretty much supported in all browsers. Mozilla and Safari specify vendor-prefixed cursor styles with the web kit.
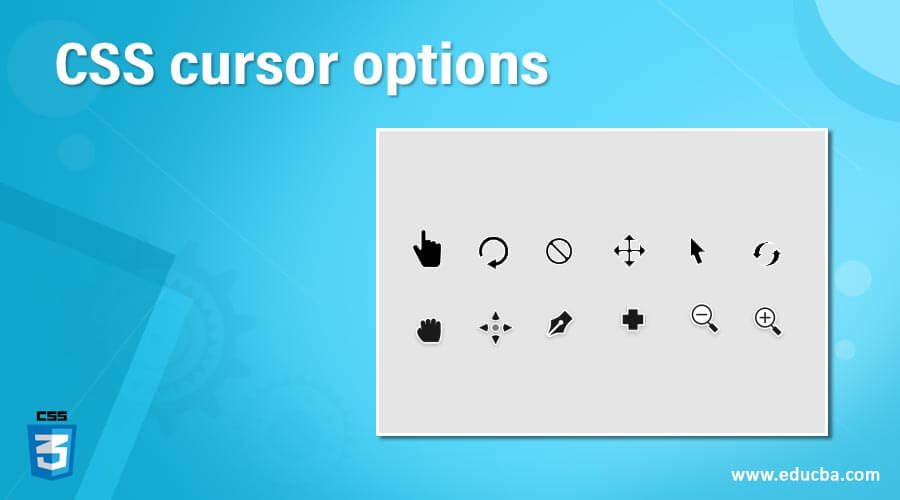
Cursor options in CSS
CSS uses the value pointer on Cursor Property. Here we can see More cursor options for a particular element on the web pages with examples. In all these examples, placing a cursor over any list of items changes into different options.
- all-scroll: In this property, the cursor indicates scrolling.
- auto: This is the default, and the browser sets the area of the content.
- cell: This cursor value depicts the set of cells like in an Excel row.
- context-menu: This sets the cursor specifying the availability of Context.
- col-resize: This value indicates that the cursor shows how the column can be resized horizontally.
- copy: This assigns when to copy any element.
- crosshair: This set is a crosshair showing plus sign.
- default: The default cursor.
- e-resize: This type makes the object directly to the right.
- ew-resize: Here, the resizing occurs Bidirectional.
- help: This cursor sets for any help cases.
- move: This type indicates something is to be moved with a four-directional dragging arrow.
- URL: This Property sets accustom Cursors with the list of URLs.
- w-resize: In this property, the cursor indicates an edge of a box is to be moved left.
- wait: This property sets when the process/task is busy.
Other Cursor options are se-resize, s-resize, sw, w, n, nw, se-resize, and ns-resize, in which the cursor indicates an action on the edge of a box(S, N, W, E denotes the cardinal directions). This wide variety of Cursor options helps in setting cursor usage. We can show our custom cursor wherever we like while developing a website.
Examples of CSS cursor options
Given below are the examples of CSS cursor options:
Example #1
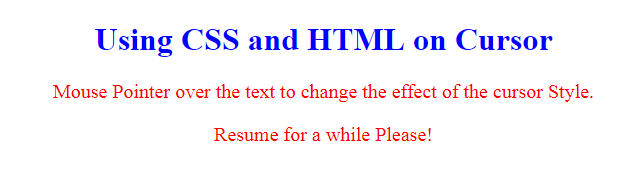
With Wait cursor Type.
Cursor.html:
<!DOCTYPE html>
<html>
<head>
<title>
CSS Demo on Cursor Property
</title>
<style>
.main {
cursor: wait;
}
h1 {
color: blue;
}
p
{ font-size: 20px;
color:red;
}
</style>
</head>
<body>
<center>
<h1>Using CSS and HTML on Cursor</h1>
<p>Mouse Pointer over the text to change the effect of the cursor Style.</p>
<p class="main"> Resume for a while Please!</p>
</center>
</body>
</html>
Explanation: The above code creates a Main class where the cursor is assigned as a wait to make the task resume for a time. By running the above code, we get the following output as
Output:
Example #2 – Grab
Sometimes, a page requests for a cursor hand when hovering over a list item; in that case, the ‘grab’ value is assigned as a cursor property. Let us see an example and discuss the grab value on the code.
ord-cur.html:
<!DOCTYPE html>
<html>
<head>
<title>Title of the document</title>
<style>
h2 {
text-align: center;
Color : Red;
}
li {
margin: 4px 4px 12px;
}
li:hover {
cursor: grab;
color: Aqua;
}
</style>
</head>
<body>
<h2>EDUCBA - Free/ Certification Courses</h2>
<div>
A massive Online Course to keep everyone learning.
</div>
<ol type="I">
<li>Python For Begineers</li>
<li>Data Science with Python</li>
<li>Examples and Demo</li>
<li>Case Studies On them</li>
<li>Assessment and Assignment</li>
</ol>
</body>
</html>
Explanation: Here, we have created an ordered list in which a hover is pointed to the list values. The output looks like this:
Output:
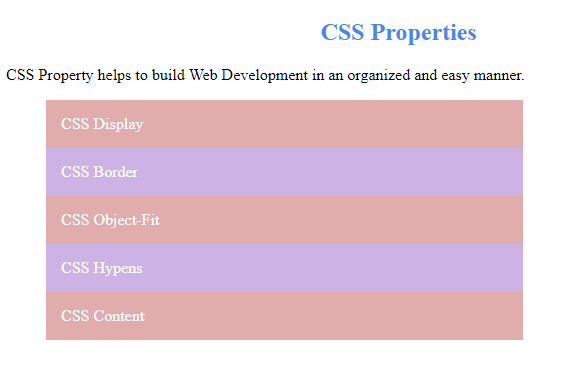
Example #3
Using Cell value on List
ord-cur.html:
<!DOCTYPE html>
<html>
<head>
<title>Title of the document</title>
<style>
body {
width: 100%;
}
h2 {
color: #4287f5;
text-align: center;
}
li {
list-style-type: none;
padding: 15px;
color: #ffffff;
}
li:nth-child(odd) {
background-color: #e0acac;
cursor: cell;
width: 60%;
}
li:nth-child(even) {
background-color: #ccb2e5;
cursor: cell;
width: 60%;
}
</style>
</head>
<body>
<h2>CSS Properties</h2>
<div>
CSS Property helps to build Web Development in an organized and easy manner.
</div>
<ul>
<li>CSS Display</li>
<li>CSS Border</li>
<li>CSS Object-Fit</li>
<li>CSS Hypens</li>
<li>CSS Content</li>
</ul>
</body>
</html>
Explanation: Here, the alternate cells are assigned a color. When we click the List, the cursor points as a Cell symbol.
Output:
Example #4
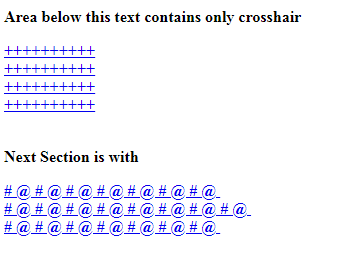
With Move and Help Values
ord-cur.html:
<html>
<head>
<title>Article- Cursor</title>
<style type="text/CSS">
.first
A{cursor:move}
.second A{cursor:help}
</style>
</head>
<body>
<strong>
<p>Area below this text contains only crosshair</p>
<span class="first">
<a href="www.educba.com"> ++++++++++</a><br>
<a href="www.educba.com">++++++++++</a><br>
<a href="www.educba.com">++++++++++</a><br>
<a href="www.educba.com">++++++++++</a><br>
</span><br>
<p>Next Section is with </p>
<span class="second">
<a href="www.educba.com"> # @ # @ # @ # @ # @ # @ # @  </a><br>
<a href="www.educba.com"># @ # @ # @ # @ # @ # @ # @ # @ </a><br>
<a href="www.educba.com"># @ # @ # @ # @ # @ # @ # @ </a><br></span></strong></body>
</html>
Explanation: The Above Output shows two cursor options that move and helps over a different area. Here I have created two classes for the corresponding cursor. When you click on the first area, we can see hover over the first text and the help symbol in the next part.
Output:
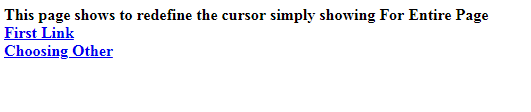
Example #5
Implementing cursor Option on entire page with Copy Cursor
ord.html:
<html>
<head>
<style type="text/css">
body {cursor: copy}
</style>
</head>
<body>
<b>
This page shows to redefine the cursor simply showing For Entire Page
<br>
<a href="homepage.htm"> First Link</a>
<br>
<a href="linkhr.htm"> Choosing Other</a>
</b>
</body>
</html>
Output:
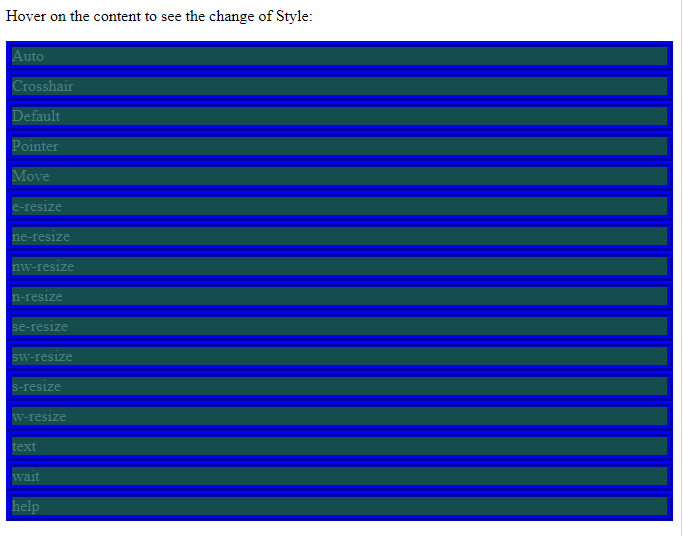
Example #6
Complete Implementation carrying all Cursor Options
ord.html:
<html>
<head>
<style>
div{font-family:Algeria; padding:10spx; border:6px ridge #0000ff;
background:#154c4e; color:#4a7f7b}
</style>
</head>
<body>
<p>Hover on the content to see the change of Style:</p>
<div style="cursor:auto">Auto</div>
<div style="cursor:crosshair">Crosshair</div>
<div style="cursor:default">Default</div>
<div style="cursor:pointer">Pointer</div>
<div style="cursor:move">Move</div>
<div style="cursor:e-resize">e-resize</div>
<div style="cursor:ne-resize">ne-resize</div>
<div style="cursor:nw-resize">nw-resize</div>
<div style="cursor:n-resize">n-resize</div>
<div style="cursor:se-resize">se-resize</div>
<div style="cursor:sw-resize">sw-resize</div>
<div style="cursor:s-resize">s-resize</div>
<div style="cursor:w-resize">w-resize</div>
<div style="cursor:text">text</div>
<div style="cursor:wait">wait</div>
<div style="cursor:help">help</div>
</body>
</html>
Output:
Conclusion
Therefore, we have seen different CSS options on the Cursor property by giving examples and understanding basic and implementation concepts. Then, we can try different browsers to check how it works well with other clients.
Recommended Articles
We hope that this EDUCBA information on “CSS cursor options” was beneficial to you. You can view EDUCBA’s recommended articles for more information.

