


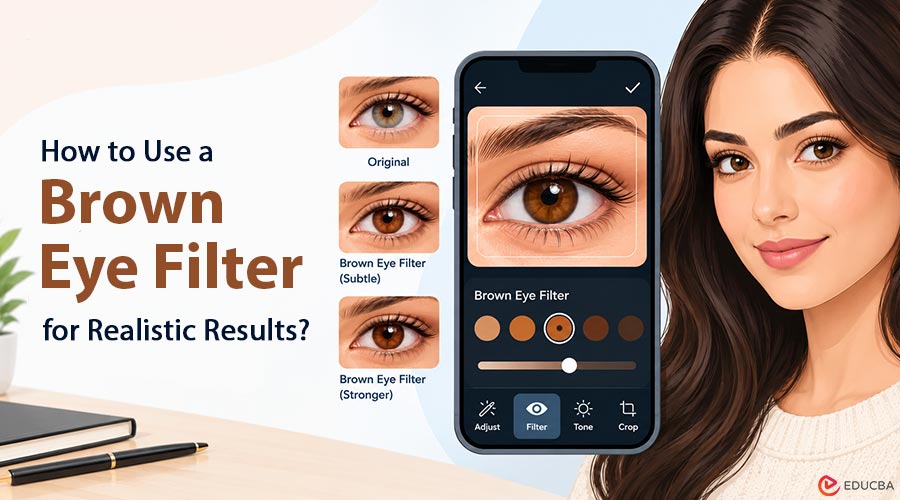
Most people take selfies in dull light, and their eyes look flat or uneven. A small edit can fix that without making the photo look fake. This guide explains how to use a brown eye filter, choose the right shade, and adjust eye color for different lighting conditions. It also covers common editing mistakes, practical tips for maintaining consistency, and frequently asked questions. Whether you are editing selfies, portraits, or videos, these techniques can help you achieve subtle, believable results.
Key Takeaways
- A good edit is small. If friends notice the filter before they notice you, dial it back.
- Brown eyes can look light, dark, or uneven depending on angle, shade, and camera processing.
- Match the eye shade to your skin tone, hair color, and the photo’s lighting.
- Edit a whole photo set the same way so your feed looks consistent.
- Color filters are a safer way to try a new look than decorative contact lenses, which carry real eye health risks.
Why Eye Color Looks Different in Photos?
According to the American Academy of Ophthalmology, eye color comes from the amount of melanin in the iris. More melanin creates darker eyes, and brown is the most common eye color worldwide. Yet brown is not one single shade. Light can turn the same eyes honey in the sun and almost black in a dim room.
Cameras add their own twist. Phone cameras sharpen, brighten, and smooth images, which can wash out the iris. A window on one side of your face can make one eye look lighter than the other. A shadow from your brow can hide the warm tones you see in the mirror.
This is why so many people reach for a brown eye filter. According to CapCut’s tool page, it lets users adjust iris depth, warmth, and ring definition without covering the eye’s natural texture. It also lets you preview the look in different lighting settings and keep the same style across a set of photos. Those are the three jobs that matter most for selfies: depth, warmth, and consistency.
What a Brown Eye Filter Actually Does?
A brown eye filter finds the iris in your photo and changes its color values. Good tools keep the fine lines and the dark ring around the iris, so the eye still looks real. Weak tools paint a flat circle over the eye, and that is when a photo starts to look odd.
Here is what you can usually change:
| Setting | What it does | Best use |
| Depth | Makes the brown darker or lighter | Fix eyes that look too pale in bright light |
| Warmth | Moves the tone toward amber or chestnut | Match warm skin or golden indoor light |
| Ring definition | Sharpens the edge of the iris | Add focus without extra makeup |
| Intensity | Controls how strong the effect is | Keep the look soft and believable |
CapCut also says the tool can help balance uneven eyes, for example, when an angle or reflection makes one iris look lighter. That kind of fix is quiet. Nobody sees it, but the face looks more even.
Step by Step: A Simple Way to Edit Eye Color
You do not need pro skills. These steps work with most editing apps and with the CapCut desktop editor.
- Start with a sharp photo: A filter cannot fix a blurry eye. If you can, take the selfie near a window.
- Zoom in on the eyes: Check for glare, shadows, and red tones before you edit.
- Apply the brown eye filter at low strength: Start at about one-third of the full effect and increase it slowly.
- Adjust warmth: Cool light needs a little more warmth. Warm light needs less.
- Compare before and after: If the eyes pull your attention away from the whole face, flip between the two views and lower the strength.
- Check the whites of the eyes: They should stay clean and natural. If it turns grey or yellow, the edit is too strong.
- Export one test copy: View it on a phone at normal size, not only zoomed in.
In the CapCut desktop editor, CapCut’s own guide says you can open the Retouch tab, go to Makeup, then Eye color, and pick the brown lens option. It also points to a template for brown eyes in the Templates tab.
Picking the Right Shade of Brown
Brown has many tones. Choosing well makes the edit feel natural.
- Light hazel brown: Works well with fair skin and light hair. It looks soft in daylight.
- Chestnut: A warm middle tone that suits most skin tones and works well in most lighting.
- Dark espresso: Looks rich on darker skin tones and in evening photos. In flat light, it can look heavy, so watch the intensity.
CapCut’s page says the tool helps match iris tone to skin undertone, hair color, and light direction. That is a useful rule. Before you choose, look at your hair and skin, then pick the shade closest to them.
Common Mistakes to Avoid
Most bad edits come from the same few errors.
- Going too strong: A bright, flat circle looks like a sticker.
- Editing only one photo: If your next post shows a different eye shade, people notice.
- Ignoring the light: A shade that looks good outdoors can look odd under a yellow lamp.
- Hiding the catchlight: The small white reflection in the eye gives it life. Keep it.
- Over-smoothing the skin around the eyes: Fine lines are normal. Removing them makes the eyes look cut out.
A Composite Example: Two Edits of the Same Selfie
The example below is a composite built from common editing patterns. It is not a real user story, and it only shows how small changes add up. Amina took a selfie in a café. The lamp above her cast a shadow, so her left eye looked darker than her right. She first tried a strong filter at full power. Both eyes turned bright copper, and her friends joked she looked like a cartoon.
She then repeated the edit with a softer approach. She raised the depth slightly on the lighter eye, added a touch of warmth to match the lamp, and kept the filter low. The result looked like a well-lit photo, and nobody could say what had been changed. The second version was the one she posted. The lesson is simple. A quiet edit that fixes a real problem looks better than a bold edit that tries to impress.
Keeping Your Photo Set Consistent
If you post often, the same eye tone across photos makes your profile look polished. Save your settings if the app allows it. Apply the same depth and warmth to each photo, then adjust only for light. CapCut notes that using one setting across a photo set helps keep retouching uniform across albums and prints. Check your edits on a phone screen and a laptop screen. Colors shift between devices, and a tone that looks right on one screen can look too red on another.
A Note on Honesty and Safety
Edits should help you look like a clear version of yourself, not hide who you are. Be honest with yourself about how editing makes you feel. If you start to feel that your real face is never good enough, take a break from filters and talk to someone you trust. If you like the look of a different eye color and are thinking about decorative contact lenses, be careful. The US Food and Drug Administration treats decorative lenses as medical devices and says they need a prescription.
It warns that lenses bought without an eye exam can cause infections, scratches, and even vision loss. A digital filter lets you try a new look without risking your eyes. If you do buy lenses, get them through a licensed eye care professional. Also ask before you edit or post a photo of another person. Changing someone else’s features without their permission is unkind and can cause real upset.
Quick Checklist Before You Post
- Is the photo sharp around the eyes?
- Did you keep the catchlight and iris texture?
- Does the eye shade match your skin, hair, and light?
- Do both eyes match each other?
- Does the photo still look like you?
- Would the edit still look good on a different screen?
Final Thoughts
Good editing is quiet. A well-chosen brown eye filter can fix uneven light, restore warmth, and keep your eyes looking like your own. Start with a sharp photo, keep the strength low, match the shade to your skin and the light, and check the result on more than one screen. When in doubt, choose the softer version.
This article is for general information and does not replace advice from an eye care professional.
Frequently Asked Questions (FAQs)
Q1. What does a brown eye filter do?
Answer: It changes the iris color values so the eyes look deeper, warmer, or more even, while keeping natural texture when the tool is well made.
Q2. Can a brown eye filter look real in close-up photos?
Answer: Yes, if you use a low intensity and keep the iris texture and catchlight. Heavy settings are what make close-ups look fake.
Q3. Is it only for selfies?
Answer: No. It also helps with portraits, group photos, and videos, especially when light makes eyes look uneven.
Q4. Is a filter safer than coloured contact lenses?
Answer: For trying a look, yes. A filter does not touch your eye. Decorative lenses can cause infections if they are not properly fitted and prescribed, according to the FDA.
Q5. How do I make my edits look less obvious?
Answer: Start low, match the shade to your skin and the light, compare with the original, and edit your whole set the same way.
Recommended Articles
We hope this comprehensive guide to using a brown eye filter helps you enhance your selfies and achieve natural-looking results. Check out these recommended articles for more photo-editing tips and creative ways to improve your photography.