EDUCBA

EDUCBA

MENUMENU
  • Free Tutorials
  • Free Courses
  • Certification Courses
  • 280+ Courses All in One Bundle
  • Login

After Effects Green Screen

Secondary Sidebar
After Effects Tutorial
  • Effects
    • Crop in After Effects
    • Color Grading in After Effects
    • Text Effects in After Effects
    • After Effects Templates
    • After Effects Bounce Expression
    • Time Remapping After Effects
    • After Effects Gradient
    • After Effect Font
    • After Effects Duplicate Composition
    • After Effects Expressions List
    • After Effects Green Screen
    • After Effects Loop Composition
    • Drop Shadow in After Effects
    • Background in After Effects
    • Blur in After Effects
    • After Effects Freeze Frame
    • After Effects Move Anchor Point
    • After effects?Quicktime
    • Text in After Effects
    • Motion Blur in After Effects
    • Mask in After Effects
    • Color Correction in After Effects
    • Blending Modes in After Effects
    • Track Matte in After Effects
    • Transparent Background in After Effects
    • Slow Motion in After Effects
    • Animation in After Effects
    • Text Animation in After Effects
    • Logo Animation in After Effects
    • 2D After Effects Animation
    • 3D Effects in After Effects
    • 3D Text in After Effects
    • After Effects 3D Objects
    • Shape Layers in After Effects
    • Export in After Effects
    • Morphing in After Effects
    • Twitch in After Effects
    • Snowfall in After Effects
    • Rain in After Effects
    • Masking Layers in After Effects
    • Group Layers in After Effects
    • Glitch Effect in After Effects
    • Ripple Effect in After Effects
    • Composition in After Effects
    • After Effects Transitions
    • Typography in After Effects
    • Slider Control After Effects
    • Motion Graphics in After Effects
    • Wiggle in After Effects
    • After Effects Portable
    • Wiggle Expression in After Effects
    • Keylight in After Effects
    • Rotoscoping in After Effects
    • After Effects Render
    • After Effects Expressions
    • After Effects Presets
    • Duik After Effects
    • After Effects Split Clip
    • Trapcode in After Effects
    • Plexus After Effects
    • Logo Reveal After Effects
    • Mocha in After Effects
    • Twixtor in After Effects
    • Lens Flare in After Effects
    • After Effects Particles
    • After Effects Timeline
    • After Effects Tracking
    • Camera Tracking in After Effects
    • After Effects Repeater
    • After Effects Cartoon
    • After Effects Loop Expression
    • After Effects?Optical Flares
    • Glow in After Effects
    • After Effects GIF
    • After Effects Motion Tracking
    • After Effect Kinetic Typography
    • Cut Clips in After Effects
    • Lower third after effect
    • Masking Layers in Adobe After Effects
  • Basic
    • What is After Effects
    • After Effects Versions
    • After Effects Software
    • After Effects Shortcuts
    • Adobe After Effects Plugins
    • How to Use After Effects
  • After Effects Tools
    • After Effects Tools
    • After Effect Hologram
    • Pen Tool in After Effects
    • Puppet Tool in After Effects
    • KeyFrames in After Effects
    • Adding Keyframes in After Effects

Related Courses

After Effects Training Course

Adobe Premiere Pro Training Course

Design Training Course

Home Design Design Tutorials After Effects Tutorial After Effects Green Screen

After-Effects-Green-Screen

Introduction to After Effects Green Screen

Adobe After Effects is an animation and video editing software. This article will learn how to use green screen in footage to give a custom background by removing it in after effects. We will also see the use of a plugin to do the same.

All in One Design Bundle(280+ Courses, 100+ projects)
AutoCADHoudiniAdobe Premiere ProPhotoshop
SolidworksVFX Visual EffectsCorelDrawUnreal Engine
Price
View Courses
280+ Online Courses | 100+ projects | 2000+ Hours | Verifiable Certificates | Lifetime Access
4.6 (64,520 ratings)

Steps to After Effects Green Screen

Different steps are mentioned below:

Start Your Free Design Course

3D animation, modelling, simulation, game development & others

Step #1

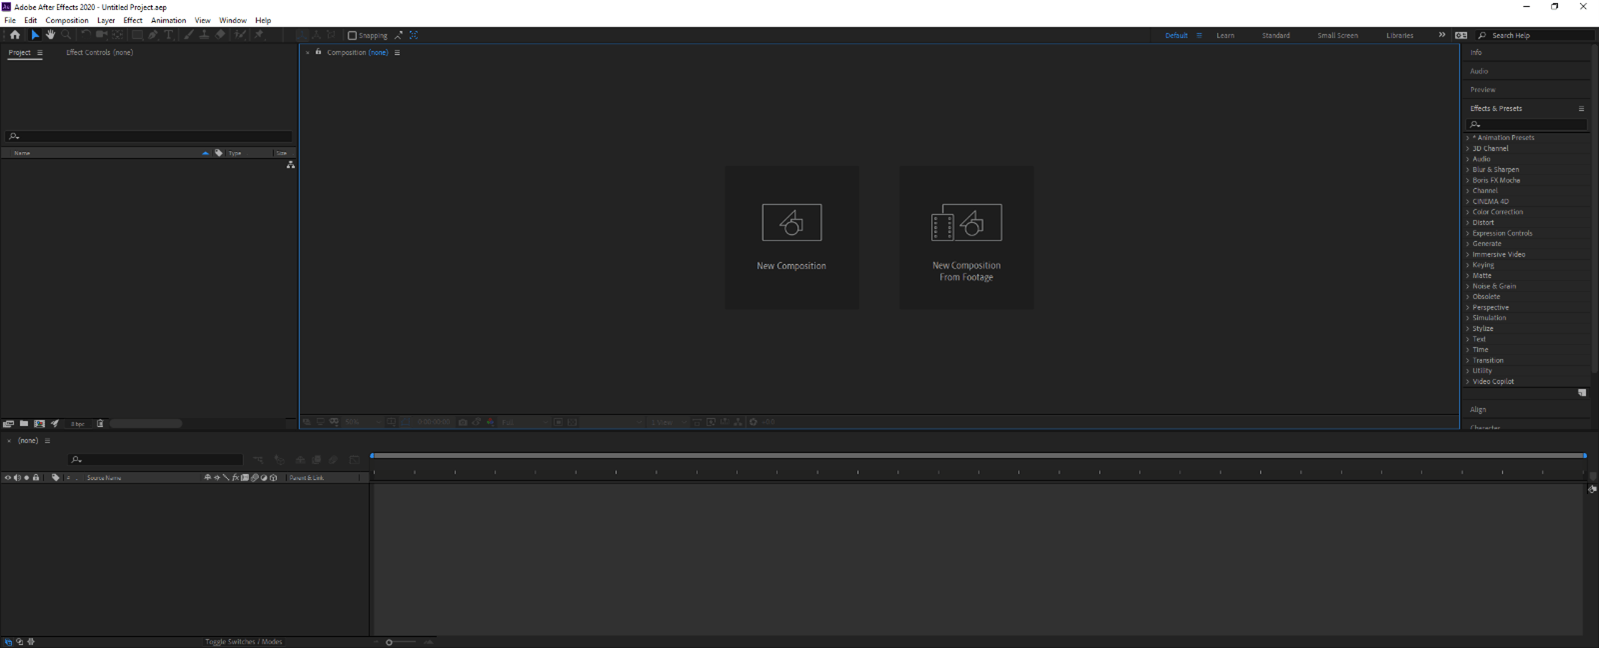
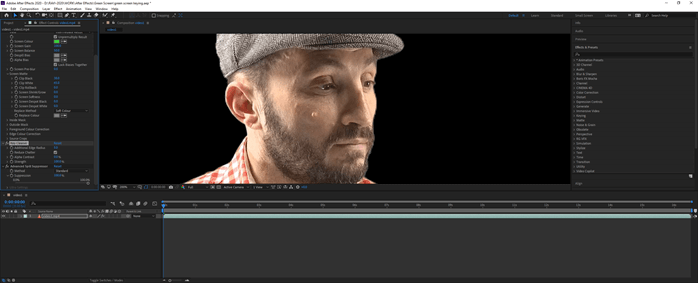
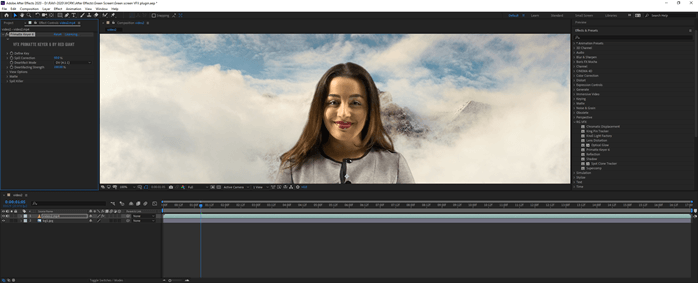
Let us first familiarize ourselves with the interface before starting to get a better understanding. At the top is the menu bar like File, Edit, etc., and each has its own submenu. Next, just below it, we have a tool panel and their properties. On the left side, a project panel consists of the project files and an effects control panel, which shows the effects applied on a particular layer. Then there is the composition panel which shows the preview of the animation or video. At the top right, we have various layout presets, which will arrange according to the type of work. We can even create our own custom layout. At the right, there are various sections used to edit the video. Finally, at the bottom, there are layers and a timeline panel used to add media and add animation keyframes.

After Effects green screen output 1

Step #2

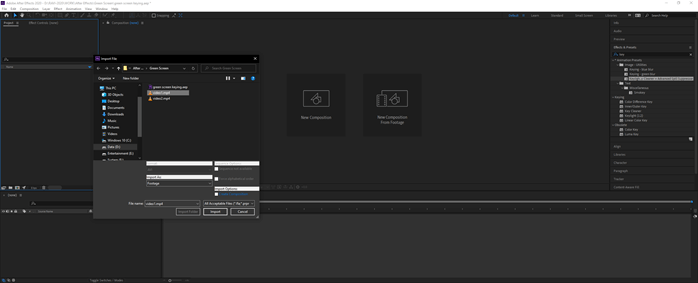
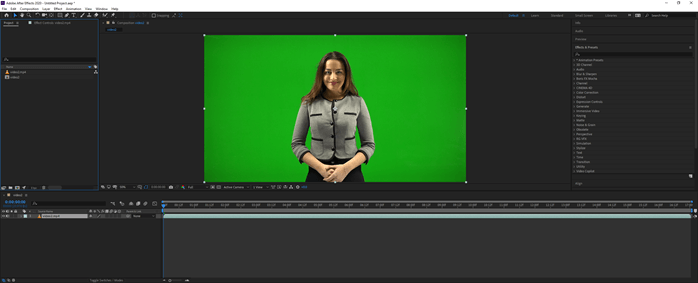
Double-click on the Project panel to import the footage with a green background.

After Effects green screen output 2

Step #3

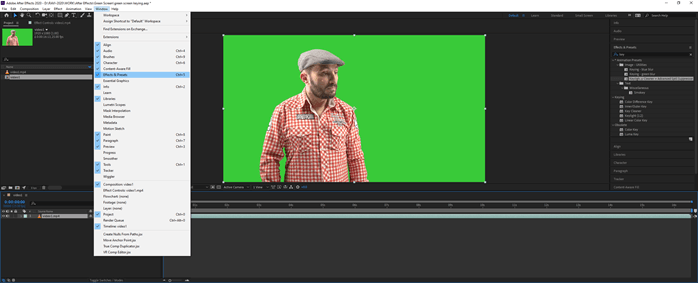
Drag the footage in the layers panel to create a comp and then go to Window -> Effects and Preset

After Effects green screen output 3

Step #4

Search key in the effects and preset panel, and you will find Keylight + Key Cleaner + Advanced Spill Suppressor. Select and drag it on the footage. This will give us all three different effects simultaneously.

After Effects green screen output 4

Step #5

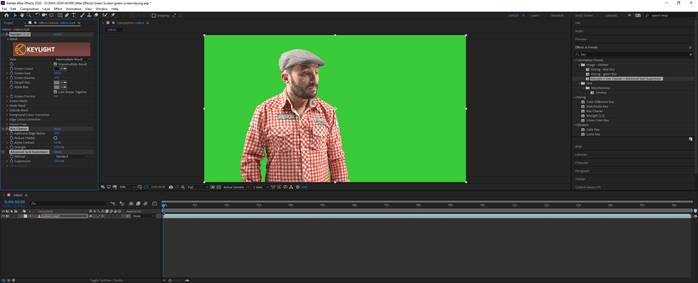
We can see that near the Screen Colour property in the Keylight effect, there is a color picker, so use it to pick the green color. Press Ctrl to sample a greater area which also increases the size of the color picker.

After Effects green screen output 5

Step #6

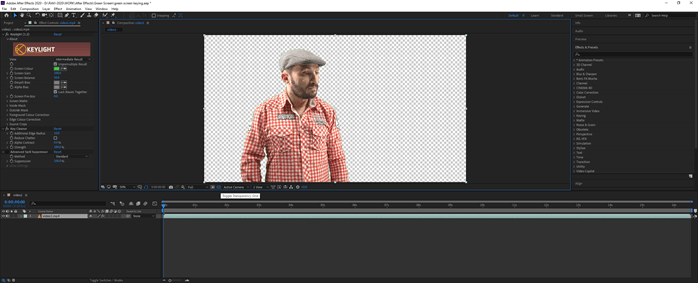
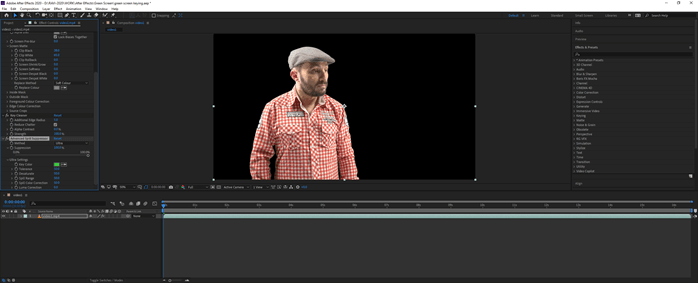
You can toggle the transparency grid to see the transparent area.

After Effects green screen output 6

Step #7

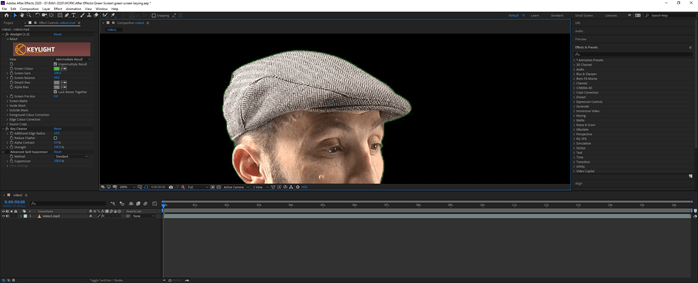
When we zoom in, we can still see green on the fringes. So, we have to adjust the parameters of the keylight effect.

After Effects green screen output 7

Step #8

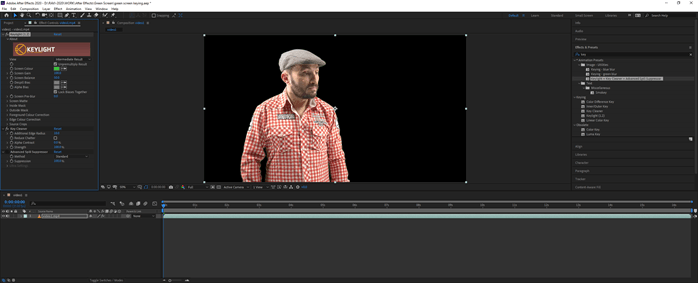
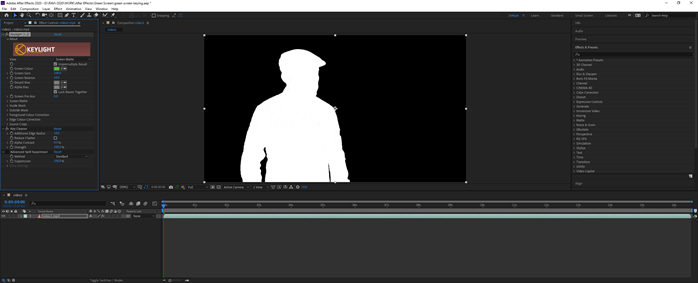
First, we will set the view to Screen Matte. This will clearly show the areas which are hidden in black and visible in white.

After Effects green screen output 8

Step #9

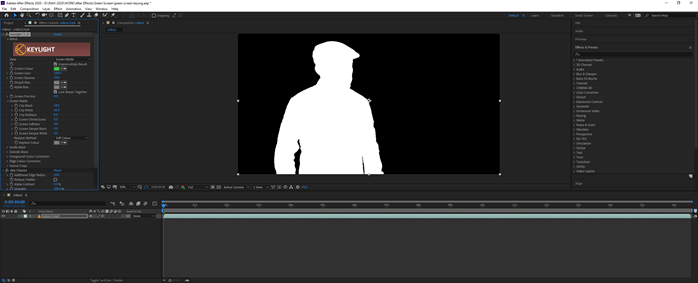
Inside the Screen Matte dropdown, Clip Black and Clip White can adjust those in such a way that the dark part is completely black, which removes the grey area, and the white part is completely white, which also removes the grey area.

After Effects green screen output 9

Step #10

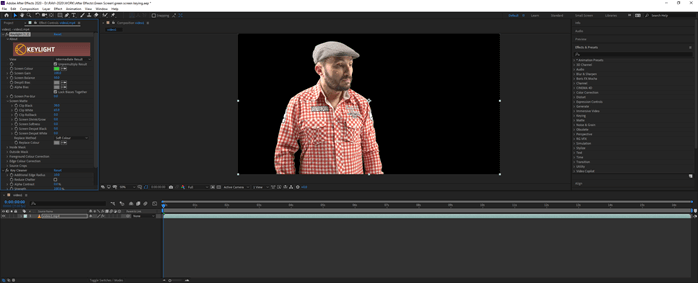
Change the view back to the Intermediate result. Don’t set the view to the Final result as you might see artifacts as that view does not work well with Key Cleaner.

After Effects green screen output 10

Step #11

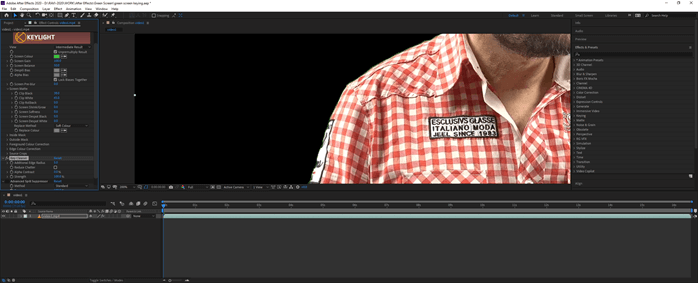
In the Key Cleaner effect, we can reduce the Additional Edge radius to 5.0 to make the subject a little sharper.

After Effects green screen output 11

Step #12

Then check to Reduce Chatter, making sure that there is no visual noise on the edges or the subject.

After Effects green screen output 12

Step #13

Since we are getting a lot of green fringes due to color spills, let us turn on the Advanced Spill Suppressor, and it will remove it. This effect will automatically detect whether you are using a green screen or a blue screen.

After Effects green screen output 13

Step #14

If this effect gives you some undesirable results, you can change the method to Ultra, giving you some additional settings to select the key color and another color adjustment.

After Effects green screen output 14

Step #15

If you want to make your edges a little smoother, you can use the Screen Shrink/Grow option and the Screen Softness option.

After Effects green screen output 15

Step #16

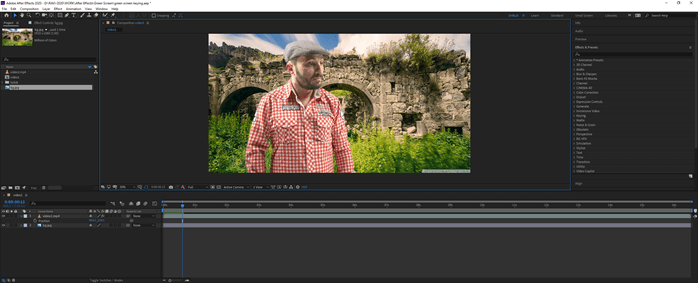
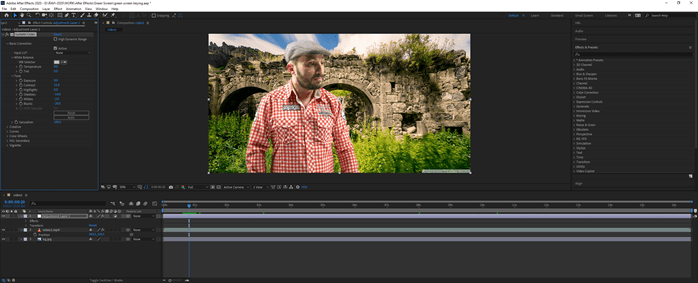
Now let us add a background for importing an image and adding it in the layers panel at the bottom.

After Effects green screen output 16

Step #17

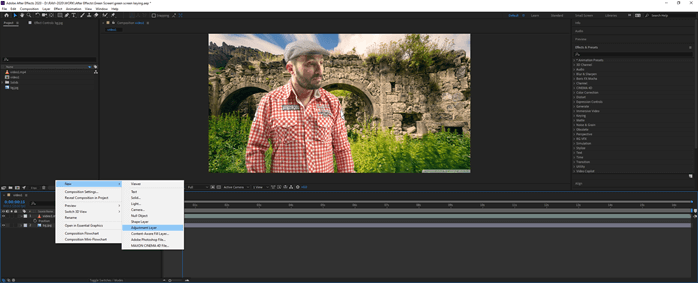
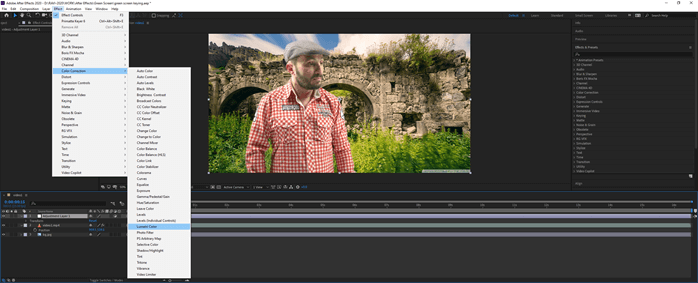
Then we will create a new Adjustment layer by right-clicking on the layers panel and then adding a Color Correction effect, Lumetri Color.

After Effects green screen output 17

After Effects green screen output 18

Step #18

Next, we do some Basic color corrections like adjusting the white balance to set the time of the day and also adjusting the temperature and tint. Finally, we have adjusted the tone by changing exposure, contrast, highlight, shadows, whites, and blacks to make the subject immerse in the environment.

output 19

Step #19

We have looked at the in-built method in after effects; next, we will use a plugin from RG VFX, which will help us with keying and for this, we will create a new project and import our footage and create a comp with it.

output 20

Step #20

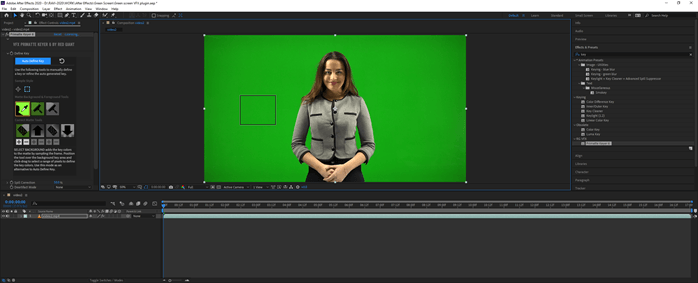
To apply this plugin, go to Effects -> RG VFx -> Primatte Keyer 6

output 21

Step #21

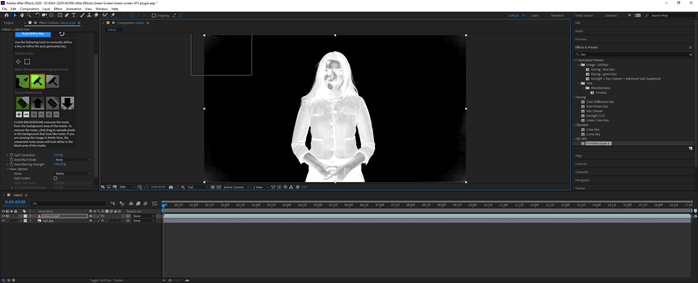
In the defined key section, first, we have to select our sample style. The first is the point sample style, and another is the rectangle sample style. Point style is similar to the Keylight effect in which we use an eyedropper, but you can also drag the pixel to create a trail and get a better sample area. In Rectangle style, we drag a box and sample multiple pixels. Let us use the rectangle style while the select the background tool is selected.

output 22

Step #22

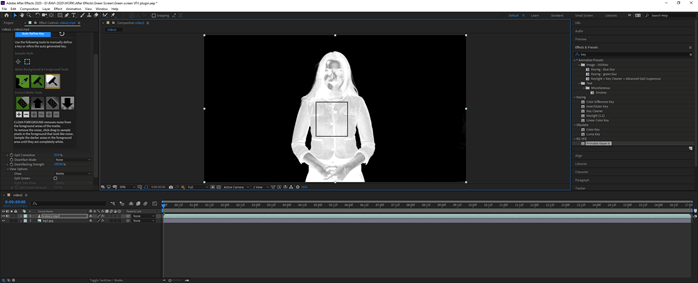
Change the view to matte and now use a clean background tool to remove the grey area.

output 23

Step #23

Then use a clean foreground tool to remove the grey from the whites. You can alternate between sample styles.

output 24

Step #24

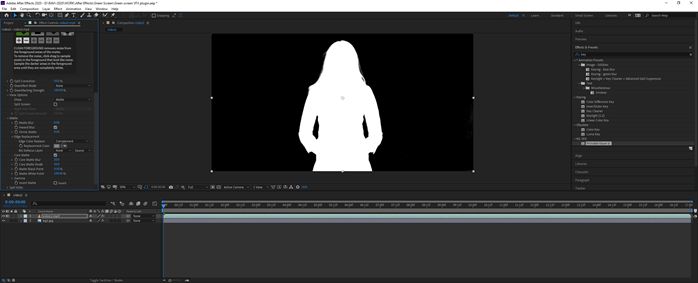
Another option is to check the core matte, which will fill the entire area inside the subject with white.

output 25

Step #25

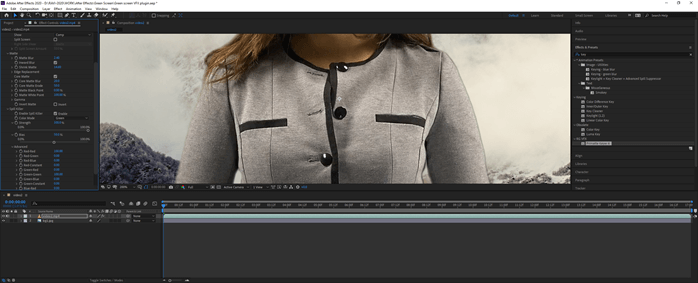
Next, change the view to comp, and we have also imported a background.

output 26

Step #26

Now we will see some green fringes, so to remove them, enable spill killer. Also, smooth the edges using shrink matte and matte blur.

output 27

Step #27

We can use Deartifact mode to reduce blocking around the edges of the image, and compression algorithms generally cause this. Set it to DV or compressed based on the type of shot footage.

output 28

Conclusion

In this article, we have learned not only how to use the default keylight effect in After Effects but also seen how to use the RG VFx plugin and used Primatte Keyer 6 effect to achieve the same result with much more functionality and greater flexibility to work with green screen.

Recommended Articles

This is a guide to After Effects Green Screen. Here we discuss how to use the default keylight effect, RG VFx plugin, and Primatte Keyer 6 effect in After Effects. You may also have a look at the following articles to learn more –

  1. After Effects Repeater
  2. Twitch in After Effects
  3. Duik After Effects
  4. After Effects Expressions
Popular Course in this category
After Effects Training (3 Courses, 3+ Projects)
  3 Online Courses |  3 Hands-on Projects |  25+ Hours |  Verifiable Certificate of Completion
4.5
Price

View Course

Related Courses

Adobe Premiere Pro Tutorial (4 Courses, 7+ Projects)4.9
All in One Design Bundle (280+ Courses, 100+ projects)4.8
0 Shares
Share
Tweet
Share
Primary Sidebar
Footer
About Us
  • Blog
  • Who is EDUCBA?
  • Sign Up
  • Live Classes
  • Corporate Training
  • Certificate from Top Institutions
  • Contact Us
  • Verifiable Certificate
  • Reviews
  • Terms and Conditions
  • Privacy Policy
  •  
Apps
  • iPhone & iPad
  • Android
Resources
  • Free Courses
  • Photoshop Tutorial
  • 3ds Max Tutorial
  • All Tutorials
Certification Courses
  • All Courses
  • Design Course - All in One Bundle
  • Photoshop Course
  • Maya Course
  • Unreal Engine Course
  • Unity Course
  • DaVinci Resolve Course
  • Pro Tools Course

ISO 10004:2018 & ISO 9001:2015 Certified

© 2022 - EDUCBA. ALL RIGHTS RESERVED. THE CERTIFICATION NAMES ARE THE TRADEMARKS OF THEIR RESPECTIVE OWNERS.

EDUCBA
Free Design Course

Banner Creation, Object Selection, Sky Replacement, Advance Filters & others

*Please provide your correct email id. Login details for this Free course will be emailed to you

By signing up, you agree to our Terms of Use and Privacy Policy.

EDUCBA Login

Forgot Password?

By signing up, you agree to our Terms of Use and Privacy Policy.

EDUCBA
Free Design Course

3D animation, modelling, simulation, game development & others

*Please provide your correct email id. Login details for this Free course will be emailed to you

By signing up, you agree to our Terms of Use and Privacy Policy.

EDUCBA

*Please provide your correct email id. Login details for this Free course will be emailed to you

By signing up, you agree to our Terms of Use and Privacy Policy.

Let’s Get Started

By signing up, you agree to our Terms of Use and Privacy Policy.

This website or its third-party tools use cookies, which are necessary to its functioning and required to achieve the purposes illustrated in the cookie policy. By closing this banner, scrolling this page, clicking a link or continuing to browse otherwise, you agree to our Privacy Policy

Loading . . .
Quiz
Question:

Answer:

Quiz Result
Total QuestionsCorrect AnswersWrong AnswersPercentage

Explore 1000+ varieties of Mock tests View more

Special Offer - After Effects Training Course Learn More