


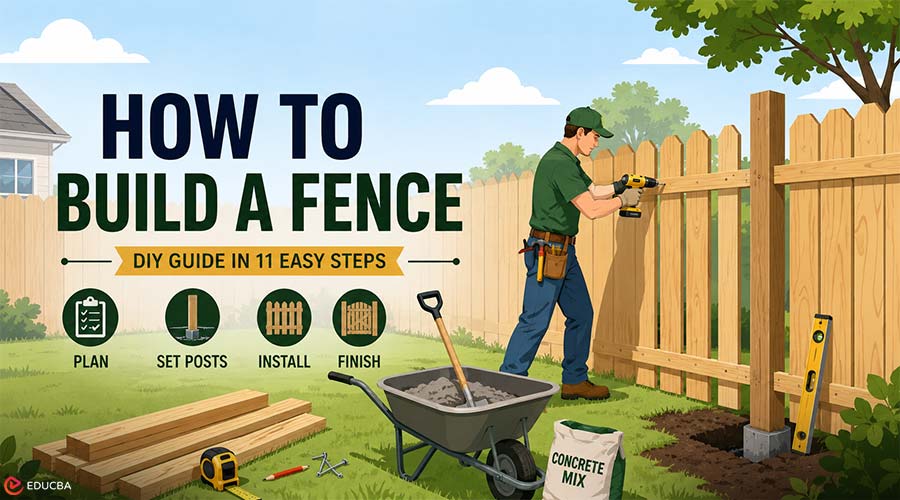
Learning how to build a fence starts before digging the first post hole. A strong fence depends on planning, accurate layout, property lines, permits, utility marking, material choice, post depth, gate placement, and proper installation. A fence can improve privacy, security, curb appeal, pet safety, and property boundaries. But if the posts are too shallow, the layout is off, or the wrong material is used, the fence may lean, sag, rot, or fail sooner than expected. Whether you are building a backyard privacy fence or planning a more security-focused fence, the steps below will help you understand the process from layout to final inspection.
How to Build a Fence in 11 Easy Steps?
Follow these essential steps to plan, install, and finish a durable fence, from choosing the right materials and marking the layout to setting posts, installing gates, and completing the final inspection.
Step 1: Decide What Type of Fence You Need
Before buying materials, decide what the fence needs to do. A privacy fence, security fence, decorative fence, and boundary fence all serve different purposes. A privacy fence is usually built with wood, vinyl, composite, or solid panels. It is common for backyards, pool areas, patios, and outdoor living spaces. This type of fence requires careful post spacing and clean panel alignment, as gaps, leaning posts, or uneven sections are easy to notice.
A security fence is built to help control access and protect property. It may use chain link, ornamental iron, steel, gates, or access-control features. Homeowners or business owners comparing security-focused fence options should work with a trusted professional like Inline Security Fence to help understand residential, commercial, and industrial fencing solutions. A decorative or boundary fence may be used for curb appeal, gardens, front yards, or property lines. It may not provide full privacy or security, but it still needs correct placement and stable posts.
Step 2: Check Property Lines, Permits, and Local Rules
Many fence problems arise because the fence is built in the wrong place or does not comply with local requirements. First, confirm the property line. Do not assume an old fence, tree line, or neighbor’s landscaping marks the true boundary. Use a survey, property records, or professional help if needed. This step can prevent disputes and expensive corrections later.
Next, check local fence height rules. Cities may have different rules for front yards, side yards, backyards, corner lots, and areas near sidewalks or driveways. Some locations also regulate fence materials, visibility, and placement. If your home is in an HOA or managed community, review those rules as well. HOAs may control fence color, height, material, style, and location. You may need approval before installation begins.
Step 3: Call 811 Before Digging
Before digging any fence post holes, request utility marking. Underground gas, electric, water, sewer, irrigation, and communication lines can run through areas where fence posts are planned.
Hitting a buried utility can be dangerous and expensive. Utility markings help you adjust your layout before digging begins. After utility lines are marked, use stakes and string to mark the fence layout. If a planned post location conflicts with a marked utility, adjust the layout before digging.
Step 4: Measure and Mark the Fence Layout
Accurate layout is what makes a fence straight, balanced, and professional-looking. Start by marking the corner posts. These posts establish the main fence lines. Use stakes and string to create straight runs between corners. Next, plan post spacing. Spacing depends on the fence material, panel size, and design.
Workers must place posts at exact intervals to support prebuilt panels. Wood fences, chain link fences, and ornamental fences may each have different spacing requirements. Plan gate locations before digging. Gates need the right width, clearance, hardware, and support. Think about lawn equipment, trash bins, pets, foot traffic, vehicles, and daily use. A gate that is too narrow or poorly placed can become frustrating, even if the rest of the fence is well built.
Step 5: Choose the Right Fence Materials
Fence materials affect cost, maintenance, lifespan, security, and appearance. Wood fencing is popular for privacy and a natural look. You can build it in many styles, but it requires maintenance. Staining, sealing, or painting can help protect wood from the sun and moisture. Without care, wood can warp, rot, split, or weather. Vinyl and composite fencing usually require less maintenance than wood. These materials work well for privacy and clean appearance, but they often cost more upfront than basic wood.
Chain link fencing is cost-effective, durable, and practical. It is commonly used for pets, boundaries, commercial properties, utility areas, and security applications. Privacy slats or coated finishes can improve appearance and function. Ornamental iron, steel, or aluminum fencing can provide visibility, security, and curb appeal. These materials are often used in front yards, on commercial properties, at access points, and in higher-end applications. Proper installation is important for long-term alignment and durability.
Step 6: Gather Tools and Supplies
Gather tools and materials before starting. This helps avoid delays once the holes are open. Common tools include a tape measure, level, stakes, string line, post hole digger or auger, shovel, drill or driver, saw, wheelbarrow, and concrete mixing tub.
Common materials include fence posts, rails or panels, pickets or mesh, concrete or gravel, screws or nails, brackets, tension hardware, hinges, latch hardware, gate framing, post caps, and finish materials. The materials required will vary depending on the type of fence you are building.
Step 7: Dig Fence Post Holes
Fence posts form the foundation of the fence. If the posts are weak, too shallow, or poorly spaced, the entire fence can lean or fail. Post depth depends on fence height, soil conditions, wind exposure, frost line, and local requirements. Taller fences usually require deeper, stronger posts.
Keep holes consistent. Remove loose soil from the bottom of each hole and make sure the holes are wide enough for proper support. In some installations, gravel at the bottom of the hole can help with drainage, especially for wood posts. Good drainage can reduce moisture problems around the base of the post.
Step 8: Set the Fence Posts
Place each post along the string line and check that it is plumb. Posts should be aligned vertically and positioned correctly before concrete is added. Builders commonly use concrete to stabilize fence posts.
Follow the product instructions and allow enough curing time before attaching rails or panels. Rushing this step can cause movement, leaning, or alignment problems. Recheck each post before the concrete sets. A small adjustment early can prevent a crooked fence line later.
Step 9: Attach Rails, Panels, or Mesh
This step depends on the type of fence. For a wood fence, workers attach horizontal rails to the posts and then install pickets along the rails. Keep spacing consistent and check alignment as you work. Installers must space the posts correctly from the beginning for prebuilt fence panels.
Panels can speed up installation, but they still require level posts and careful adjustments on slopes. For chain link fencing, installation includes terminal posts, line posts, top rail, tension bands, tension wire, and stretched fabric. Proper tension is important to keep the fence looking clean and secure.
Step 10: Build and Install the Gate
Gates need extra attention because they move and carry weight. A poorly installed gate can sag, drag, or fail to latch properly. Use strong gate posts. Wider or heavier gates may need larger posts, additional bracing, or stronger hardware.
Install hinges and latches that match the gate size and material. Check that the latch closes securely and lines up properly. Leave the right clearance. Account for ground slope, hardware movement, swelling wood, and daily use. A gate should open smoothly without scraping the ground.
Step 11: Finish and Protect the Fence
Once you build the fence, finish and inspect it. Wood fences should usually be stained, sealed, or painted to protect against the sun and moisture. Follow the finish product’s instructions and allow proper drying or curing time.
Clean up the fence line by removing extra concrete, loose dirt, debris, and cut materials. Check for sharp edges, exposed fasteners, loose rails, or unstable sections. Walk the full fence line and inspect posts, panels, rails, pickets, hardware, and gates. Make small corrections before calling the project complete.
When to Hire a Professional Fence Company?
DIY fence installation can work for simple backyard projects, but professionals are better suited to handle some fences. Large fence runs, slopes, uneven ground, retaining walls, rocky soil, tight access, and complex layouts can make installation harder. Mistakes in layout or post setting can make material installation expensive. Security, commercial, and industrial fences often need stronger materials, gate planning, durable hardware, and careful access-point design.
For larger projects, security fencing, commercial properties, or repairs requiring professional installation, Inline Security Fence can help property owners plan fence design, installation, and long-term durability. Driveway gates, commercial gates, and controlled access points also require more planning than a standard backyard gate. Hardware, alignment, safety, and daily use all need to be considered.
Common Fence Building Mistakes to Avoid
One of the biggest mistakes is skipping property line research. Building even a few inches into the wrong area can create neighbor disputes or removal costs. Another mistake is forgetting to call 811 before digging. Utility marking is a safety step, not an optional task. Setting posts too shallow can cause them to lean, wobble, or fail early. The fence may look fine at first, but weak posts often show problems after wind, rain, soil movement, or regular gate use.
Poor drainage can also shorten the life of the fence, especially with wood posts. Moisture around the base of the post can lead to rot and instability. Gate planning is another common problem. Gates that are too narrow, too heavy, or poorly supported may sag or fail. Finally, avoid choosing a material only because it is cheap. The best fence material depends on privacy, security, maintenance, durability, appearance, and the property’s actual use.
Final Thoughts
Learning how to build a fence means planning the layout, checking property lines, understanding local rules, calling 811, choosing the right material, setting posts correctly, and installing gates carefully. Good planning and preparation build the strongest fences before construction starts. A simple DIY fence may be manageable for a homeowner with the right tools and time, but larger, security-focused, or commercial fencing projects often benefit from professional installation. A fence is more than a row of posts and panels. When built well, it can improve privacy, security, function, and the overall use of the property for years.
Recommended Articles
We hope this guide on how to build a fence helps you plan and complete your fencing project with confidence. Check out these recommended articles for more fence installation tips and home improvement ideas.