Updated August 28, 2023
Introduction to Ripple Effect
In this article, we are going to learn how to create a ripple effect in After Effects. The ripple effect occurs when a disturbance is created on a smooth surface and it propagates to an increasingly larger surface which we see usually in water when the drops or any object fall into it. We can create this illusion in after effect using mostly the radio wave effect. To break the continuous shape, we will also use Turbulence displace and some blurring effect to give is a natural look. We will adjust various parameters of the effect and also, we will create a water drop animation to signify the origin of the wave.
Step 1: Let’s start by creating a composition from either the Project panel or from the menu with a width and height of 1920 px by 1080 px and give it a name and keep all the settings to the default of HDTV 1080 29.97.

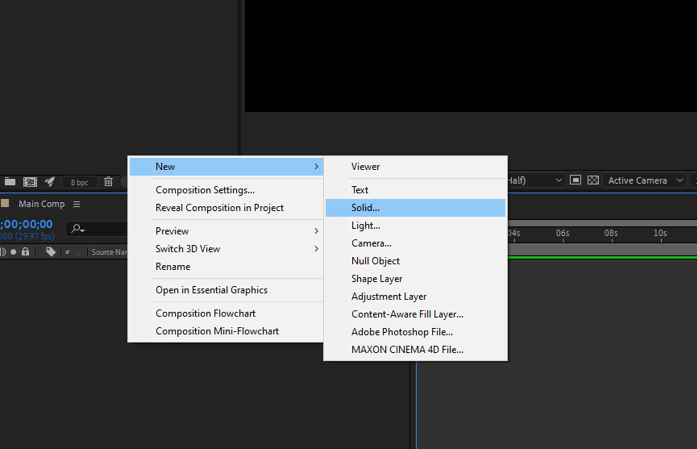
Step 2: Now let’s create a New solid from either the Composition panel or the Layers panel. Right-click on the Composition panel and then New -> Solid.
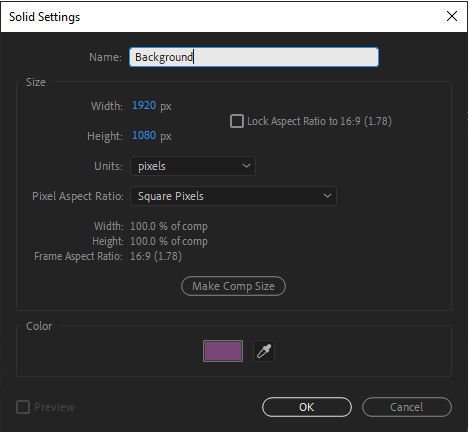
Step 3: Let’s call it background and give a suitable color, purple in this instance.
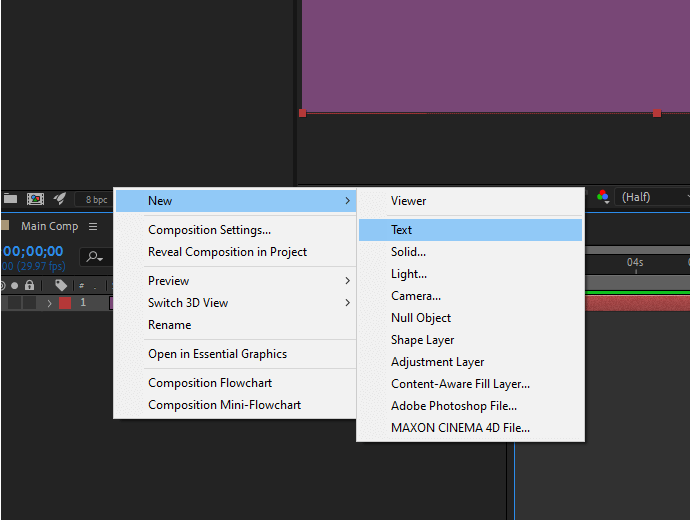
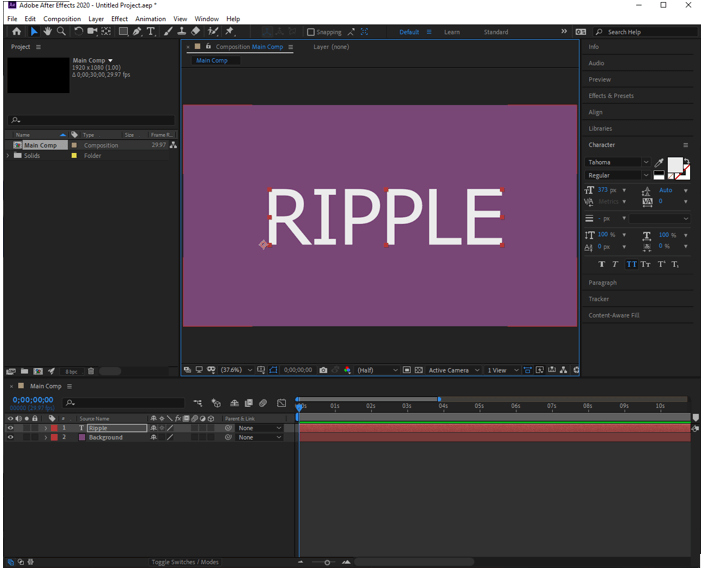
Step 4: Next create a Text layer again either from the composition panel or from the menu. Right-click on the Composition panel and then New -> Text.
Step 5: Give it any name and give it a big font size and align it to center vertically and horizontally from Align panel. Font should be preferably bolder so that we can see the effect clearly.
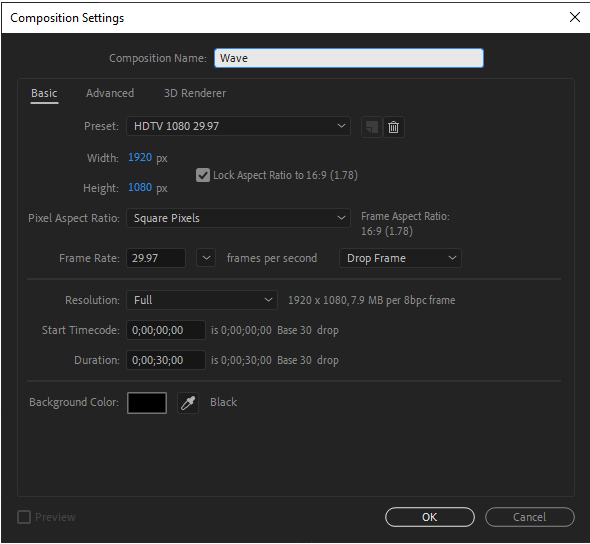
Step 6: Then create a new composition by Ctrl + N or from the menu. This will be our wave used for a ripple effect.
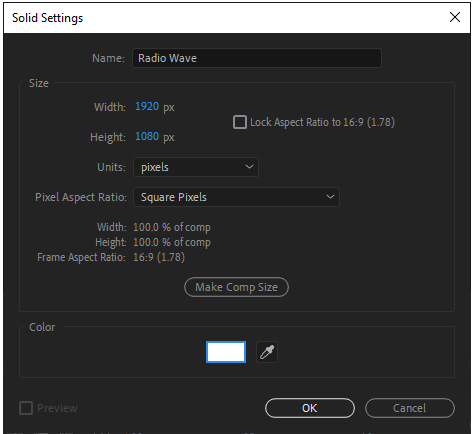
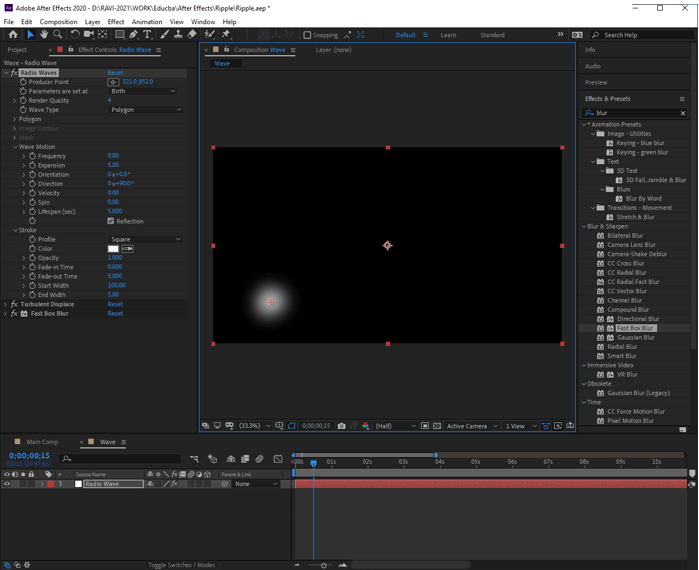
Step 7: Then create a new solid named Radio Wave. Keep the defaults for other options.
Step 8: Apply Radio waves effect from Effects and Presets panel. By default, it will create the effect as shown.
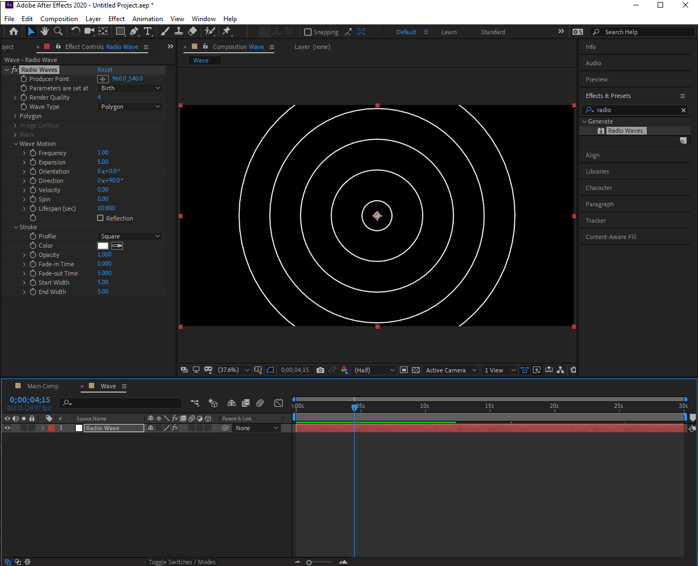
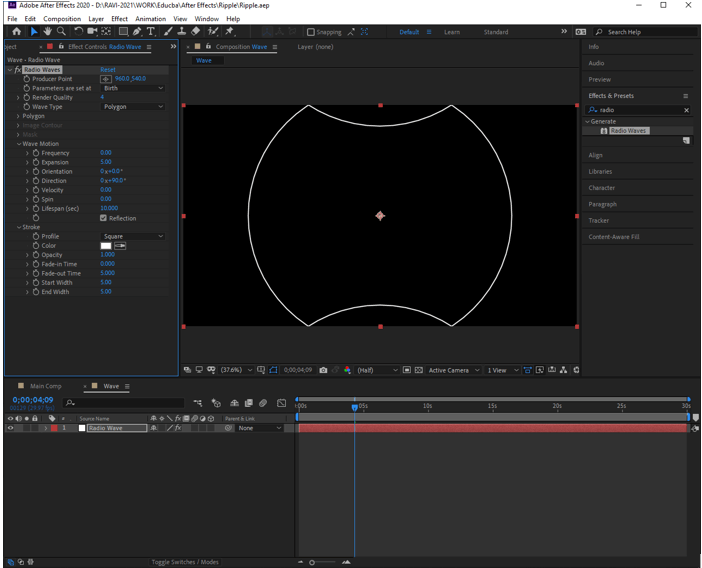
Step 9: Set the frequency to 0 and adjust expanse and lifespan according to how long you want the ripple to last.
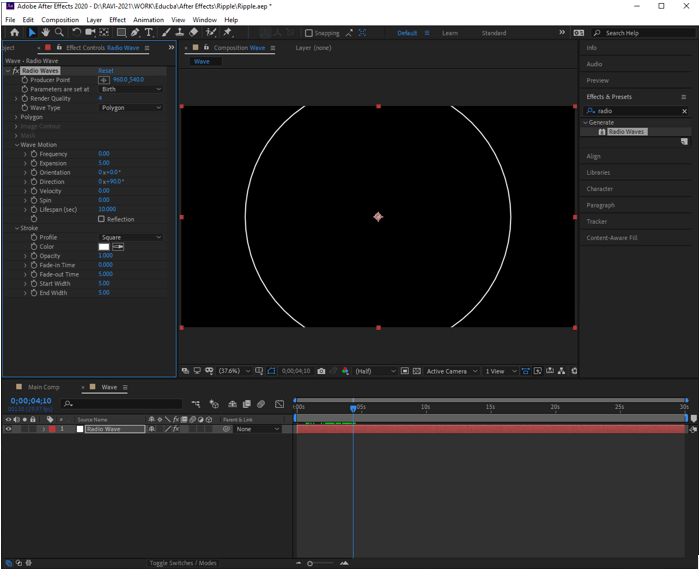
Step 10: You can also set the reflection so the wave will bounce from edges along with the start width. Along with that fade in time and fade out time can be adjusted if you want to delay or prolong the ripple effect.
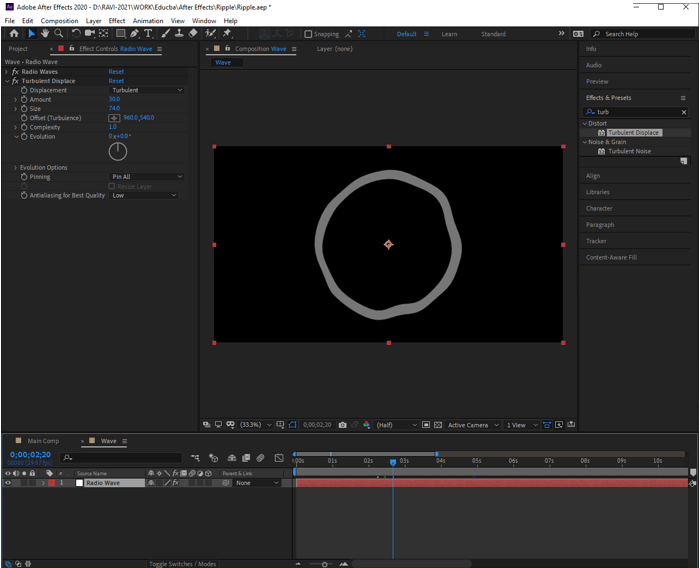
Step 11: Then we will apply the Turbo Displace effect to break the uniformity of the wave. Adjust the amount and size according to the needs. The displacement type will be turbulent.
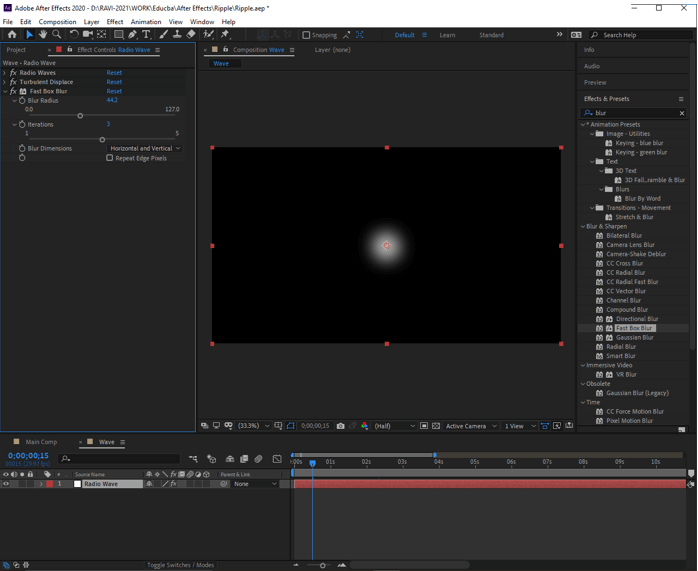
Step 12: Then apply Fast Box Blur and increase the blur radius to make the ripple fuzzy and less sharp. Iterations will be 3 and blue will be applied horizontally and vertically.
Step 13: Now we will change the producer point of the wave somewhere bottom left. Click on the point in effect control panel and then click in the composition at the position where you want.
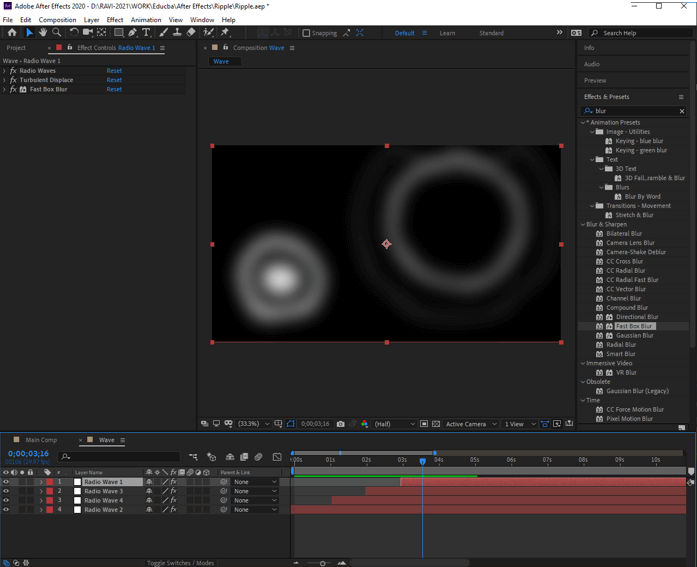
Step 14: Similarly duplicate the layer and create the effect on the top right side by changing the producer point.
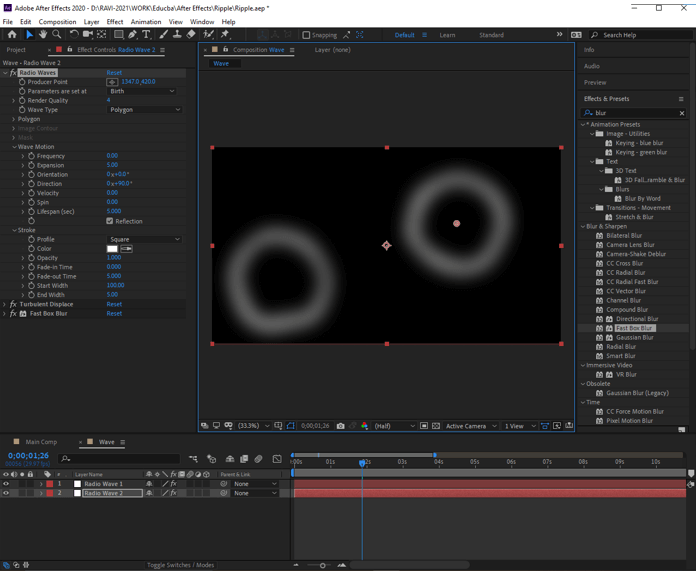
Step 15: Now we will duplicate the wave and adjust the timing so that two ripples will be created at the same position but at different times.
Step 16: Now in our main composition create a new Adjustment layer from either the composition panel or from the menu. Right-click on the Composition panel and then New -> Adjustment Layer
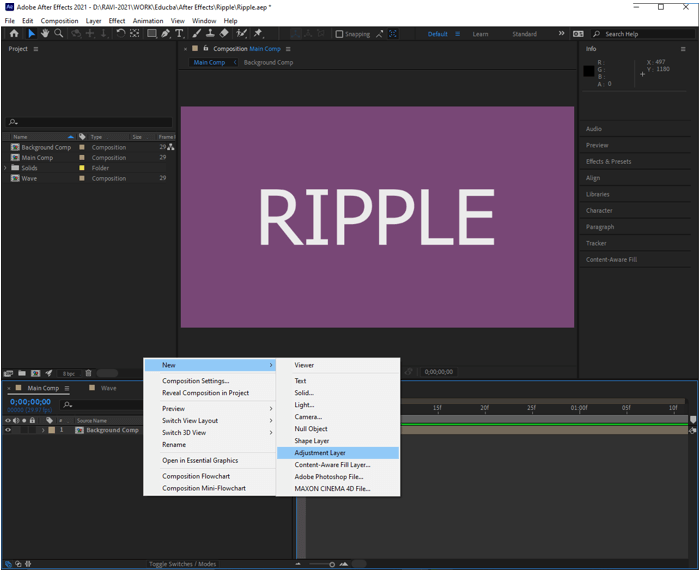
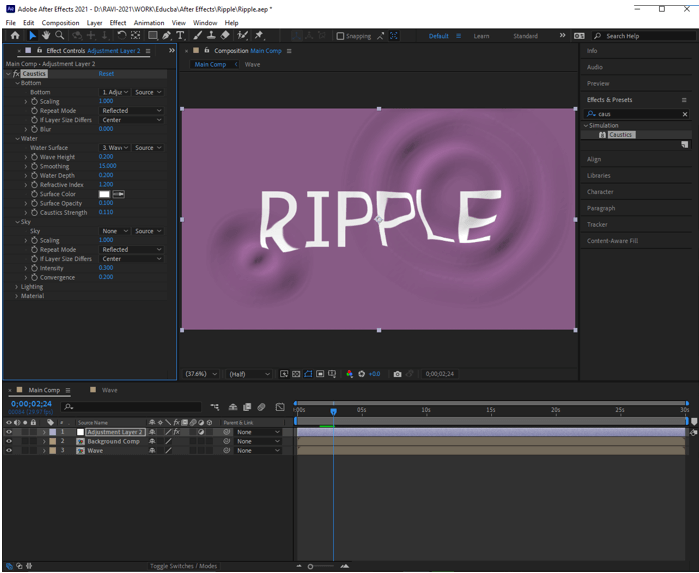
Step 17: On this adjustment layer drag and drop caustic effect from the effects and preset panel and for water, surface select the wave layer.
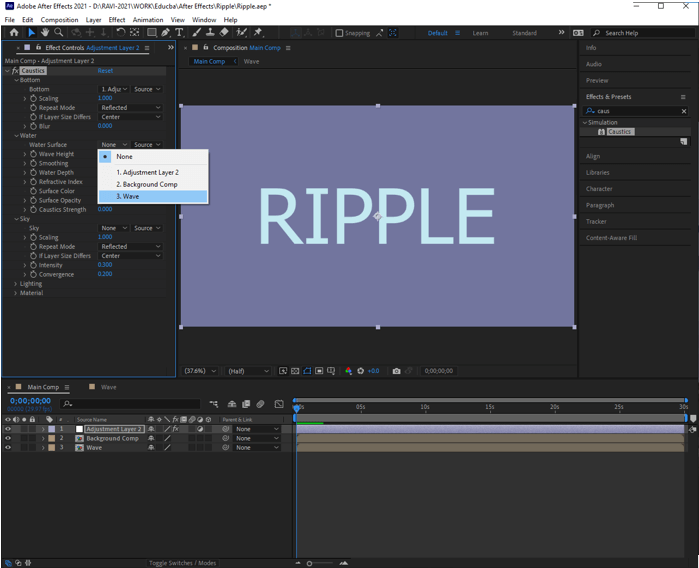
Step 18: Now adjust the wave height, smoothing, water depth, surface opacity, and caustic strength to get a nice ripple effect.
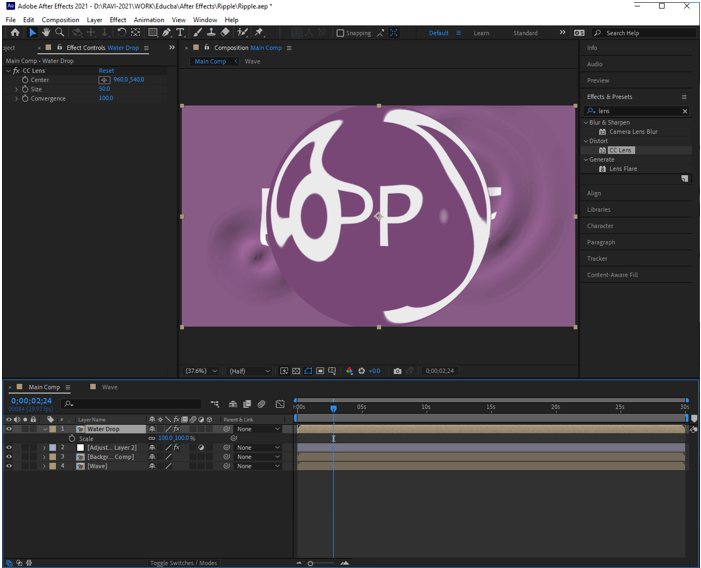
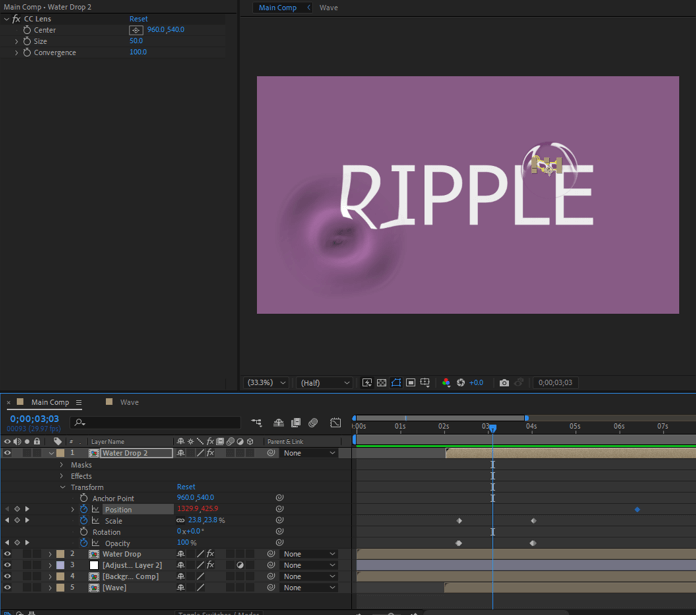
Step 19: Now we will create an effect in which a drop of water is falling to create the ripple for which we will duplicate the Background comp and rename it to Waterdrop the apply the CC lens effect and adjust the size.
Step 20: Next we use the pen tool to create a mask.
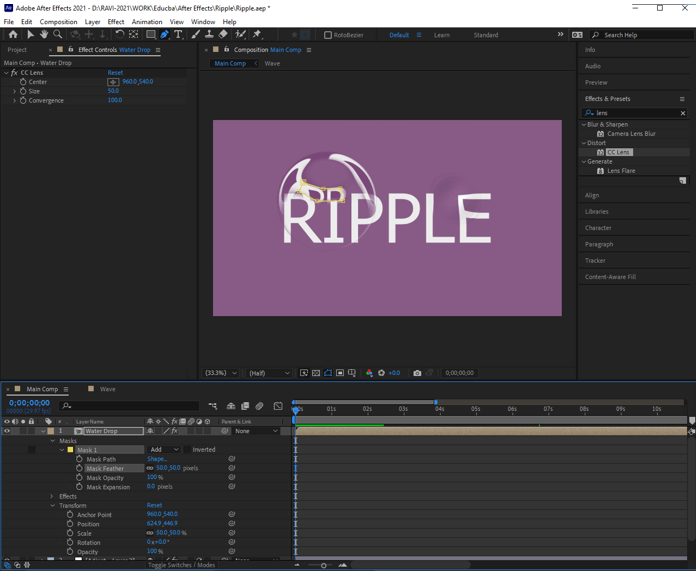
Step 21: Then change the position where the ripple is going to happen.
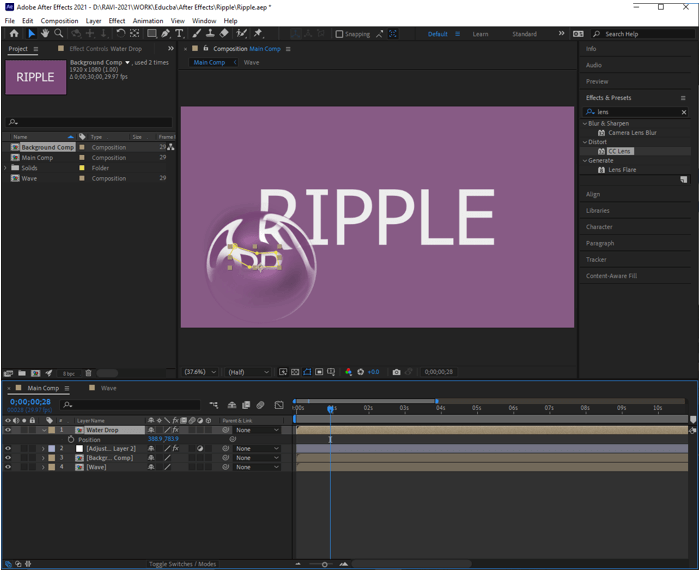
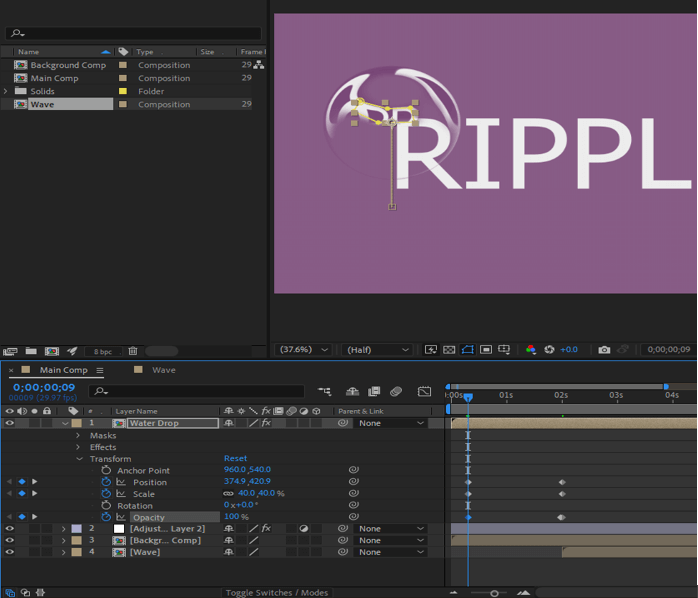
Step 22: Also adjust the scale and then set key points for position, scale, and opacity.
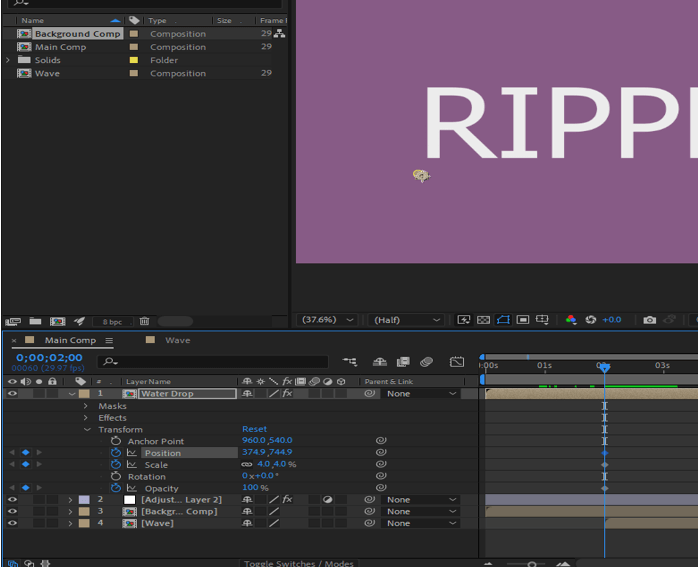
Step 23: On this keyframe set the opacity to 0.
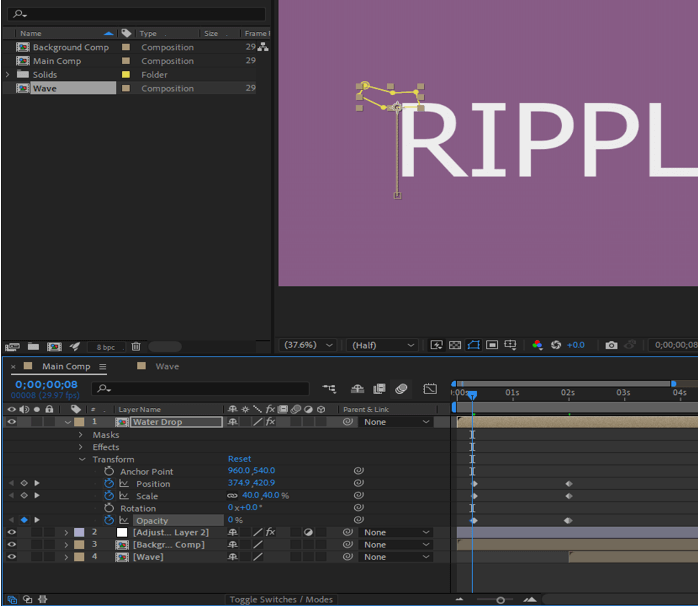
Step 24: Then move up one frame you can also use Page Up button as a hotkey and then set the opacity to 100%.
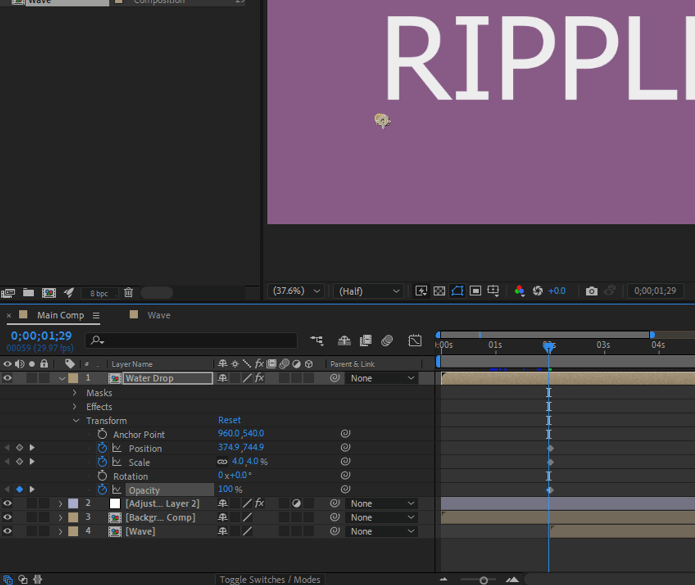
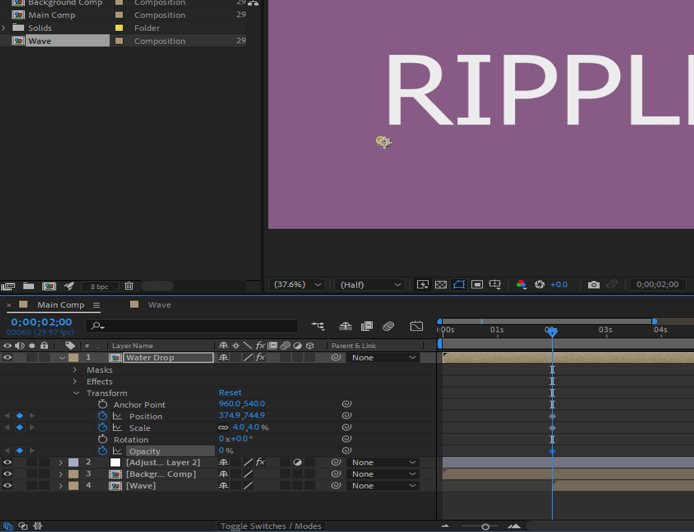
Step 25: Then move the current-time indicator near the start of the timeline and set the value of position, scale, and opacity. Set the position of the water drop to the top of the letter and the scale to around 40%.
Step 26: Then again move up one frame you can also use Page Up button as a hotkey and then set the opacity to 0.
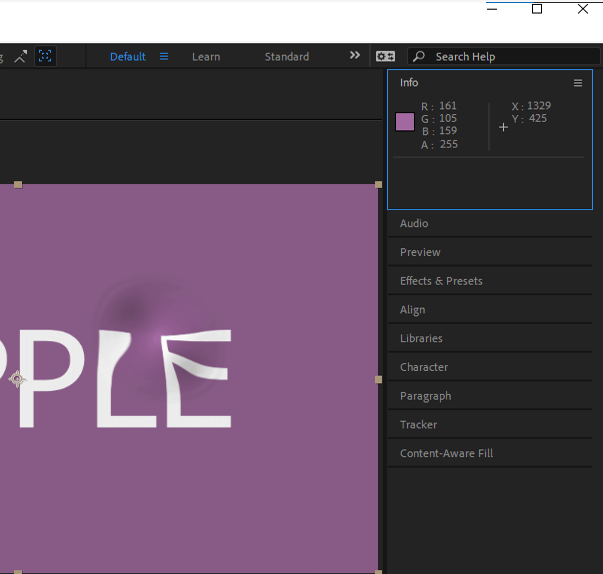
Step 27: Similar effect we will create of the water drop on the ripple effect on top right side. First, we will look at the info panel for the position of X and Y coordinates. Then we will subtract the position of water drop 1 from water drop 2 and get the differences that will be used later.
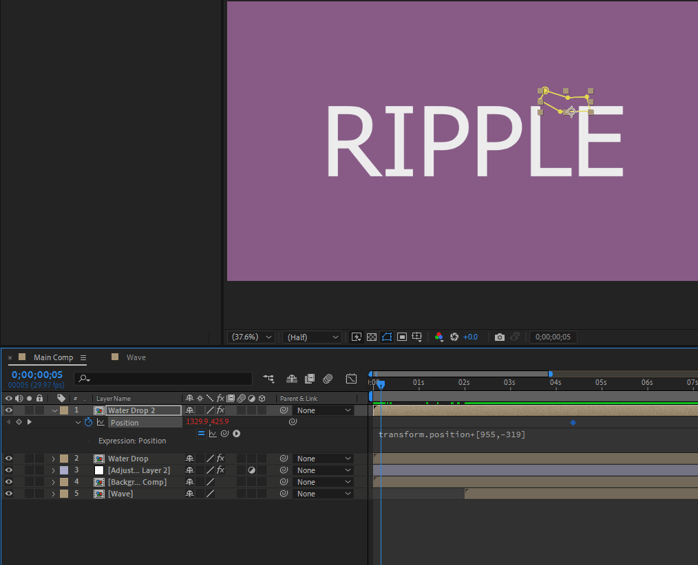
Step 28: Duplicate the water drop layer and alt-click on the clock icon for a position that will let us write expressions and we will write the following expression as shown which will add the difference.
Step 29: Next we will delay the frames of water drop 2 such that it starts after the frames of water drop 1 is finished.
Conclusion
In this article, we have seen how to create a ripple effect in After effects. First, we have started by creating the main component which is a simple text and a background. Then we have created a new comp in which we created the waves and set their different parameters to make it look natural and then integrated with the main comp which an adjustment layer with a caustic effect. Then we have created an animation for water drop so that we can see the start of the ripple effect.
Recommended Articles
This is a guide to Ripple Effect in After Effects. Here we discuss the Introduction, how to create ripple effect in After effects. You may also have a look at the following articles to learn more –
