


Updated November 7, 2026
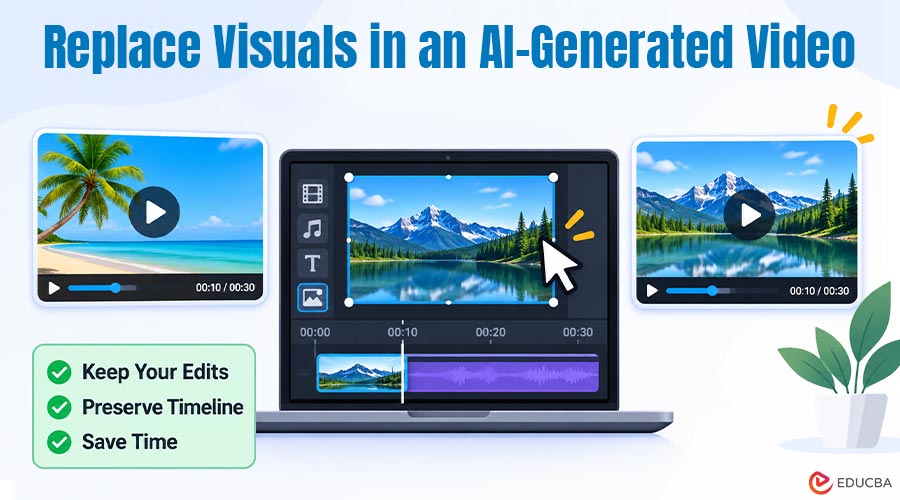
AI video generators can turn a short script into a finished clip in minutes. However, the first draft rarely looks perfect. A scene might show the wrong product, a warped hand, or a stock clip that feels off-brand. The good news is that you do not have to start over. Instead, you can replace visuals in an AI-generated video one scene at a time. You keep the script, voiceover, and pacing that already work. Then you swap only the parts that need fixing.
This guide walks you through the full process, from first audit to final export. You will also learn how to keep every new scene consistent with the rest of your video.
Why You Might Need to Replace Visuals in an AI-Generated Video?
AI tools match each line of your script to a visual, but they do not always choose well. Here are the most common reasons creators swap scenes after generation.
- Visual glitches: AI footage often shows extra fingers, melting text, or flickering faces. Viewers notice these flaws quickly, which can damage your credibility.
- Off-brand imagery: The generator might pick colors, settings, or people that clash with your brand. As a result, the video can feel like it belongs to someone else.
- Literal mismatches: A line about cloud storage might pull up footage of actual clouds. Such literal picks confuse viewers instead of helping them.
- Repetitive stock clips: Many generators draw from the same popular footage libraries. As a result, your video can look like dozens of others.
- Usage rights: Some auto-selected media may carry limits on commercial use. Replacing it with footage you own removes that worry.
- Outdated details: Product shots, app screens, and logos change over time. A quick visual swap keeps an older video accurate without a full rebuild.
In short, replacing a few weak scenes often lifts the whole video. At the same time, you keep the voiceover, captions, and timing you already approved.
Prepare Your AI Video Project Before Swapping Footage
A little planning saves hours of rework later. Before you touch the timeline, spend ten minutes on these three tasks.
1. Audit Every Scene in Your Draft
Watch the full draft once without stopping. Then watch it again and note each weak moment with its timestamp. For example, you might write “0:14, blurry product shot” or “0:32, wrong city skyline.” Next, rank each issue by how much it distracts viewers. Fix glitches and factual errors first, since they cause the most damage. After that, move on to style tweaks and minor upgrades.
2. Back Up the Original Project
Always duplicate the project before you edit it. That way, you can return to the first version if a change goes wrong. Also, save a copy of the script and the voiceover file separately.
3. Gather Your Replacement Assets
Collect the visuals you plan to use before you start swapping. These might include brand photos, product clips, screen recordings, or licensed stock footage. Check that each file matches your video’s resolution and orientation. Otherwise, you may need to crop or upscale later, which can soften the image.
How to Replace Visuals in an AI-Generated Video: Step-by-Step
The exact buttons differ between tools, but the core workflow stays the same. Follow these seven steps to swap scenes cleanly.
Step 1: Open Your Draft in a Scene-Based Editor
Start with an editor that splits your video into separate scenes. This layout lets you change one clip without disturbing the rest. For example, CapCut’s AI video maker turns your script into a draft you can edit scene by scene. You can then replace any visual with AI-generated media or your own uploads.
Step 2: Select the Scene You Want to Change
Click the scene that needs a new visual. Scene-based editors usually highlight the clip and show its script line. Check that line closely because your new visual must support it. When a scene runs long, consider splitting it first. Then you can replace only the weak half and keep the strong part.
Step 3: Choose the Right Replacement Source
At this point, decide where the new visual will come from. You have three main options, each suited to a different need.
- Stock footage: This option works well for generic scenes such as city streets, offices, or nature shots.
- Your own media: Upload product clips, team photos, or screen recordings when accuracy matters most.
- AI-generated visuals: Create a fresh clip or image from a text prompt when stock options feel too generic.
In general, use your own media for anything specific to your brand. Meanwhile, stock and AI visuals can fill in broader, mood-setting moments.
Step 4: Regenerate AI Scenes With Better Prompts
Sometimes the best fix is a new AI clip rather than a swap. In that case, rewrite the prompt with more detail. Describe the subject, setting, lighting, camera angle, and mood. For instance, “a woman typing on a laptop” is vague. However, “a smiling woman types on a silver laptop in a sunny café” gives clear direction. Also, keep a short style note that you add to every prompt. A line like “soft daylight, warm tones, realistic style” helps new clips match the old ones. Generate two or three versions and then pick the closest match.
Step 5: Sync the New Clip With Your Voiceover
Timing matters as much as the image itself. A clip shorter than its narration can leave a frozen frame or a black gap. So trim or extend the clip until it covers the full script line. In addition, listen for key words in the voiceover. Ideally, the visual should change right when the narrator mentions a new idea.
Step 6: Match Framing, Aspect Ratio, and Motion
Your replacement clip must also fit the video’s format. A horizontal clip inside a vertical video will show black bars or an awkward crop. Therefore, reframe each new visual so the subject stays centered and clear. Motion matters too. A static photo can feel jarring between clips that use slow camera pans. So add a gentle zoom or pan to still images. This small trick helps them blend in with moving footage.
Step 7: Preview the Full Video and Export
Finally, watch the entire video from start to finish. Pay close attention to the seconds before and after each swap. Do the cuts feel smooth? Does the new visual match the narration and the mood? Once everything flows, export the video at the highest quality your platform supports. It also helps to check the export on a phone, since many viewers will watch it there.
Advanced Techniques for Swapping Elements in AI Footage
Not every problem needs a whole new scene. Instead, you may only need to fix one object, face, or background. The following techniques handle those smaller jobs.
1. Replace the Background With Masking or Chroma Key
If your subject looks fine but the setting feels wrong, change only the background. Many editors offer AI masking or background removal that isolates the subject automatically. After that, place the subject over a new scene, such as an office or a studio backdrop.
Chroma key offers another route. For instance, ask the AI to generate your subject against a plain green wall. Then a chroma key tool can remove the green and let you drop in any background.
2. Swap Objects With AI Inpainting
Inpainting lets you erase or replace a small area inside a frame. For example, you can remove a warped logo or swap a coffee cup for your product. Simply brush over the area, describe the new object, and let the AI fill it in.
This approach works best on still images and short clips. On longer moving shots, the patched area may flicker between frames. Because of this, review the result at full speed before you keep it.
3. Animate Your Own Photos With Image-to-Video
Image-to-video tools animate a still photo with subtle motion. This method helps when you need an exact product or person on screen.
Start with a sharp, well-lit image and then add a short motion prompt like “slow push-in.” As a result, your real asset gains the same cinematic feel as the AI scenes around it.
How to Keep Visual Consistency Across Replaced Scenes?
A new clip can look great on its own yet still feel out of place. Viewers sense these breaks even when they cannot name them. Use the checks below to make every swap blend in.
1. Match Color and Lighting
Compare the new clip with the scenes on either side. Is it warmer, cooler, brighter, or darker? Adjust temperature, exposure, and saturation until the shots feel like one shoot. You can also apply one filter or LUT across the whole video for a unified look. Light direction deserves attention too. When other scenes light the subject from the left, the new clip should do the same.
2. Keep Characters and Style Consistent
Mixing art styles is one of the fastest ways to break immersion. For example, a cartoon clip inside a realistic video looks like a mistake. Likewise, a presenter who changes face or outfit between scenes confuses viewers. To avoid this, reuse the same character description in every prompt. Some tools also accept a reference image, which helps the AI keep features stable.
3. Check Resolution and Frame Rate
A 720p clip will look soft next to 1080p or 4K footage. Similarly, a 24 fps clip can stutter inside a 30 fps project. Whenever possible, match the resolution and frame rate of your original draft. If you cannot, pick assets with higher specs, since downscaling looks cleaner than upscaling.
4. Smooth the Cuts With Simple Transitions
A quick crossfade can hide small differences between old and new footage. However, do not add flashy transitions to every cut. Too many effects distract from your message and make the edit feel amateurish.
Common Mistakes to Avoid When Editing AI-Generated Videos
Even experienced editors slip up during scene swaps. Watch out for these frequent errors.
- Forgetting the captions: Burned-in captions or text overlays may still describe the old visual. Update them whenever you change a scene.
- Ignoring clip audio: A new clip might bring its own sound, such as music or street noise. Mute it unless that sound adds value.
- Skipping the license check: Free-to-download footage is not always free for ads or client work. Read the usage terms before you publish.
- Changing too many scenes at once: Large batches make new problems harder to spot. Swap a few scenes, review them, and then move on.
- Missing background artifacts: Editors often fix the main subject but overlook odd details behind it. Scan every corner of the frame, especially in wide shots.
After all, the best edits are the ones viewers never notice.
Frequently Asked Questions (FAQs)
Q1. Can I replace just one scene in an AI-generated video?
Answer: Yes. Most scene-based AI editors let you swap one clip while everything else stays intact. That includes your script, voiceover, music, and timing.
Q2. Will replacing a visual change my voiceover?
Answer: No, the voiceover usually stays the same. However, you may need to trim or extend the new clip so it lines up with the narration.
Q3. Can I use my own photos and videos in an AI-generated video?
Answer: Absolutely. Many AI video tools accept uploads so that you can mix your own footage with AI scenes. In fact, real product shots often build more trust than generic visuals.
Q4. How do I keep an AI character looking the same in new scenes?
Answer: Write one detailed character description and paste it into every prompt. Include fixed details like age, hairstyle, and clothing. Also, use the same reference image for each generation if your tool supports it.
Q5. What resolution should replacement clips have?
Answer: At a minimum, match your project’s resolution. For most social and web videos, that means 1080p. If you plan to crop or zoom, start with 4K footage so the image stays sharp.
Final Thoughts
Learning how to replace visuals in an AI-generated video is less about starting over and more about making targeted improvements. Begin by reviewing your draft and backing up the original project. Then replace weak scenes with suitable stock footage, uploaded media, or newly generated visuals. Finally, adjust the color, timing, framing, and format to ensure that every replacement blends naturally with the rest of the video.
With a little practice, you can fix a flawed AI video in minutes instead of hours. More importantly, your audience will see a polished, trustworthy result that reflects your brand. So open your latest draft, pick the weakest scene, and start there.
Recommended Articles
We hope this comprehensive guide on how to replace visuals in an AI-generated video helps you create more polished and engaging videos. Check out these recommended articles for more tips and techniques to improve your AI video editing skills.