Updated March 6, 2023
Introduction to PowerShell unzip
PowerShell unzip extracts the files and folders from the specific Zip file on the same path that the ZIP file exists or the specific destination path using the Expand-Archive command or by using System.IO.Compression namespace to decompress files and folders.
Syntax of PowerShell unzip
Given below are the syntax mentioned:
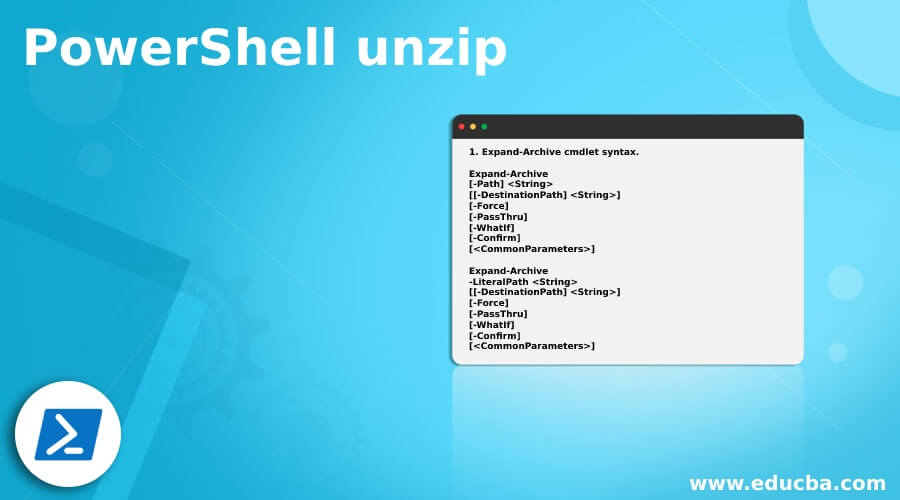
1. Expand-Archive cmdlet syntax.
Expand-Archive

[-Path] <String>

[[-DestinationPath] <String>]
[-Force]
[-PassThru]
[-WhatIf]
[-Confirm]
[<CommonParameters>]
Expand-Archive

-LiteralPath <String>

[[-DestinationPath] <String>]
[-Force]
[-PassThru]
[-WhatIf]
[-Confirm]
[<CommonParameters>]
2. Unzip using NameSpace.
[System.IO.Compression.ZipFile]::ExtractToDirectory(String, String)
[System.IO.Compression.ZipFile]::ExtractToDirectory(String, String, Boolean)
[System.IO.Compression.ZipFile]::ExtractToDirectory(String, String, Encoding)
[System.IO.Compression.ZipFile]::ExtractToDirectory(String, String, Encoding, Boolean)
3. 7ZIP module to extract archive content.
Expand-7Zip

[-ArchiveFileName] <string>

[-TargetPath] <string>

[-CustomInitialization <scriptblock>]
[<CommonParameters>]
Expand-7Zip

[-ArchiveFileName] <string>

[-TargetPath] <string>

[-Password <string>]
[-CustomInitialization <scriptblock>]
[<CommonParameters>]
Expand-7Zip

[-ArchiveFileName] <string>

[-TargetPath] <string>

[-SecurePassword <securestring>]
[-CustomInitialization <scriptblock>]
[<CommonParameters>]
How do unzip Commands work in PowerShell?
Expand-Archive is the inbuilt command that is used to extract the contents from the ZIP files. Other archive file formats like RAR, 7ZIP aren’t supported by this cmdlet.
ZIP utility commands (Compress-Archive and Expand-Archive) are part of the PowerShell module called Microsoft.PowerShell.Archive.
Code:
Get-Command Expand-Archive
Output:

For the source path, PowerShell uses any of the Path or the LiteralPath (If you don’t want to use the wildcard). You can use the source and destination path as the local path or the NAS folder path with the appreciate read and write permissions.
In case you don’t have this module installed in your system, you can download it from the PowerShell gallery.
https://www.powershellgallery.com/packages/Microsoft.PowerShell.Archive/1.1.0.0
Second, you can use the .Net namespace [System.IO.Compression], class ZipFile with ExtractToDirectory methods where you can provide the source path of the Zip file and the destination path to extract the same. This method requires IO.Compression.ZipFile.dll should present on the system.
Third, in case your files are RAR, ISO, or 7Zip apart from the ZIP file, you can download the 7ZIP module for PowerShell supported by the 7ZIP utility. There is a command Expand-7Zip which extracts the compressed mostly all kinds of the compressed file.
Examples of PowerShell unzip
Given below are the examples of PowerShell unzip:
Example #1
Expand-Archive command to extract files and folders on Local computer.
The below command will extract the DSC.Zip on the source path and the Destination path E:\Extract.
Code:
Expand-Archive -Path E:\DSC.zip -DestinationPath E:\Extract -Verbose
Please note that in the above command, destination folder Extract, might not exist but the Expand-Archive command creates it automatically if it is not there already.
Output:

Example #2
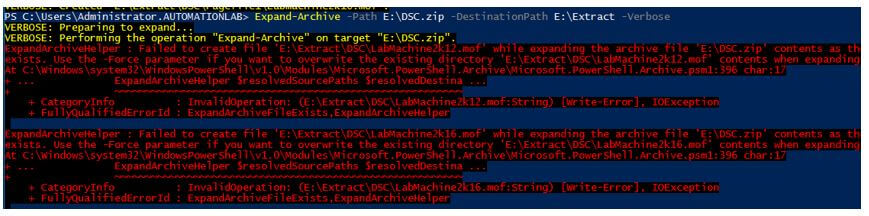
Expand-Archive command with -Force parameter.
If the files already exist on the destination path then with -Force parameter then it overwrites the files and folders on the destination path.
Without -Force parameter.
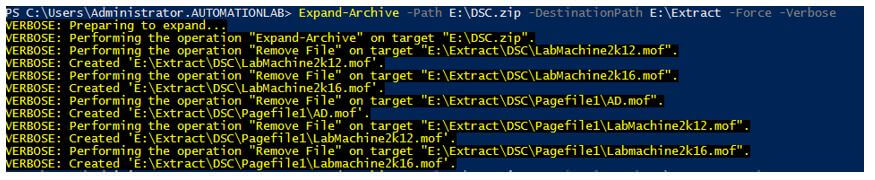
With -Force Parameter.
Expand-Archive -Path E:\DSC.zip -DestinationPath E:\Extract -Force -Verbose
Output:
Example #3
Expand-Archive command to extract data on a local path.
To extract the data on the local path, use the dot (.) for the destination path as shown below.
Code:
Expand-Archive E:\DSC.zip -DestinationPath . -Force -Verbose
The above command will extract the E:\DSC.Zip to the C:\temp folder path.
Example #4
Expand-Archive command for a shared drive.
We can also use the shared path as the source and the destination with the appropriate read and write permissions.
Code:
Expand-Archive -Path \\ad\Shared\Temp\DSC.zip `

-DestinationPath \\ad\shared\temp\extracted -Force -Verbose
The above command extracts the ZIP on the shared folder path.
Example #5
System.IO.Compression.ZipFile namespace.
This method uses the .Net namespace System.IO.Compression class ZIPFile to extract the data from the compressed file.
In case if this ZipFile class isn’t available, we can add the assembly as shown below.
Code:
Add-Type -AssemblyName System.IO.Compression.ZipFile
To extract the data.
[System.IO.Compression.ZipFile]::ExtractToDirectory("C:\Temp\DSC.zip","C:\Temp\Extracted")
The above command will extract ZIP file content to the C:\Temp\Extracted path. If the destination folder (“Extracted”) doesn’t exist, it will create that folder.
When you use the same destination to extract files again, it will throw an exception with destination files that already exist.

To overwrite destination files, we need to add a third parameter and which is a Boolean value. Use $true to overwrite.
Code:
[System.IO.Compression.ZipFile]::ExtractToDirectory("C:\Temp\DSC.zip","C:\Temp\Extracted",$true)
You can also use the encoding for reading and Writing zip files and for that, you need to add the additional argument entryNameEncoding.
To know more about encoding class check the below link:
https://learn.microsoft.com/en-us/dotnet/api/system.text.encoding?view=net-5.0
Below is the example of europa encoding:
Code:
$encode = [System.Text.Encoding]::GetEncoding(29001)

[System.IO.Compression.ZipFile]::ExtractToDirectory(

"C:\Temp\DSC.zip","C:\Temp\Extracted",$encode )
To overwrite the destination files with encoding, use the $true boolean argument.
Code:
[System.IO.Compression.ZipFile]::ExtractToDirectory( "C:\Temp\DSC.zip", "C:\Temp\Extracted", $encode,$true)
Example #6
Using 7Zip module commands.
In case your files are compressed with other software than ZIP, you can use 7ZIP to extract the compressed file (even ZIP files). 7ZIP is very popular software but you don’t need to install the software, only you need to download and install modules.
You first need to download and Install the 7Zip module 7Zip4PowerShell.
To download and install the module, use the below command.
Code:
Install-Module 7Zip4PowerShell -Scope CurrentUser -Force -Verbose
Alternatively, you can also download the module from the PowerShell gallery and follow the instructions given.
https://www.powershellgallery.com/packages/7Zip4Powershell/1.9.0
Below commands are shipped with this module.
Code:
Get-Command -Module 7Zip4PowerShell
Output:

To extract the compressed file, we will use the Expand-7Zip command.
Code:
Expand-7Zip -ArchiveFileName C:\Temp\DSC.rar -TargetPath C:\Extracted -Verbose
Output:
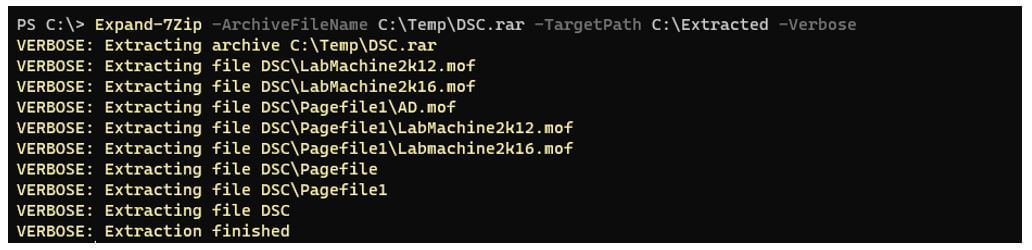
If the destination folder doesn’t exist, it will create automatically.
Conclusion
Files and folders are compressed and stored into a single file called the ZIP file. PowerShell has various ways to extract them without downloading and installing any single software. The above-mentioned methods work both on cross-platform applications.
Recommended Articles
This is a guide to PowerShell unzip. Here we discuss the introduction, how do unzip commands work in PowerShell? and examples respectively. You may also have a look at the following articles to learn more –
