Updated August 11, 2023
AutoSave in Excel
Excel provides a very powerful tool to enable AutoSave a workbook in Excel. It helps to protect our workbook in case of Power failures, closed Excel without saving it, or something unexpected happens.
When we enable AutoSave mode in Excel, we can save our workbook file in a gap of every 10 minutes. It will happen periodically. We can change as per our requirements; let us take an example. Suppose we are working on something very important and want to reduce the time to 1 min. So, there is no need to worry about losing data due to any problem. Rather, we will lose very minimal data instead of losing it completely.
Shortcuts to Save the Excel file: We can use Ctrl + S shortcut to save the workbook manually.

How to Enable AutoSave in Excel?
AutoSave in Excel helps us to protect our files in case of a system crash. It is also useful when we accidentally close the working file.
Let’s understand How to Enable AutoSave in Excel with some examples.
Example #1
Enable AutoSave in Excel:
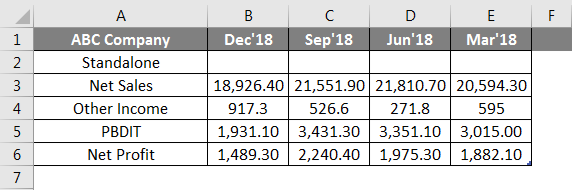
A user has standalone book data of sales, income, PBDIT, and Profit details for each quarter of ABC Company.
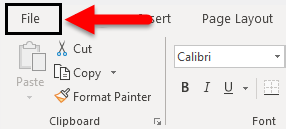
Step 1: Open Excel and Click on the File tab.
Step 2: Now click on Options.

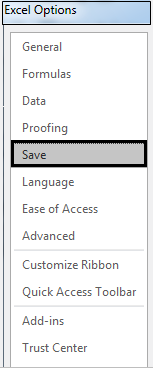
Step 3: After clicking on Options, a pop-up will open with a header as Excel Options; click on Save.
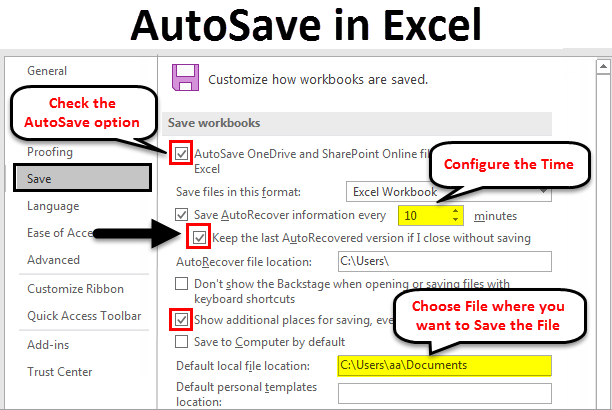
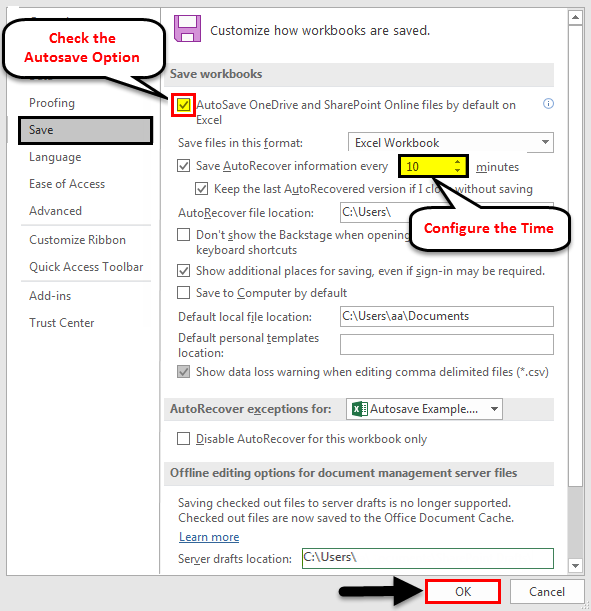
Step 4: Now AutoSave setting will be open where a user can configure AutoSave settings, tick mark on the AutoSave checkbox, configure the time interval you want to save the workbook for AutoRecover, and select the respective file where you want to save the file. Then click the OK button to apply all the settings to the workbook.
Summary of Example #1:
As we can see in the above example of an Excel AutoSave, a user can configure the time interval to save the workbook for AutoRecover and select the respective file where they want to save the file.
Now a user can work without losing data that might happen due to an Excel crash or any system issue. AutoSave will save the data to the user’s located path, and he can recover the data as per requirement.
Example #2
How to enable Excel AutoSave and save maximum work from losing it due to some power failure or something unexpected happening in Excel.
A user has standalone book data of sales, income, PBDIT, and Profit details for each quarter of ABC Company.
Step 1: Open MS Excel and Click on the File tab.
Step 2: Now click on Options.
Step 3: After clicking on Options, one pop-up will open with the header Excel Options; click on Save.

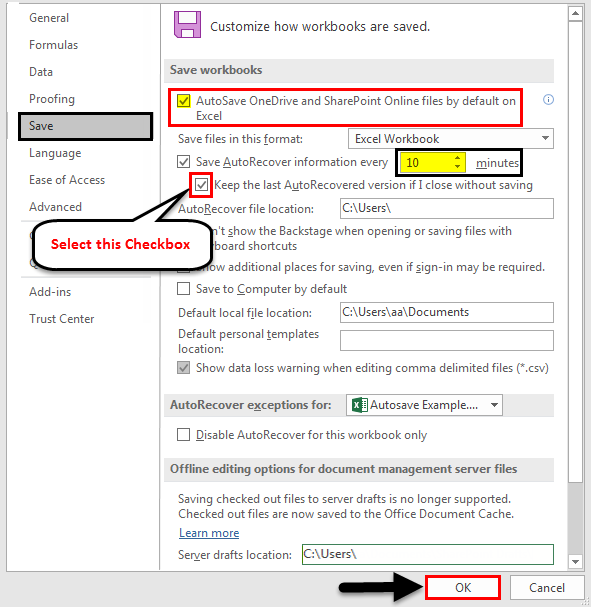
Step 4: Now AutoSave setting will be open where a user can configure AutoSave settings, tick mark on the AutoSave checkbox, configure the time interval you want to save the workbook for AutoRecover, and select the respective file where you want to save the file.
Step 5: Now select the Keep the last AutoRecovered version if I close without saving box to save the last saved file for the auto-recovered. Then click the OK button to apply all the settings to the workbook.
Summary of Example #2:
As we can see in the above example of an Excel AutoSave, a user can configure the time interval to save the workbook for AutoRecover and select the respective file where they want to save it. When a user recovers the file from the saved file, the last version of the saved workbook will open if you close it without saving it.
Now a user can work without any tension of losing data due to an Excel crash or any system issue. AutoSave will save the data to the user’s located path, and he can recover the data as per requirement.
Example #3
How to save the backup file to your choice of folder?
Let’s take the same data for this example.
Step 1: Open Excel and Click on the File tab.
Step 2: Now click on Options.
Step 3: After clicking on Options, one pop-up be open with a header as Excel Options. Click on Save.
Step 4: Now AutoSave setting will be open where a user can configure AutoSave settings, tick mark on the AutoSave checkbox, configure the time interval you want to save the workbook for AutoRecover, and select the respective file where you want to save the file.
Step 5: Now select the Keep the last AutoRecovered version if I close without saving box to save the last saved file for the auto-recovered.
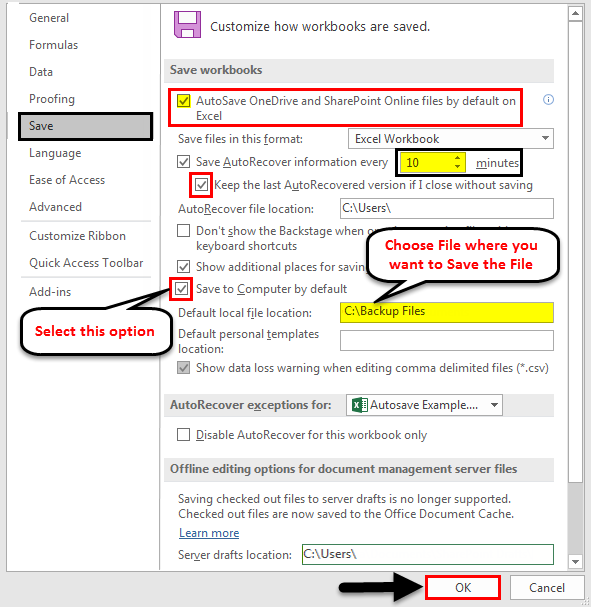
Step 6: Now select the box Save to computer by default option, and provide your default local path.
Step 7: Now click the OK button, and all the settings will be applied to the workbook.
Summary of Example #3:
As we can see in the above example of an Excel AutoSave, a user can configure the time interval to save the workbook for AutoRecover and select the respective file where they want to save it. When a user is about to recover the file from the saved file, the last version of the saved workbook will open if you have closed it without saving it. It will save all our backup files in the local path in the default file location, C:\Backup Files.
Now a user can work without any tension of losing data due to an Excel crash or any system issue. AutoSave will save the data to the user’s located path, and he can recover the data as per requirement.
Things to Remember
- If a user is given AutoSave time of 15 minutes in the AutoSave configuration settings, it will save the data every 15 mins.
- On another side of point 1, If you want to increase your workbook performance, increase the AutoSave time to time digits like 20 Min, 25 Min, etc.
- Always try to keep a lesser or small number for AutoSave time, like 4 min, 5 min, etc., to save data more frequently.
- If you are not enabling AutoSave mode in Excel, ensure you save your workbook more frequently.
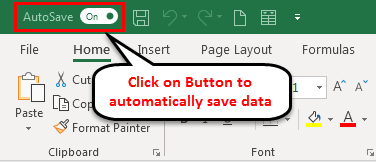
- If you save your file to one drive or share point and use the latest version of Excel, you will find a button on the top left of Excel, which will automatically save your data every few seconds.
Recommended Articles
This has been a guide to AutoSave in Excel. Here we discussed AutoSave in Excel and How to Enable AutoSave in Excel, along with practical examples. You can also go through our other suggested articles –
