


Updated November 13, 2026
Understanding the Script-to-Video Workflow
Artificial intelligence has reshaped digital content creation by automating the initial stages of video production. Generative tools can analyze a written concept, break it into logical scenes, select stock footage, generate text overlays, and even synthesize a natural-sounding voiceover. However, automated systems rarely produce a final, distribution-ready draft. It serves as an advanced blueprint that requires human judgment, stylistic refinements, and structural adjustments.
Moving a computer-generated video draft into a polished production requires bringing the project into a timeline-based, multi-track editor. This is where Multi-Track Video Editing gives creators greater control over individual media elements and their synchronization. While automated algorithms excel at contextual matching, they lack the creative intuition needed for precise pacing, emotional resonance, and sophisticated visual storytelling. Learning how to manipulate audio tracks, media layers, and graphic elements within a multi-track environment is an essential skill for modern video creators, educators, and digital marketers.
The Role of Multi-Track Video Editing in Modern Content Creation
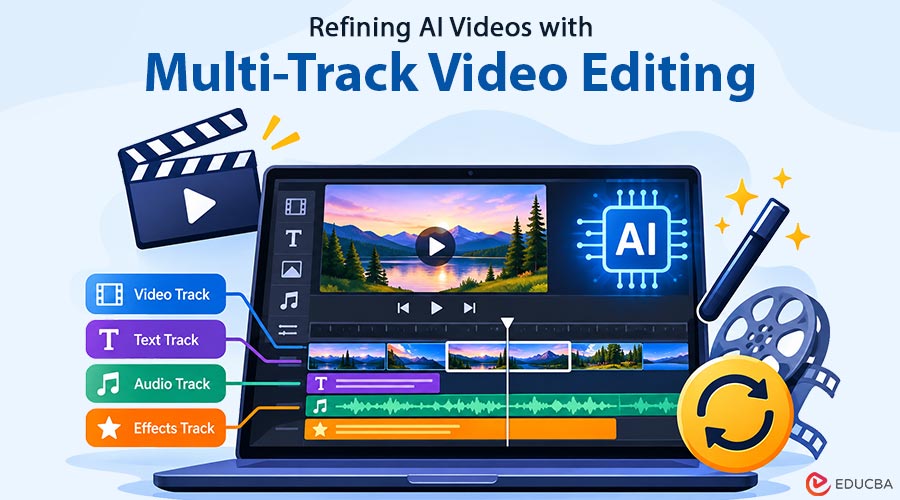
A multi-track editor provides a visual interface where different media types video clips, sound effects, background music, voiceovers, subtitles, and graphic overlays are organized on independent horizontal rows. This layering lets creators edit specific elements without disrupting the timing of adjacent media.
When you use a modern script to video AI system, the software generates a basic sequence based on prompt keywords. However, the key advantage of a multi-track timeline is control. If an AI tool places a visual transition slightly out of sync with a spoken emphasis, a multi-track editor lets you adjust the cut point to the exact frame without altering the underlying audio track.
Essential Steps to Refine an AI-Generated Video Using Multi-Track Editing
Step 1: Analyzing and Cleaning Up the Audio Track
Audio is the backbone of any narrative-driven video. When reviewing an automated draft, focus first on the speech and sound mix. Synthetic voiceovers often generate slight unnatural pauses or uneven cadences that can distract viewers if left unedited.
- Review Speech Pacing: Zoom in on the main voiceover audio track and check for awkward gaps between sentences; trim space to maintain an energetic narrative flow.
- Balance Audio Levels: Ensure the primary voice track stays consistently between -12dB and -6dB. Background music should sit comfortably lower, typically between -24dB and -18dB, to avoid drowning out narration.
- Apply Audio Ducks: Configure background audio tracks to automatically lower their volume whenever the main narration channel contains speech waveforms.
- Add Micro Sound Effects: Enhance scene transitions and text pop-ups by inserting subtle sound effects like swooshes, clicks, or soft risers on a dedicated sound effects track.
By isolating your voiceover, background score, and sound effects onto separate tracks, you maintain total control over the acoustic dynamics of the final render. A clean audio mix instantly elevates a video’s perceived quality, making synthetic elements sound significantly more professional.
Step 2: Refining Visual Pacing and Asset Matching
Automated draft engines match script phrases to stock library tags, which sometimes leads to generic or misaligned footage choices. Once your audio timing is locked, systematically audit every visual element on your primary video track.
Watch the draft in real-time without looking at the editing timeline. Mark any moments where the visual content feels repetitive, visually jarring, or contextually incorrect. A common issue in automated drafts is ‘jumpy’ pacing, where footage cuts too frequently or stays on a static frame for too long during an important explanation.
To fix visual mismatching, replace literal stock interpretations with metaphorical or abstract imagery. For example, if the narration mentions ‘revenue growth,’ an automated draft might insert a literal photo of a potted plant growing. Replacing this clip with a dynamic shot of a team collaborating in a modern office or an animated chart creates a far more engaging viewer experience.
Step 3: Layering Secondary Media and B-Roll
Single-track editing restricts you to simple linear cuts where one clip directly follows another. Multi-track video editing lets creators layer secondary video tracks (often called Track V2 or V3) over their base footage. This technique is crucial for introducing B-roll footage, split-screen layouts, and visual reaction shots.
To build visual depth, insert supplemental clips on an upper video layer while keeping the primary narrative footage or talking-head video on the lower track. This setup lets you cut away to show relevant details, product close-ups, or supporting graphic diagrams while maintaining the continuous audio stream from your main media clip.
- Use J-Cuts and L-Cuts: Allow the audio of an upcoming clip to start a second before the video changes (J-Cut), or let the visual transition occur while the previous audio finishes (L-Cut). This smooths out visual jarring.
- Overlay Graphic Reaction Shots: Insert lower-third graphics or screen recordings over stock footage to ground abstract concepts in tangible examples.
- Apply Picture-in-Picture Effects: Place secondary footage in a smaller window in the corner of the frame to show supporting data alongside the presenter.
Step 4: Typography, Subtitles, and On-Screen Graphics
Modern mobile audiences often watch video with the sound muted. As a result, text overlays, captions, and key-point callouts are vital components of any digital video layout. Automated script-to-video generators usually insert dynamic captions, but their positioning and styling often require manual correction in a multi-track environment.
A well-organized Multi-Track Video Editing timeline lets creators place dedicated text tracks above video layers to ensure legibility. Inspect the automatically generated subtitles for spelling errors, proper noun capitalization, and line length. Subtitles that span across three or four lines clutter the screen; aim for one to two clean lines of text per caption block.
Beyond basic subtitles, use higher text tracks to introduce strategic visual emphasis. When your voiceover highlights a critical metric, add a custom text element that animates onto the screen alongside a subtle audio cue. Aligning these text cards precisely with the spoken word reinforces key learning points for educational or informational content.
Step 5: Color Grading and Visual Consistency
Because script-to-video tools assemble media clips from varied source libraries, the default output often looks visually disjointed. One clip may feature warm, saturated lighting while the next appears cool, muted, and high-contrast. A multi-track timeline simplifies color correction across these disparate assets.
Apply a global adjustment layer across the top-most track of your entire timeline. By applying a subtle color profile, warmth adjustment, or contrast balance to an adjustment layer, you treat every video track beneath it simultaneously. This unifies the color temperature and creates a cohesive cinematic aesthetic across stock footage, screen captures, and custom graphic assets.
Additionally, check aspect ratios and clip positioning. Ensure that all media assets fill the canvas uniformly without unintended black bars on the edges, unless those bars are part of a deliberate letterbox styling choice.
Advanced Editing Techniques for Refined Drafts
Once you’ve synced basic audio, video, and text, advanced timeline techniques can turn a standard presentation into a dynamic media experience. Professional editors use dynamic camera movements, visual masking, and custom speed ramps to sustain viewer engagement. These techniques also expand the creative possibilities of Multi-Track Video Editing.
Keyframing is one of the most powerful features available in multi-track video editing software. By setting spatial and scale keyframes on your media tracks, you can add slow zooms or panning motions to completely static stock photos or high-resolution graphics. A gentle 10% zoom over five seconds converts a flat graphic into an engaging visual sequence.
- Speed Ramping: Adjust clip speeds dynamically, slowing down key action frames while accelerating functional transitions to add stylistic emphasis.
- Masking and Vignettes: Mask out bright visual distractions in background footage to keep the viewer’s focus on primary text overlays.
- Motion Blur on Graphics: Enable motion blur settings for text overlays and graphical transitions to make visual movements feel organic.
Common Pitfalls to Avoid During the Editing Phase
Editing an AI-generated draft is an exercise in restraint. The availability of dozens of transitions, stock assets, and automated effects can lead creators to over-edit, resulting in a cluttered composition that distracts from the core message.
One common error is using overly dramatic transitions between simple scenes. Use star wipes, dynamic 3D flips, and vibrant light leaks sparingly. Standard hard cuts and subtle dissolves handle 90% of scene changes far more effectively. Reserve stylized transitions for major thematic shifts or scene changes within your script.
Another frequent mistake is neglecting screen hierarchy. Make sure text, visual focus points, and motion overlays don’t fight for the viewer’s attention in the same quadrant of the frame. Maintain a clean focal zone so the viewer instantly understands where to look.
Optimizing the Final Export for Distribution
Before rendering your final project, run a systematic quality-assurance pass. Play the timeline from start to finish without pausing, checking specifically for frame drops, audio pops at cut points, graphic misalignments, or rogue text frames.
Select export settings tailored to your primary publishing channel. For high-definition web playback, export using the H.264 or H.265 (HEVC) codec in an MP4 container. Ensure your target bit rate matches your resolution, typically 10-15 Mbps for 1080p content and 35-45 Mbps for 4K video renders. Maintaining these parameters preserves video fidelity across video sharing platforms and learning management systems.
Final Thoughts
Script-to-video automation offers an excellent starting point for digital content creators, drastically reducing the time needed to conceptualize and assemble raw project assets. However, the true creative polish occurs through Multi-Track Video Editing. By taking full manual control of audio balancing, frame-accurate timing, media layering, and color consistency, creators can turn automated rough drafts into compelling, professional videos tailored to their audiences.
Recommended Articles
Explore our recommended articles to learn more about multi-track video editing, script-to-video workflows, and professional video production. Discover practical techniques for editing audio and video layers, adding B-roll footage, improving visual storytelling, and refining AI-generated video drafts into engaging, high-quality content.