EDUCBA

EDUCBA

MENUMENU
  • Free Tutorials
  • Free Courses
  • Certification Courses
  • 280+ Courses All in One Bundle
  • Login
Home Design Design Tutorials Photoshop Tutorial Photoshop Distort Effect
Secondary Sidebar
Photoshop Tutorial
  • Basics and Advanced
    • What is Photoshop?
    • Install Adobe Photoshop
    • Introduction to Photoshop
    • Career in Photoshop
    • Uses of Photoshop
    • Adobe Photoshop Commands
    • Is Photoshop Free?
    • Website Layout in Photoshop
    • Adobe Photoshop
    • Top Features in Adobe Photoshop
    • Adobe Photoshop Elements tools
    • Free UI Kits For Photoshop Download
    • Layers Panel in Photoshop
    • Photoshop Moon Brushes
    • Ripple Effect Photoshop
    • Action in Photoshop
    • Photoshop Color Match
    • Photoshop color picker
    • Photoshop split toning
    • Photoshop GIF
    • Photoshop Extend Background
    • Photoshop template flyer
    • Photoshop content aware fill
    • Photoshop Overlays
    • Photoshop vignette
    • Photoshop Textures
    • Photoshop liquify
    • Photoshop automate
    • Photoshop presets
    • Layer effects in Photoshop
    • Photoshop hologram effect
    • Vintage Effect Photoshop
    • Vaporwave Photoshop
    • Photoshop Polaroid
    • Pixel Effect Photoshop
    • Photoshop Creative
    • MP4 to GIF Photoshop
    • Templates in Photoshop
    • Night Effect in Photoshop
    • Photoshop Sun Effect
    • Photoshop Gold Gradient
    • Perspective Correction in Photoshop
    • VHS Effect Photoshop
    • Halftone in Photoshop
    • Puppet Warp in Photoshop
    • Photoshop Cheat Sheet
    • Resize Object in Photoshop
    • Distortion Effect Photoshop
    • Clone Stamp Tool in Photoshop
    • Fisheye Effect in Photoshop
    • Vanishing Point in Photoshop
    • Fix Perspective in Photoshop
    • Warp Image Photoshop
    • Transform Tool Photoshop
    • Photoshop Straighten Image
    • Glitch Effect in Photoshop
    • Photoshop Cinemagraph
    • Stamp Effect in Photoshop
    • Typography in Photoshop
    • Photoshop Distort Effect
    • How to Print in Photoshop?
    • Morphing in Photoshop
    • Glow Effects in Photoshop
    • Tree Brush Photoshop
    • 3D Text Effect in Photoshop
    • Shiny Effect Photoshop
    • Photoshop Font Effects
    • Metallic Effect Photoshop
    • Ice Effect in Photoshop
    • Dispersion Effect in Photoshop
    • Healing Brush Tool in Photoshop
    • Crop Tool in Photoshop
    • Artboard in Photoshop
    • Fire Effect in Photoshop
    • Photoshop Versions
    • Portrait Effect in Photoshop
    • Quick Selection Tool in Photoshop
    • How to Highlight Text in Photoshop?
    • How to Change Text Color in Photoshop?
    • Change Color in Photoshop
    • Filters in Photoshop
    • Change Hair Color in Photoshop
    • How to Change Shirt Color in Photoshop?
    • Watercolor Brushes in Photoshop
    • How to Blend Images in Photoshop?
    • Plastic Effect in Photoshop
    • Ruler Tool in Photoshop
    • How to Fill Color in Photoshop?
    • How to Delete Background in Photoshop?
    • Plugins in Photoshop
    • Photoshop Mixer Brush Tool
    • Color Replacement Tool in Photoshop
    • Eraser Tool in Photoshop
    • Motion Effect in Photoshop
    • How to Make Logo in Photoshop?
    • Lasso Tool in Photoshop
    • Reflection Effect in Photoshop
    • Metal Text Effect in Photoshop
    • Gold Text Effect in Photoshop
    • Smart Objects in Photoshop
    • Text Effects in Photoshop
    • Layers in Photoshop
    • 3D Text in Photoshop
    • Selection Tool in Photoshop
    • Patch Tool in Photoshop
    • Eyedropper Tool in Photoshop
    • Rectangle Tool in Photoshop
    • Background Eraser Tool in Photoshop
    • Rain Effect in Photoshop
    • Oil Paint Filter in Photoshop
    • Clipping Mask in Photoshop
    • Burn Tool in Photoshop
    • Paint Bucket Tool in Photoshop
    • Snow Effect in Photoshop
    • Mirror Effect in Photoshop
    • Adobe Photoshop Alternatives
    • Transparent Text in Photoshop
    • Sharpen Tool in Photoshop
    • Custom Shape Tool in Photoshop
    • Adobe Photoshop Tools
    • Red Eye Tool in Photoshop
    • Adobe Photoshop Shortcut Keys
    • Pencil Tool in Photoshop
    • Blur Tool in Photoshop
    • Smudge tool in Photoshop
    • Sponge Tool in Photoshop
    • Magic Wand Tool in Photoshop
    • Move Tool in Photoshop
    • Line Tool in Photoshop
    • Photoshop Interview Questions

Related Courses

Photoshop Training Course

Adobe Premiere Pro Training Course

Design Training Course

Photoshop Distort Effect

Photoshop Distort Effect

Introduction to Photoshop Distort Effect

The Distort effect helps in warping, bending, and otherwise deforming pixels. It can be utilized to twist characters for things like facial appearances or even body gestures. They can also be utilized to twist objects like flags, clothes, chimney smoke, or the water’s surface to imitate movement, such as being swept in the wind. Distorting objects like these can be beneficial to bring matte paintings to reality. Distort effects can also be utilized on straightforward, geometric objects to make their life so that they can be utilized as motion graphic elements.

Applying Distort Effect in Photoshop

The following are all the effects which work under the Distort Effect:

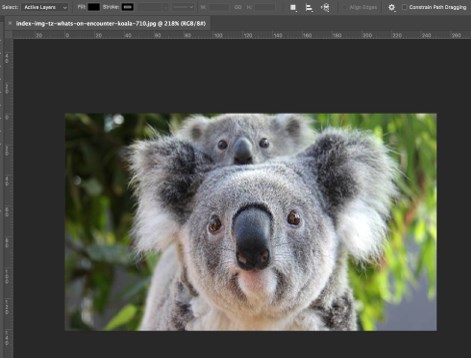
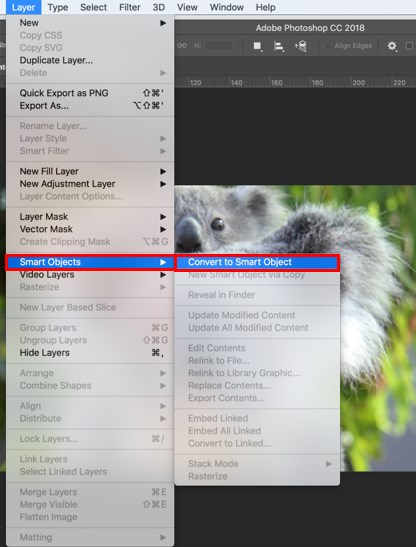
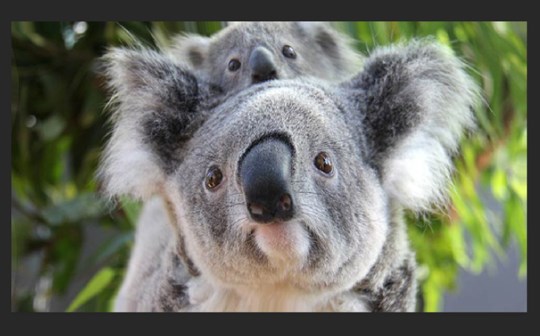
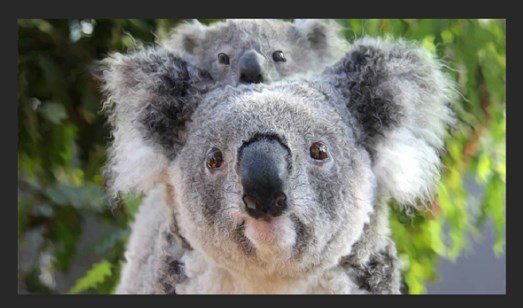
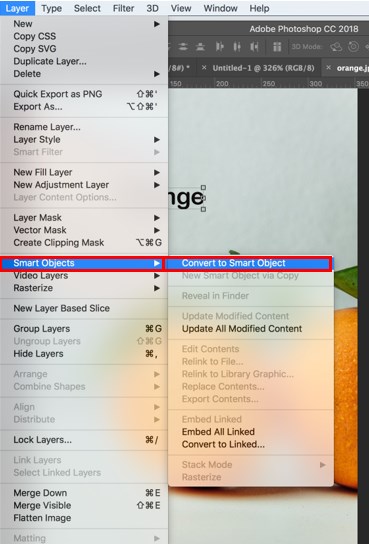
Step 1: Select your image file in Adobe Photoshop. Here we will be using the koala bear image. To start, right-click your image and choose to Convert to Smart Object or click on Layer, then Smart Objects and Convert to Smart Object.

Photoshop Distort Effect - 1

Start Your Free Design Course

3D animation, modelling, simulation, game development & others

Smart Object

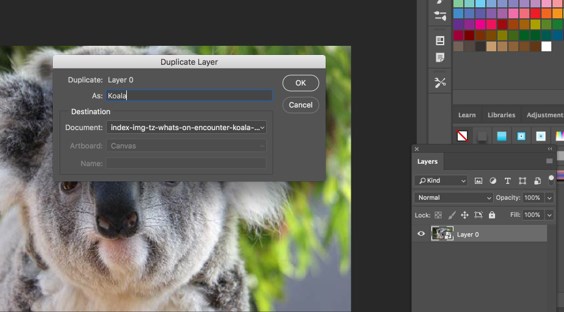
Step 2: Duplicate the current layer by right-clicking on it and choosing Duplicate Layer, so you have an original to return to. Name that layer as Koala and the other as original.

Duplicate Layer

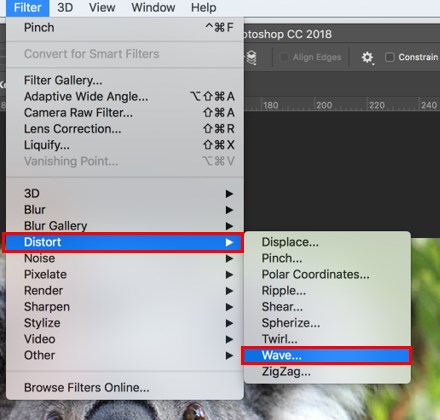
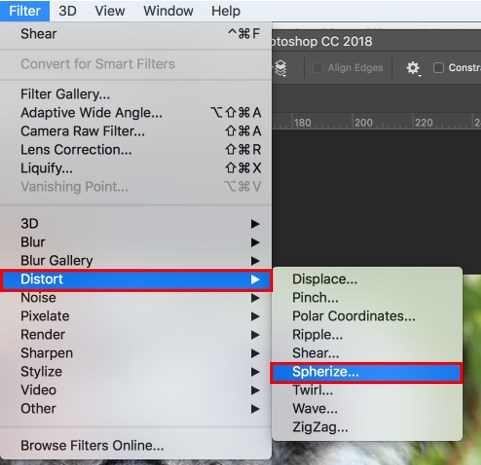
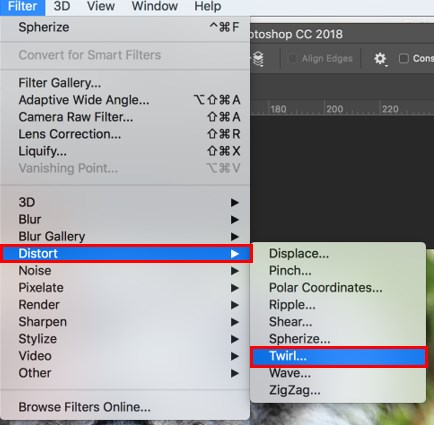
Step 3: Now, with the Koala layer chosen, click on Filter and Distort, then Wave. For this layer, we will produce a subtle effect.

Photoshop Distort Effect - 4

1. Wave Effect

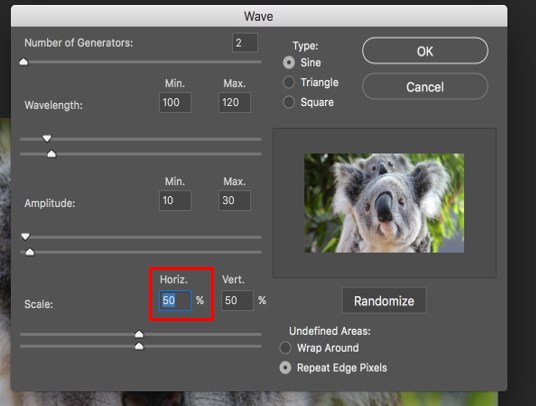
After you select the wave effect, you will get a dialog box. Here you can modify any of the alternatives as per your need, but for this example, select the number of generators to be 2. Next, set the Wavelength to minimum 100 and maximum to 120 and the Amplitude to a minimum of 10 and maximum to 30. Then select the Scale to be 50% horizontal and vertical, respectively. You can select your Type as Sine, Triangle, or Square. Here we will select Sine. For Undefined Areas, select Repeat Edge Pixels. Once all these settings are done, you can hit randomize until you decide on the preview you wish to use. This merely provides the koala bear with a minute jagged effect, as you can see below.

Jagged Effect

wave Effect - 6

  • In this way, you can distort an image. Under the Distort effect, you have many effects that you can apply to your image. We will see it one by one below.
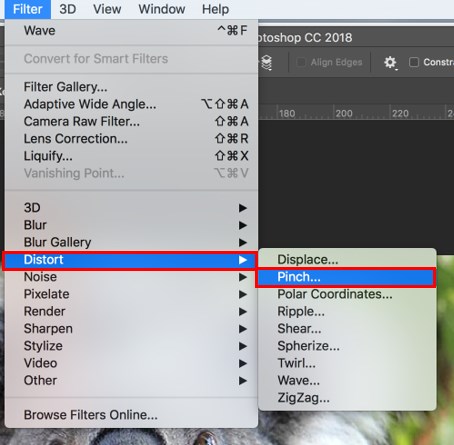
2. Pinch Effect

We will use the same image for this effect.

Step 1: Duplicate the original layer and name it as Koala Pinch.

Duplicate

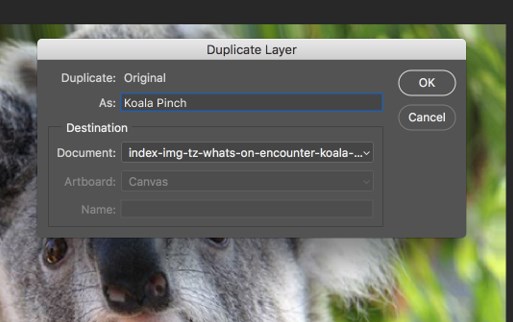
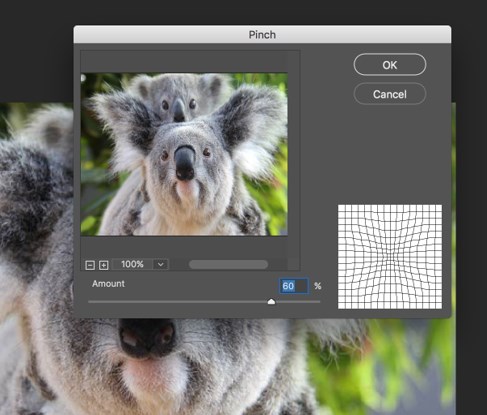
Step 2: After duplicating the layer, select this layer and then click on Filter and Distort, then Pinch. Once you do this, you will get the Pinch dialog box. Set the amount to 60% to give a subtle pinch effect to the image.
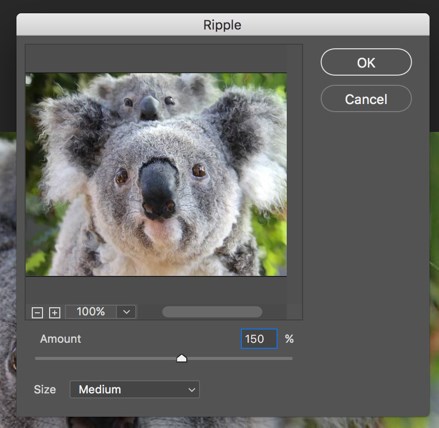
Photoshop Distort Effect - 8

amount to 60%

Pinch Effect

3. Ripple Effect

We will use the same image for this effect.

All in One Design Bundle(280+ Courses, 100+ projects)
AutoCADHoudiniAdobe Premiere ProPhotoshop
SolidworksVFX Visual EffectsCorelDrawUnreal Engine
Price
View Courses
280+ Online Courses | 100+ projects | 2000+ Hours | Verifiable Certificates | Lifetime Access
4.6 (64,963 ratings)

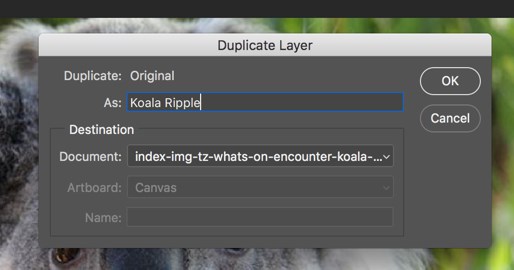
Step 1: Duplicate the original layer and name it as Koala Ripple.

Duplicate

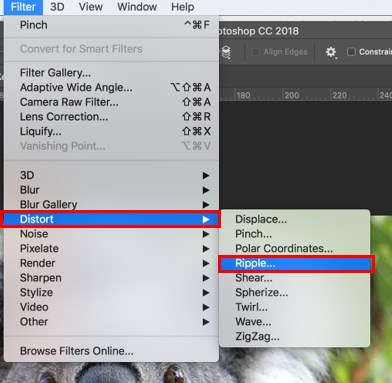
Step 2: After duplicating the layer, select this layer and then click on Filter and Distort, then Ripple. Once you do this, you will get the Ripple dialog box. Set the amount to 150% and select the size as the medium.

Photoshop Distort Effect -12

amount to 150%

Ripple Effect

4. Spherize Effect

We will use the same image for this effect.

Step 1: Duplicate the original layer and name it as Koala Spherize.

Duplicating the layer

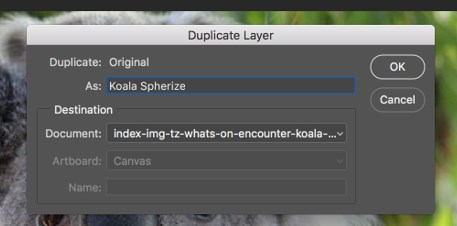
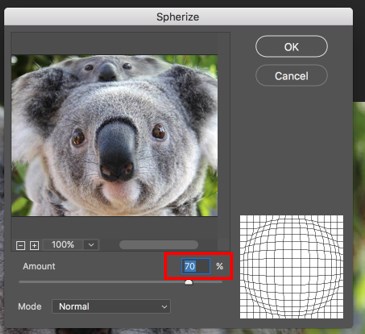
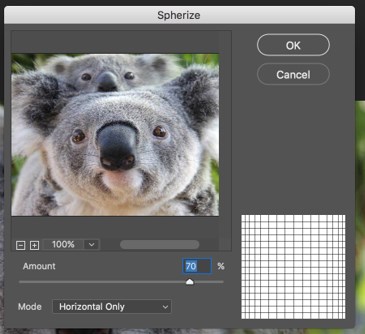
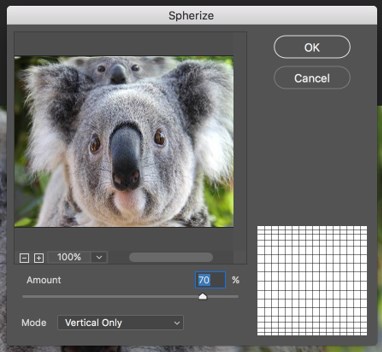
Step 2: After duplicating the layer, select this layer, click on Filter and Distort, and then Spherize. Once you do this, you will get the Spherize dialog box. Set the amount to 70% and select the mode as Normal. The other available modes are Horizontal Only and Vertical Only. You can select any depending on your requirements.

Photoshop Distort Effect -16

Spherize effect

Step 3: Select Horizontal and Vertical mode from the dialog box. To see the final image.

Horizontal and Vertical

Spherize effect 2

Spherize Effect 3

5. Twirl Effect

We will use the same image for this effect.

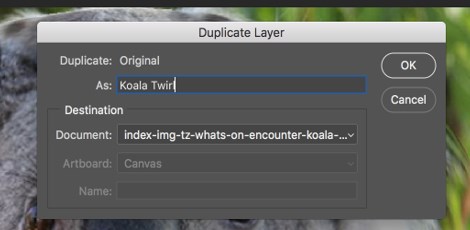
Step 1: Duplicate the original layer and name it as Koala Twirl.

Photoshop Distort Effect -21

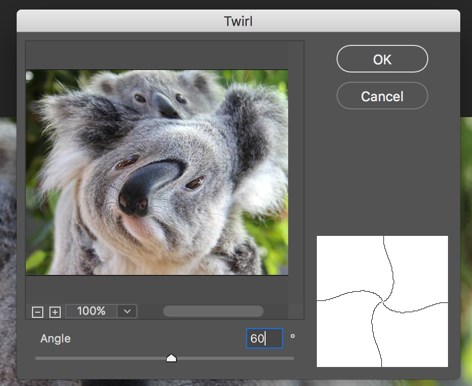
Step 2: After duplicating the layer, select this layer and then click on Filter and Distort, then Twirl. Once you do this, you will get the Twirl dialog box. Set the Angle to 60 degrees.

Photoshop Distort Effect -22

Photoshop Distort Effect -23

Photoshop Distort Effect -24

6. ZigZag Effect

We will use the same image for this effect.

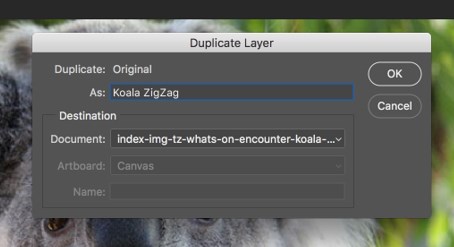
Step 1: Duplicate the original layer and name it as Koala Zigzag.

Duplicate the layer

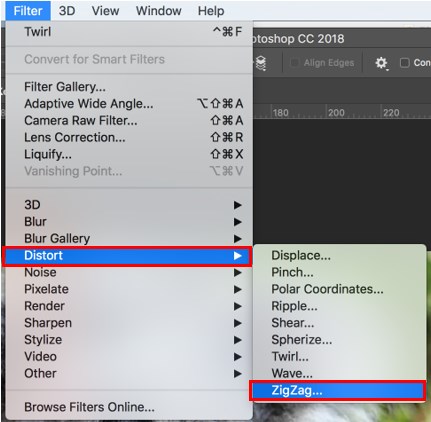
Step 2: After duplicating the layer, select this layer and then click on Filter and Distort, then ZigZag. Once you do this, you will get the ZigZag dialog box. Set the amount to 15 and ridges to 10, then select the style as Pond Ripples. The other style options available are Around Center and Out From Center. You can select any depending on your requirements.

Photoshop Distort Effect -26

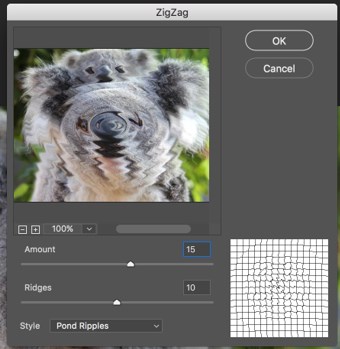
Step 3: ZigZag Dialog Box With Pond Ripples Style.

ZigZag Dialog Box

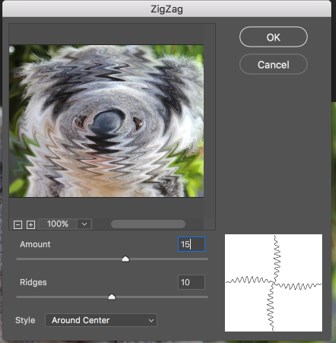
Step 4: ZigZag Dialog Box With Around Center and without from center style.

Photoshop Distort Effect -28

Photoshop Distort Effect -29

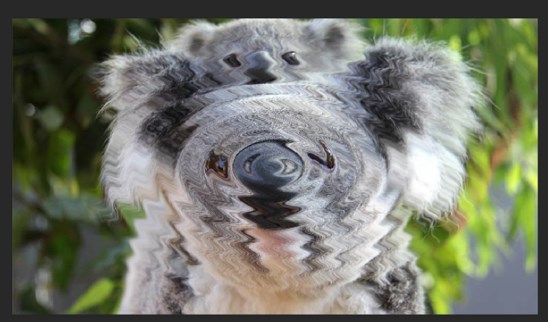
Step 5: Image with Pond Ripples Style.

Pond Ripples Style

How to Use Distort on Text?

The below steps will explain how to use the distort effect on the text:

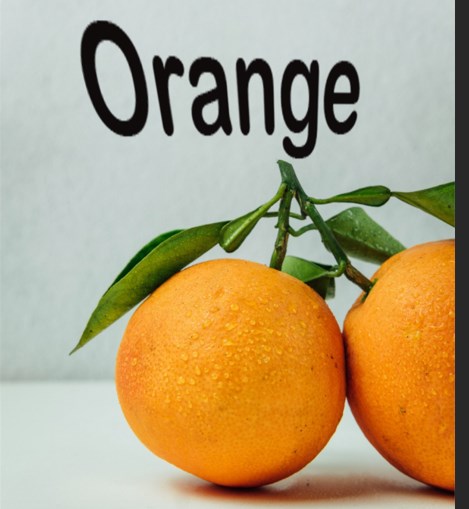
Step 1: Select an image first (Here, we are using the orange image). Add a text over the image.

Photoshop Distort Effect -31

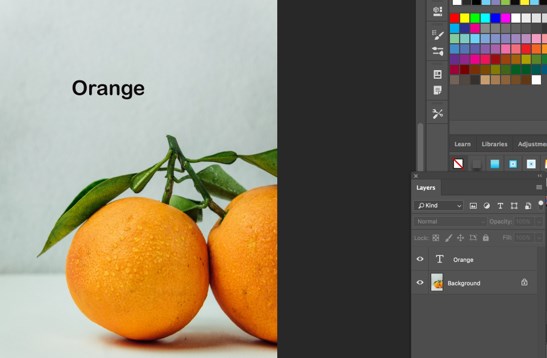
Step 2: Transform both the text and the image into a smart object to convert them as much as required without losing any quality because smart objects are non-destructive. The Text layer(Orange) is now present inside the smart object(orange image), indicating that we can unfold the smart object and modify the text whenever required.

Photoshop Distort Effect -32

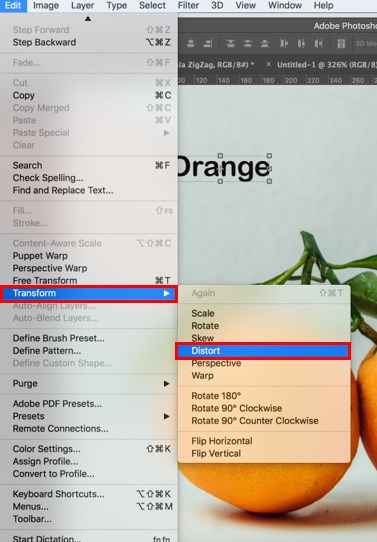
Step 3: Once you are done converting them into smart objects, select the text and then click on Edit and Transform, then Distort. Then you can stretch the text and give it a distorted look.

Photoshop Distort Effect -33

Step 4: Stretching the Text.

Photoshop Distort Effect -34

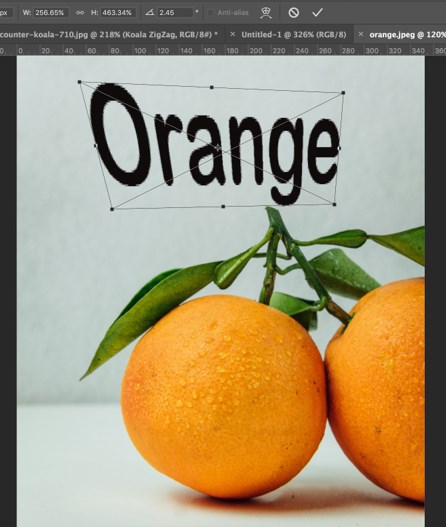
Step 5: The Final image.

Photoshop Distort Effect -35

  • In this way, you can distort a text in Adobe Photoshop.

Conclusion – Photoshop Distort Effect

Although standard image effects are still favored, designers try to do something new to keep their websites captivating. And the fabled distortion effect, which many designers avoided, now finds itself to be useful. Although it suggests a disfigured and warped impression, it is even now ubiquitous. It blends properly with differing information. The distort effect flawlessly fraternizes with solutions depended on mouse cursor connections and the usual scrolling. The effect makes normal things look fortifying and motivating.

Recommended Articles

This is a guide to Photoshop Distort Effect. Here we discuss the Introduction, various effects in Distort Effect and various steps to enhance the distort effect in photoshop. You can also go through our other related articles to learn more –

  1. How to Create Shiny Effect Photoshop?
  2. 3D Text Effect in Photoshop
  3. Glitch Effect in After Effects
  4. Dispersion Effect in Photoshop
Popular Course in this category
Photoshop Training (10 Courses, 12+ Projects)
  10 Online Courses |  12 Hands-on Projects |  80+ Hours |  Verifiable Certificate of Completion
4.9
Price

View Course

Related Courses

Adobe Premiere Pro Tutorial (4 Courses, 7+ Projects)4.9
All in One Design Bundle (280+ Courses, 100+ projects)4.8
0 Shares
Share
Tweet
Share
Primary Sidebar
Footer
About Us
  • Blog
  • Who is EDUCBA?
  • Sign Up
  • Live Classes
  • Corporate Training
  • Certificate from Top Institutions
  • Contact Us
  • Verifiable Certificate
  • Reviews
  • Terms and Conditions
  • Privacy Policy
  •  
Apps
  • iPhone & iPad
  • Android
Resources
  • Free Courses
  • Photoshop Tutorial
  • 3ds Max Tutorial
  • All Tutorials
Certification Courses
  • All Courses
  • Design Course - All in One Bundle
  • Photoshop Course
  • Maya Course
  • Unreal Engine Course
  • Unity Course
  • DaVinci Resolve Course
  • Pro Tools Course

ISO 10004:2018 & ISO 9001:2015 Certified

© 2022 - EDUCBA. ALL RIGHTS RESERVED. THE CERTIFICATION NAMES ARE THE TRADEMARKS OF THEIR RESPECTIVE OWNERS.

EDUCBA
Free Design Course

Banner Creation, Object Selection, Sky Replacement, Advance Filters & others

*Please provide your correct email id. Login details for this Free course will be emailed to you

By signing up, you agree to our Terms of Use and Privacy Policy.

EDUCBA Login

Forgot Password?

By signing up, you agree to our Terms of Use and Privacy Policy.

EDUCBA
Free Design Course

3D animation, modelling, simulation, game development & others

*Please provide your correct email id. Login details for this Free course will be emailed to you

By signing up, you agree to our Terms of Use and Privacy Policy.

EDUCBA

*Please provide your correct email id. Login details for this Free course will be emailed to you

By signing up, you agree to our Terms of Use and Privacy Policy.

Let’s Get Started

By signing up, you agree to our Terms of Use and Privacy Policy.

This website or its third-party tools use cookies, which are necessary to its functioning and required to achieve the purposes illustrated in the cookie policy. By closing this banner, scrolling this page, clicking a link or continuing to browse otherwise, you agree to our Privacy Policy

Loading . . .
Quiz
Question:

Answer:

Quiz Result
Total QuestionsCorrect AnswersWrong AnswersPercentage

Explore 1000+ varieties of Mock tests View more