Updated April 14, 2023
Introduction to Docker Volume
Docker volume is a storage mechanism that is used for persistent data storage generated by Docker containers. Docker volumes are managed by Docker itself. It is better to store data in a volume rather than storing it in a container’s writable layer as it does not increase the size of the container; also, containers are ephemeral, which means container lifetime is short, and containers get destroyed, and so the data as well. Docker volume can be shared with more than one container.
Syntax:
docker volume COMMAND
Commands of Docker Volume
Below are the different commands of Docker Volume:
1. create: It is used to create new volumes.
2. ls: It is used to list all the volumes in a namespace.
3. inspect: It is used to know more about any of the volumes.
4. rm: It is used to remove any volume if it is no longer required.
5. prune: It is used to remove all unused volumes.
Command:
docker volume --help
Output:
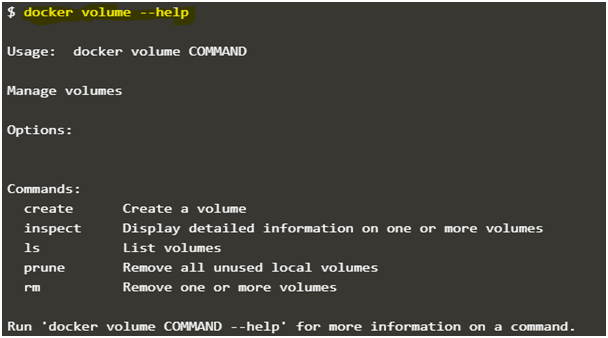
We can get more information about any command by using the ‘help’ option after the command as below:
Command:
docker volume COMMAND --help
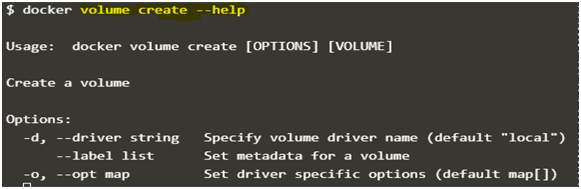
Below is the example:
Command:
docker volume create --help
How Does Volume Work in Docker?
We use the ‘-v’ or ‘-volume’ option to mount the Docker volume to standalone containers, and the ‘–mount’ option is used for swarm services only. However, we can use the ‘–mount’ option with the standalone containers as well in Docker version 17.06 and newer. The ‘–mount’ is simpler than ‘-v’ as it is more explicit and verbose. We must use the ‘–mount’ flag while mounting the volume to the container if we want to specify a volume driver.
Let’s understand the syntax of each flag:
1. -v or –volume: It has three fields separated by (:). The first field is the name of the volume and the second field is the path of the file or folder in the container where we are going to mount the volume, and the third one is optional that specify the access mode of the mounted file. We must follow the field order correctly in this option.
Below is the example:
Command:
-v my-vol:/etc/:ro
In the above example, ‘my-vol’ is the name of the volume, and ‘/etc/’ is the folder inside the container, and access mode is read-only.
2. –mount: It has key-value pairs, and it is separated by commas.
Below keys are used in this option:
- type: This key specifies the type of the mount like bind, volume, or tmpfs. Here, we are discussing Docker volume, so the type of the mount will be volume.
- source: It specifies the source of the mount, which means any path on the host; however, for named volume, we specify the name of the volume. It might be specified as ‘source’ and ‘src’.
- destination: It specifies the path where we want to mount the file or directory in the container. It can be specified as ‘destination’, ‘dst’, or ‘target’.
- volume-opt: This option can be used multiple times; it also takes key-value pair, which is consists of an option name and its value.
- volume-driver: we can specify the volume driver using this option.
Examples to Implement Docker Volume
Below are the examples of Docker Volume:
Scenario: We will create a volume first and verify it, and then we will check the all details about the newly created volume. We will then mount this volume to a container and then create a test file in the container at the location where we mounted the volume. We will then mount the same volume to different containers and check the test file over there to verify it worked as expected. Let’s get started.
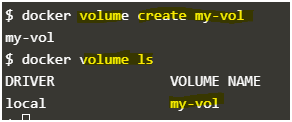
1. Create a new volume named ‘my-vol’ and list it as below.
docker volume create my-vol

docker volume ls
Output:
2. Check all details of this volume using the ‘inspect’ command as below:
Command:
docker volume inspect my-vol
Output:
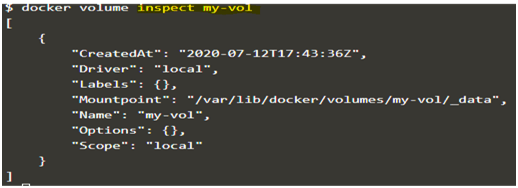
Explanation: The ‘Mountpoint’ is the location where the files or folders going to store actually. So if we browse that location, there is nothing right now. we will populate the data after mounting it to any container; then, if we browse this location, we will get the files or folders over here that we have created at the mounting location in the container.
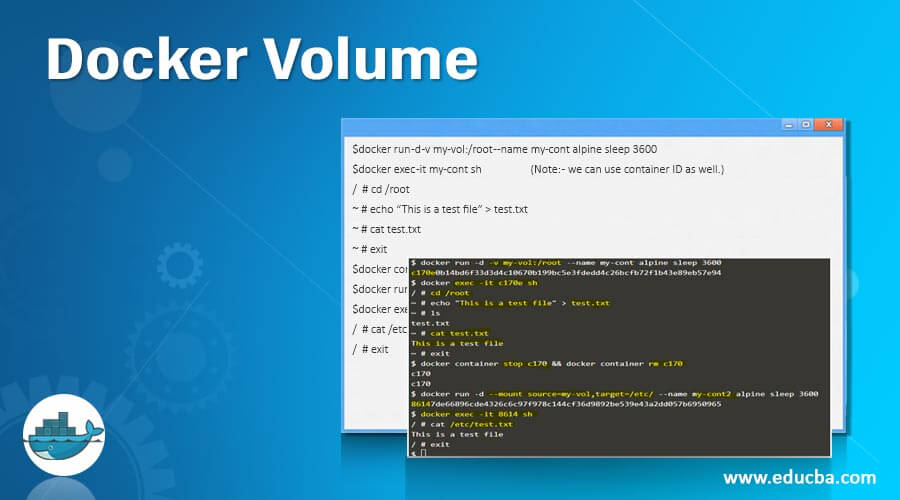
3. Now, mount this volume to a container using the ‘-v’ flag and connect to the container using the ‘docker exec’command, create a new test file ‘test.txt’. Stop and delete this container and create a new container and connect the same volume to this container. Again, execute this new container and check if the file is available or not in this newly created container as below:
Commands:
$docker run -d -v my-vol:/root --name my-cont alpine sleep 3600

$docker exec -it my-cont sh                  (Note: - we can use container ID as well.)

/  # cd /root

~ # echo “This is a test file” > test.txt

~ # cat test.txt

~ # exit

$docker container stop my-cont && docker container rm my-cont

$docker run -d --mount source=my-vol,target=/etc/ --name my-cont2 alpine sleep 3600

$docker exec -it my-cont2 sh

/  # cat /etc/test.txt

/  # exit
Output:
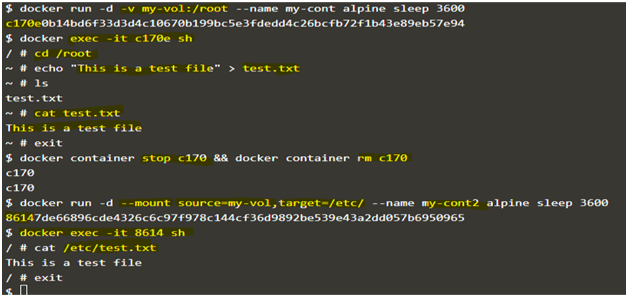
Explanation: In the above snapshot, we can see that the file is available even after the first container got destroyed.
4. If we want to see the above file without mounting it to any container as discussed in the explanation of point 2, then we have to browse the ‘Mountpoint’ of the volume as below:
Command:
sudo cat /var/lib/docker/volumes/my-vol/_data/test.txt
![]()
5. Let’s assume that this volume is no longer required and can be deleted; we can do so using the ‘rm’ command as below:
Command:
docker volume rm my-vol
Output:

docker container rm my -cont2

6. If there are multiple volumes that need to be deleted, we use the ‘prune’ command to delete all unused volumes at once as below:
docker volume prune
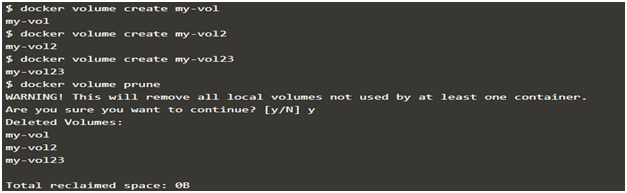
Explanation: In the above example, we have created 3 new volumes and did not attach any container to them it so we can use the ‘prune’ command to delete all the three volumes at once.
Advantages of Docker Volume
- We can attach volumes on both types of containers, whether it is a Linux and Windows container.
- We can store volumes on separate hosts or any remote hosts or cloud providers, encrypt the contents of volumes or add more functionality using volume drivers.
- We can share volumes among multiple containers safely; backup and migration of volumes are also easy.
Conclusion
Docker volumes are safe any easy way to store the data persistently. We also have a bind mount for persistent storage; however, it has less functionality compare to Docker volumes. We have discussed named volume, we also have anonymous volumes that do not have a specific source, and it is removed once the container got deleted.
Recommended Articles
This is a guide to Docker Volume. Here we discuss the Introduction of Docker Volume and its advantages along with its Examples and Code Implementation. You can also go through our other suggested articles to learn more –

