Updated June 27, 2023

Introduction to ASP.Net CompareValidator
CompareValidator server control compares user inputs on the web page with a constant value or another user input. It allows the application developer to enforce a validation policy on the web page and prevent posting the form data to the server unless the validation check has passed. Why did I use the term server control? Like all other server controls, ASP.NET provides its own tag for the CompareValidator control, which is run at the server, and the generated HTML code is returned as a response to the browser. The CompareValidator control generates the HTML span tag from an HTML perspective, which hides it by default and displays an error message when the validation fails.
Syntax:
The CompareValidator control can be coded using ASP.NET-provided tags or dragged and dropped using Visual Studio IDE. The drag-and-drop feature ultimately generates the same code.
The syntax of ASP.NET CompareValidator in its simplest form is:
<asp:CompareValidator
ID="CompareValidatorId" runat="server"
ControlToCompare="ComparerControlId"
ControlToValidate="TargetControlId"
ErrorMessage="ErrorMessage">
</asp:CompareValidator>
Using the CompareValidator control requires the properties listed above. Let’s understand what each property signifies:
- ID: A unique id of the CompareValidator control.
- ControlToCompare: The id of the control whose value would be used as the comparator. An optional property in case the comparator is a constant value and not a user input.
- ControlToValidate: The id of the control whose value would be compared. A mandatory property.
- ErrorMessage: The message to be displayed when validation fails.
Behind the Scenes
So, how does the CompareValidator mechanism work? When the ASP.NET engine encounters the control, it adds a task to the checklist before posting the form to the server. Validation occurs when you remove focus from either the control you are validating or the control you are comparing. The system displays an error message if the validation fails. The validation check must pass to post the form data to the server.
Properties of ASP.Net CompareValidator
The ASP.NET CompareValidator control comes with certain pre-defined properties. The native HTML code converts these properties into attributes. They help define additional behavior for the CompareValidator control. Let’s discuss some of the frequently used ones in detail:
1. BackColor, ForeColor
This property gets or sets the background and the foreground color of the control.
<asp:CompareValidator ID="myCompareValidator" ControlToCompare="TextBox_1" ControlToValidate="TextBox_2" ErrorMessage="Error" BackColor="DarkBlue" ForeColor="White" runat="server"> </asp:CompareValidator>2. BorderColor, BorderStyle and BorderWidth
These properties get or set the border styling for the control.
<asp:CompareValidator ID="myCompareValidator" ControlToCompare="TextBox_1" ControlToValidate="TextBox_2" ErrorMessage="Error" BorderWidth="5" BorderColor="Blue" BorderStyle="dashed" runat="server"> </asp:CompareValidator>3. CssClass
This property gets or sets the CSS class to be applied to the control.
<asp:CompareValidator ID="myCompareValidator" ControlToCompare="TextBox_1" ControlToValidate="TextBox_2" ErrorMessage="Error" CssClass="txtBxClass" runat="server"> </asp:CompareValidator>4. Enabled
This property gets or sets the value indicating whether the control is enabled or disabled. The default value is true.
<asp:CompareValidator ID="myCompareValidator" ControlToCompare="TextBox_1" ControlToValidate="TextBox_2" ErrorMessage="Error" Enabled="false" runat="server"> </asp:CompareValidator>5. Font
This property gets or sets the font of the text to be displayed in the control. Plenty of styles and options exist, such as bold, italics, underline, strikeout, etc.
6. Height, Width
These properties get or set the height and width of the control in the number of pixels.
<asp:CompareValidator ID="myCompareValidator" ControlToCompare="TextBox_1" ControlToValidate="TextBox_2" ErrorMessage="Error" Height="100" Width="500" runat="server"> </asp:CompareValidator>7. ID
This property gets or sets the unique identifier attribute to the control.
<asp:CompareValidator ID="myCompareValidator" ControlToCompare="TextBox_1" ControlToValidate="TextBox_2" ErrorMessage="Error" runat="server"> </asp:CompareValidator>8. Type
You can access and modify this attribute to select the data type used for value comparison.
<asp:CompareValidator ID="myCompareValidator" ControlToCompare="TextBox_1" ControlToValidate="TextBox_2" ErrorMessage="Error" Type="string" runat="server"> </asp:CompareValidator>9. Visible
This property determines whether the control will be displayed on the UI or hidden. The default is true.
<asp:CompareValidator ID="myCompareValidator" ControlToCompare="TextBox_1" ControlToValidate="TextBox_2" ErrorMessage="Error" Visible="false" runat="server"> </asp:CompareValidator>Examples of ASP.Net CompareValidator
Let us create a CompareValidator sample application in a step-by-step manner.
Step 1: Create a new ASP.NET WebApplication project. This will create a shell template with a working application with a Default.aspx and Default.aspx.cs page. The .cs page is the code behind the page for the .aspx page.
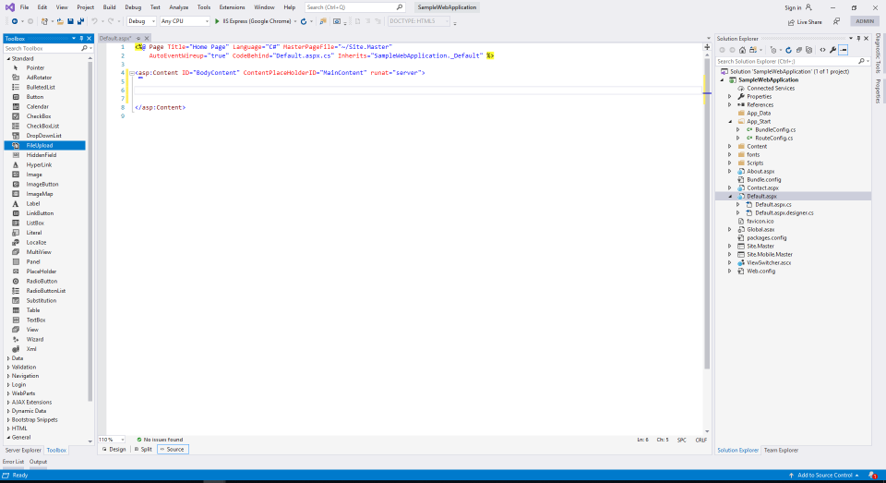
Step 2: Go to the Default.aspx file and remove the contents of the shell template to look like below.
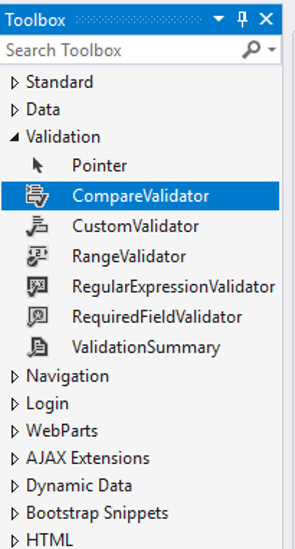
Step 3: In the Visual Studio IDE Toolbox pane, you will notice a set of Validation Controls ready to drag and drop in your project. Find the CompareValidator control and drag it into the default.aspx page.
Step 4: Once you drop the CompareValidator control, you will notice an auto-generated ASP.NET CompareValidator tag in your default.aspx file. Modify the code to look like below.
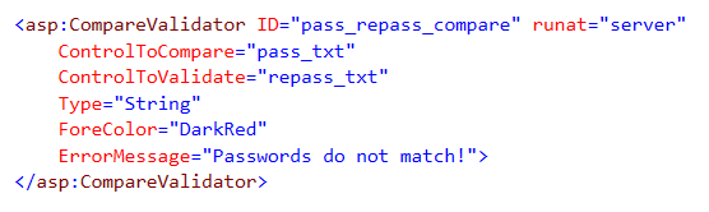
Alternatively, you can skip the drag-and-drop part and write the code above.
<asp:CompareValidator ID="pass_repass_compare" runat="server"
ControlToCompare="pass_txt"
ControlToValidate="repass_txt"
Type="String"
ForeColor="DarkRed"
ErrorMessage="Passwords do not match!">
</asp:CompareValidator>
Step 5: Copy the below code in your default.aspx file.
<%@ Page Title="Home Page" Language="C#" MasterPageFile="~/Site.Master"
AutoEventWireup="true" CodeBehind="Default.aspx.cs" Inherits="SampleWebApplication._Default" %>
<asp:Content ID="BodyContent" ContentPlaceHolderID="MainContent" runat="server">
<br /><br />
<asp:Label ID="pass_lbl" runat="server" Text="Label">Enter Password</asp:Label>
<asp:TextBox ID="pass_txt" TextMode="Password" runat="server"></asp:TextBox>
<br /><br />
<asp:Label ID="repass_lbl" runat="server" Text="Label">Re-enter Password</asp:Label>
<asp:TextBox ID="repass_txt" TextMode="Password" runat="server"></asp:TextBox>
<br /><br />
<asp:Label ID="msg" runat="server" Text=""></asp:Label>
<br /><br />
<asp:CompareValidator ID="pass_repass_compare" runat="server"
ControlToCompare="pass_txt"
ControlToValidate="repass_txt"
Type="String"
ForeColor="DarkRed"
ErrorMessage="Passwords do not match!">
</asp:CompareValidator>
<br /><br />
<asp:Button ID="Validate_btn" runat="server" OnClick="Validate_btn_Click" Text="Validate" />
</asp:Content>
Step 6: Copy the below code in your default.aspx.cs file.
using System;
using System.Web.UI;
namespace SampleWebApplication
{
public partial class _Default : Page
{
protected void Validate_btn_Click(object sender, EventArgs e)
{
if (Page.IsValid) {
msg.Text = "Account created successfully.";
}
}
}
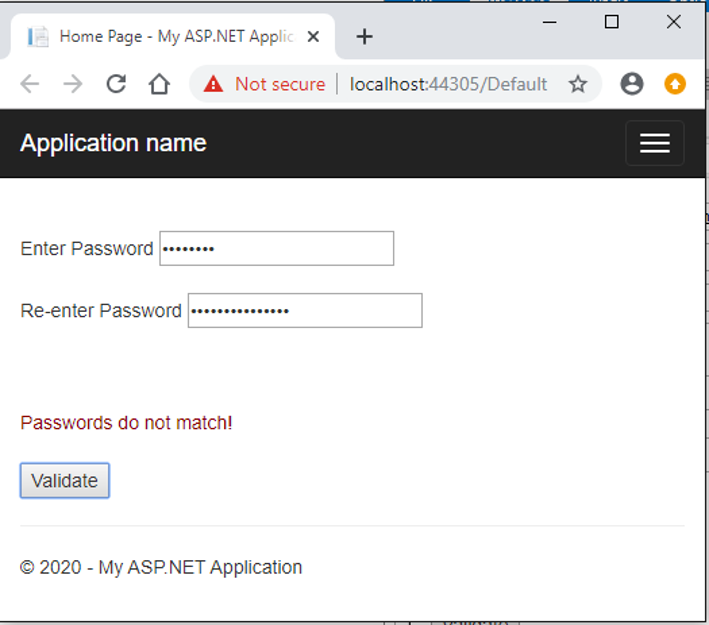
}Step 7: Run the application. Below is the output of your code. It has two text boxes and a validation control to check whether the values of both text boxes match or not.
The code behind the file has a button click function to the Validate button. This function only triggers when the CompareValidator successfully returns a result.
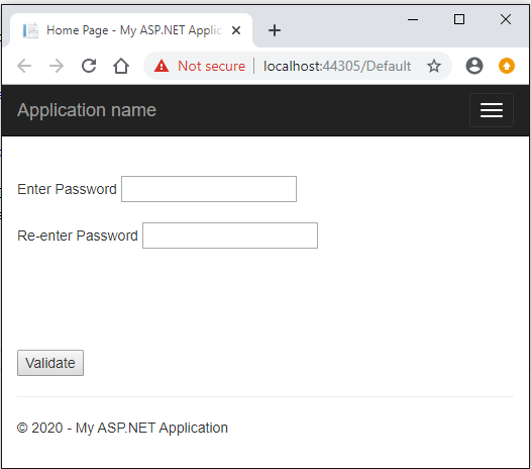
The above is the landing page of your application. Enter a password and then re-type the password. The function’s code behind it will not execute if the passwords do not match, and an error message will display. The server only receives the data if the passwords match.
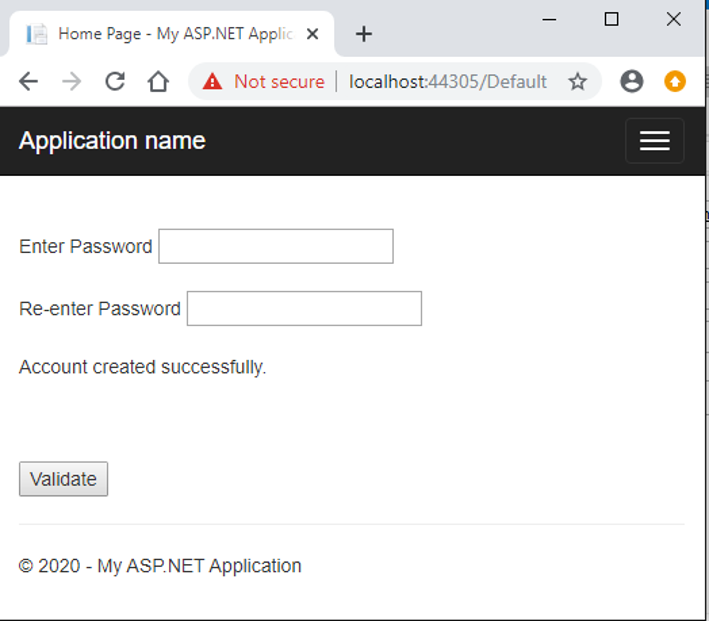
When the passwords match, the function executes the code behind it and displays a message.
Recommended Articles
We hope that this EDUCBA information on “ASP.Net CompareValidator” was beneficial to you. You can view EDUCBA’s recommended articles for more information.

