Updated August 25, 2023

Photoshop Elements is a quick and easy photo editing software that is valuable to professional photographers and anyone who wants to color-correct their pictures. Apart from the color correction, the elements software allows editing, organizing, adding effects, and sharing photos online.
As with every update of the elements, the recent launch of Photoshop Elements 14 has its share of interesting Photoshop Elements 14 tools and effects that add more value to the software. Photoshop Elements 14 helps designers move ahead in photo correction and editing.
Adobe Photoshop Elements
Here is the list of updates the latest version offers
#1. Shake Reduction
We always aim to click our best selfie or with our friends. It doesn’t matter, even if you are using the latest phone with a grand megapixel camera and an updated version of the technology. We still end up with a little bit of a moderate shake in the picture. Sadly, we cannot help to reduce the natural shake in our body to adjust to the technology.
However, you may not make out the blurry image when you check it on your phone screens. But, the moment your file is transferred to an iPad or a laptop, the distortion is profoundly visible. By then, it’s too late to call for another shot on the same spot to recall the same joyous moment.
With the new Shake Reduction tool introduced in Photoshop Elements 14, controlling the blur and shake of your photos and selfies are just a matter of a click. You can easily choose to fix the image in two modes.
- Auto Shake reduction
- Shake reduction
Auto Shake Reduction
Enhance > Auto shake reduction
It helps beginners and intermediate-level users correct their photographs with little to do on their own. Photoshop’s content intelligence determines how to best edit your photo by reducing the shake and fixing the perfect shot for you.
Shake Reduction/ Manual Shake Reduction
Enhance > Shake Reduction
If you want more than what Photoshop can give you through Auto shake reduction or enjoy working more on your blurry images. Photoshop allows you to reduce the shake and blur of the image manually. It gives you more control enabling the power to edit and fine-tune the details until you achieve the desired results.
Both options work well on images. It is only a matter of personal choice whether you choose to work on an Auto or Manual response. This newly added feature is a farewell to blurry, shaky selfies.
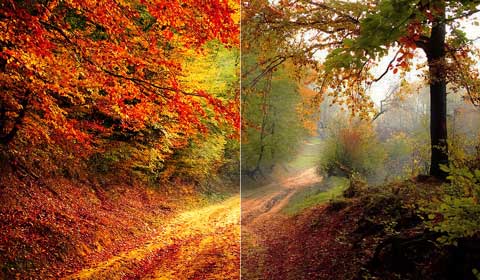
#2. Haze Removal Tool
Photoshop introduced the new haze removal tool, which helps to remove the daunting haze that spreads across your photograph. Usually, when you try to capture a landscape on an outdoor tour, natural haze becomes a problem for professional and amateur photographers. Strangely, the haze is invisible to the human eye while we look at something. But in the case of a camera, the air’s moisture obstructs to capture of the natural beauty as we see. We observe a thick patch of haze spread across the image affecting the colors and blocking the entire picture. It is the major hurdle when you are all set to capture the beauty of nature. Preserving the desired colors and removing the haze was a herculean task before introducing the new haze-removal tool.
With Photoshop Elements, haze removal, spotless horizons, oceans, and landscapes have never been so easy. It clears the haze in the image without affecting the colors and clarity of the image, outputting the exact colors and quality as experienced with your naked eye.
You can choose to remove the haze in two methods
- Auto Haze removal
- Haze removal
Auto Haze Removal
Enhance> Auto haze removal
Through this option, Photoshop elements analyze the colors in the image, find the haze and remove it in one click without changing any colors or affecting the image’s background. You can also find the picture much clear with enhanced colors and quality.
Haze Removal
Enhance> Haze removal
You can gain more control over the process by choosing the haze removal option that enables manually controlling the image sensitivity option that will determine the haze in the photograph by selecting the picture, which provides great control in editing the image.
In both cases, by using the haze removal tool, you will have a haze-free, crisp and colorful image.
#3. Guided Effects
Every often, there will be an idea in your mind, and you may feel hard to put it down into your image with your current tools. The constraints of the software and Photoshop Elements 14 tools may not give you that one-step-ahead advantage to add the desired effect to your photographs. In other cases, beginners and intermediate people may not have the sound technical capacity to design the effect they conceived. Photoshop elements guided effects can solve your purpose with hundreds of predefined effects that bring life.
The guided effects are an interesting factor that makes Photoshop elements easy to use. In the latest version, Photoshop Elements 14, the existing guided edits are enhanced and reinforced with more photoshop elements 14 tutorials to walk you through the step-by-step process to help you achieve the look you want.
A few of the guided edits introduced in the 14 are
- Speed Edit
- Resize
- Panorama
- Using edited results.
#4. Speed Edit
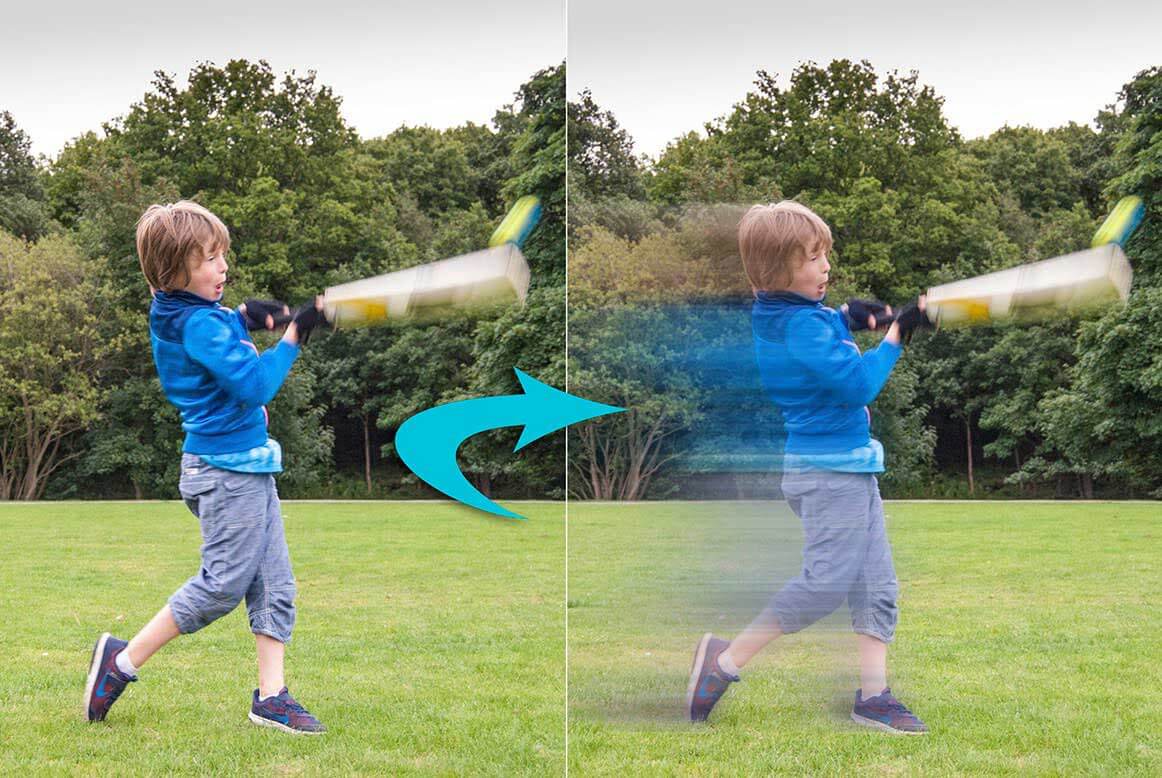
While our latest cameras are designed to capture high-quality images of objects moving at a certain speed, often, the technology may not be enough to quench your creative thirst. Speed editing adds motion to the moving object in a two-dimensional space, a great idea most cameras cannot capture.
With the new speed effect, you can instantly add a movement to a still image. And the level of control that Photoshop Elements provide is outstanding for adding a dynamic look to your image.
#5. Resize Edit
Resizing your images according to your requirement is a tedious task. Imagine an image you want to use in your print brochure or website and save another low-size copy for future requirements. You have to work on the image multiple times to have an image for every required format. The process can be more boring when you are working on a batch of images, demanding hours of time, and boring every time you sit to work.
With resizing effect, you can resize the images in a few clicks for print, web, and future requirements. Whether you are working on a single image file or a group of images doesn’t make much difference. The resize edit makes the job easy by changing the dimensions of your images within a few clicks.
#6. Photo Merge Panorama Edits
The process of stitching and editing multiple images into a single panorama is simplified with the Photo Merge Panorama edit. The step-by-step tutorial allows you to easily create your panorama image for web and print purposes.
#7. Using Edited Results
Photoshop Elements 14 takes the guided edits one step further with the new using guided edits options. It enables you to choose the next step you want to take after your artwork is completed. You may choose between the following options- continue to edit in a different mode, save the file, or share it online, and some edits will allow you to print the file directly from this step.
#8. Straighten an Image
Often horizontal images are not horizontal and vertical images are not vertical. The wrong alignment usually happens due to the handshake while taking the picture, where the angle of the image is wrongly shot. Photoshop Elements introduced Straighten, an image tool that can work on the images and align them exactly to the axis you wanted them to be.
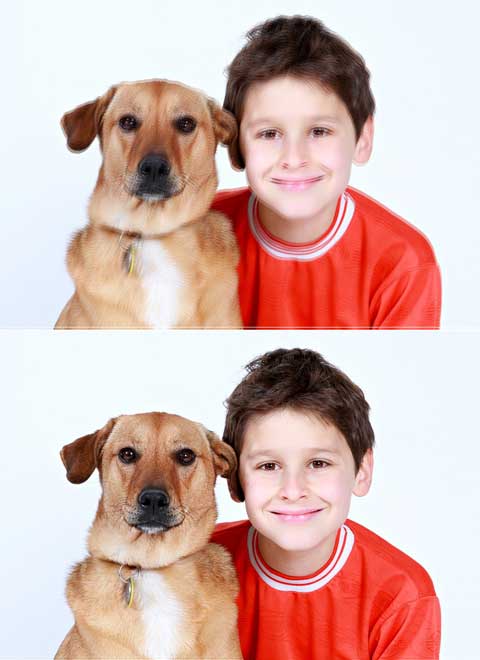
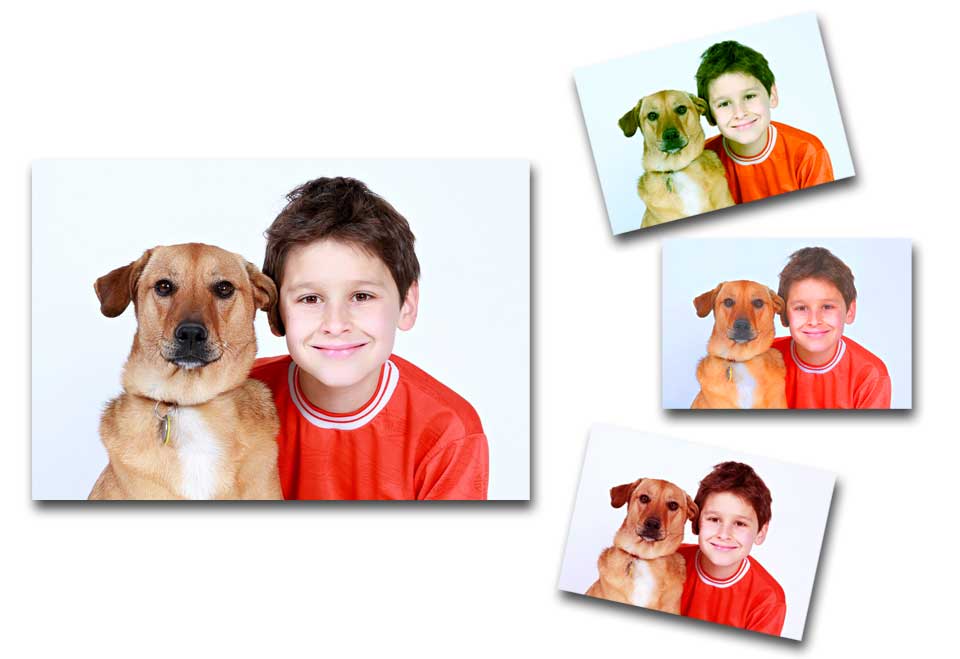
#9. Refine Selection Brush
When was the last time you manually tried to select your furry friends in Photoshop? It requires a great amount of patience and experience to select furry animals or objects in any software. For designers and enthusiasts, it is a challenging factor any software poses.
With a refined selection brush tool, it is the end of the problem. The tool allows you to easily select the fur and hair objects and animals and automatically create a copy with ultra-fine edges. The enhanced refine section tool gains additional controls for even precise selection that can detail every strand of hair or every blade of grass.
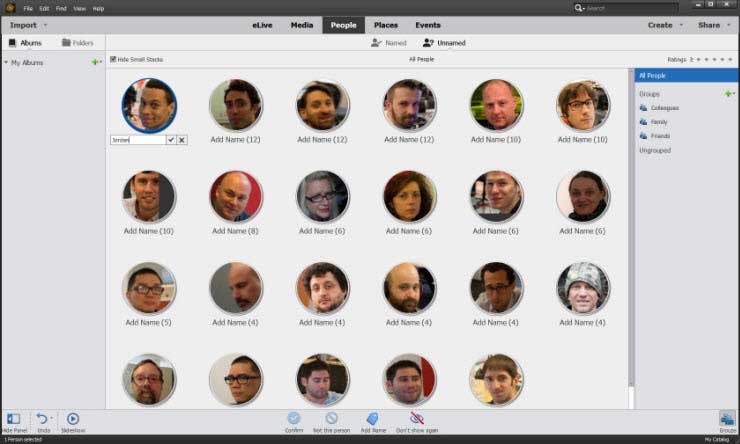
#10. Enhanced People Recognition While Tagging
The latest version made tagging people in your photos much easier and faster. In the previous versions, the user has to manually select the faces individually in the media view to tag them. In the recent Photoshop Elements 14 updates, the Photoshop Elements 14 organizer automatically groups similar faces during import.
After finishing importing the photos, the faces of people who are not tagged are displayed in the un-named tab so that you can tag people from a whole batch of photos simultaneously.
#11. Enhanced Find by Places
The updated find places in Elements 14 automatically tags your images embedded with the GPS information. If your camera supports a GPS tracking system, every file generated will include the GPS information, and they are displayed in the Pinned tab immediately after they are imported.
If your images do not mention the GPS tracking information, you can choose to add the location for them manually. In this case, the images are displayed in the unpinned tab after importing, and once the locations are added to them, they are immediately shifted to the Pinned tab.
#12. Auto Smart Looks
Photoshop Elements 14 features automatically analyze your photographs and suggest you a set of five effects. The intelligent assessment is based on the color and lighting of your photograph and identifies the image’s content with five predefined color templates among various effects.
Photoshop Elements 14 is exciting to color correct your images or add spectacular effects just a click away with all-new effects.
To know more about the recent updates and tutorials on Adobe-related products and Graphic Designing Software, check our regular updates.
Related Articles
Here are some articles that will help you to get more detail about Adobe Photoshop Elements 14, so just go through the link.
- Adobe Photoshop
- Top 10 Features of Adobe Photoshop
- Adobe Illustrator for beginners
- Graphic Design Interview Questions
